#自定义元件
如果内置元件无法满足你的需求,你可以通过自定义元件来扩展 Lynx 的能力。本节将向你展示如何在 Android, iOS, HarmonyOS 和 Desktops 上创建和注册自定义元件。
#构建你的原生代码
自定义元件的实现分为几个步骤,包括:声明并注册元件、创建原生视图、处理样式与属性、事件绑定等。接下来以一个简单的自定义输入框元件 <explorer-input> 为例,简要介绍自定义元件的实现流程。
完整实现参见 LynxExplorer/input 模块查看。通过编译运行 LynxExplorer 示例项目可实时预览自定义元件效果。
#声明并注册元件
#声明自定义元件
下面是 <explorer-input> 自定义元件的实现,需要继承自 LynxUI。
#import <Lynx/LynxUI.h>

NS_ASSUME_NONNULL_BEGIN

@interface LynxTextField : UITextField

@property(nonatomic, assign) UIEdgeInsets padding;

@end

@interface LynxExplorerInput : LynxUI <LynxTextField *> <UITextFieldDelegate>

@end

NS_ASSUME_NONNULL_END
#import "LynxExplorerInput.h"

@implementation LynxExplorerInput

//...

@end


@implementation LynxTextField

- (UIEditingInteractionConfiguration)editingInteractionConfiguration API_AVAILABLE(ios(13.0)) {
  return UIEditingInteractionConfigurationNone;
}

- (void)setPadding:(UIEdgeInsets)padding {
  _padding = padding;
  [self setNeedsLayout];
}

- (CGRect)textRectForBounds:(CGRect)bounds {
  CGFloat x = self.padding.left;
  CGFloat y = self.padding.top;
  CGFloat width = bounds.size.width - self.padding.left - self.padding.right;
  CGFloat height = bounds.size.height - self.padding.top - self.padding.bottom;

  return CGRectMake(x, y, width, height);
}

- (CGRect)editingRectForBounds:(CGRect)bounds {
  return [self textRectForBounds:bounds];
}
@end
#注册自定义元件
元件注册有两种方式:全局注册和局部注册。
#全局注册
全局注册的元件可以在多个 LynxView 实例中共享。
#import "LynxExplorerInput.h"
#import <Lynx/LynxComponentRegistry.h>

@implementation LynxExplorerInput

LYNX_LAZY_REGISTER_UI("explorer-input")

@end


@implementation LynxTextField

- (UIEditingInteractionConfiguration)editingInteractionConfiguration API_AVAILABLE(ios(13.0)) {
  return UIEditingInteractionConfigurationNone;
}

- (void)setPadding:(UIEdgeInsets)padding {
  _padding = padding;
  [self setNeedsLayout];
}

- (CGRect)textRectForBounds:(CGRect)bounds {
  CGFloat x = self.padding.left;
  CGFloat y = self.padding.top;
  CGFloat width = bounds.size.width - self.padding.left - self.padding.right;
  CGFloat height = bounds.size.height - self.padding.top - self.padding.bottom;

  return CGRectMake(x, y, width, height);
}

- (CGRect)editingRectForBounds:(CGRect)bounds {
  return [self textRectForBounds:bounds];
}
@end#局部注册
局部注册的元件仅适用于当前 LynxView 实例。
#import <Lynx/LynxEnv.h>
#import <Lynx/LynxView.h>

  LynxView *lynxView = [[LynxView alloc] initWithBuilderBlock:^(LynxViewBuilder *builder) {
    builder.config =
        [[LynxConfig alloc] initWithProvider:[LynxEnv sharedInstance].config.templateProvider];
    [builder.config registerUI:[LynxExplorerInput class] withName:@"explorer-input"];
  }];
其中,"explorer-input" 对应前端 DSL 的标签名称。当 Lynx Engine 解析到该标签时,会查找已注册的原生元件并创建实例。
#创建原生 View 实例
每个自定义元件都需要实现 createView 方法,该方法返回一个与之对应的原生 View 实例。
以下是 <explorer-input> 元件的实现:
#import "LynxExplorerInput.h"
#import <Lynx/LynxComponentRegistry.h>


@implementation LynxExplorerInput

LYNX_LAZY_REGISTER_UI("explorer-input")


- (UITextField *)createView {
  UITextField *textField = [[LynxTextField alloc] init];
  //...
  textField.delegate = self;
  return textField;
}


@end


@implementation LynxTextField

- (UIEditingInteractionConfiguration)editingInteractionConfiguration API_AVAILABLE(ios(13.0)) {
  return UIEditingInteractionConfigurationNone;
}

- (void)setPadding:(UIEdgeInsets)padding {
  _padding = padding;
  [self setNeedsLayout];
}

- (CGRect)textRectForBounds:(CGRect)bounds {
  CGFloat x = self.padding.left;
  CGFloat y = self.padding.top;
  CGFloat width = bounds.size.width - self.padding.left - self.padding.right;
  CGFloat height = bounds.size.height - self.padding.top - self.padding.bottom;

  return CGRectMake(x, y, width, height);
}

- (CGRect)editingRectForBounds:(CGRect)bounds {
  return [self textRectForBounds:bounds];
}
@end
#处理前端更新的样式和属性
你可以使用 LYNX_PROP_SETTER 宏来监听前端传入的属性变化,并更新原生视图。例如,处理 <explorer-input> 元件的 value 属性:
#import "LynxExplorerInput.h"
#import <Lynx/LynxComponentRegistry.h>
#import <Lynx/LynxPropsProcessor.h>

@implementation LynxExplorerInput

LYNX_LAZY_REGISTER_UI("explorer-input")

LYNX_PROP_SETTER("value", setValue, NSString *) {
    self.view.text = value;
}

- (UITextField *)createView {
  UITextField *textField = [[LynxTextField alloc] init];
  //...
  textField.delegate = self;
  return textField;
}


@end


@implementation LynxTextField

- (UIEditingInteractionConfiguration)editingInteractionConfiguration API_AVAILABLE(ios(13.0)) {
  return UIEditingInteractionConfigurationNone;
}

- (void)setPadding:(UIEdgeInsets)padding {
  _padding = padding;
  [self setNeedsLayout];
}

- (CGRect)textRectForBounds:(CGRect)bounds {
  CGFloat x = self.padding.left;
  CGFloat y = self.padding.top;
  CGFloat width = bounds.size.width - self.padding.left - self.padding.right;
  CGFloat height = bounds.size.height - self.padding.top - self.padding.bottom;

  return CGRectMake(x, y, width, height);
}

- (CGRect)editingRectForBounds:(CGRect)bounds {
  return [self textRectForBounds:bounds];
}
@end
#处理排版信息(可选)
#处理 Lynx Engine 的排版结果
通常,Lynx Engine 会自动计算并更新 View 的排版信息,无需开发者手动处理。但在某些特殊情况下,例如需要对 View 进行额外调整时,
可以在 layoutDidFinished 回调中获取最新的排版信息,并应用自定义逻辑。
#import "LynxExplorerInput.h"
#import <Lynx/LynxComponentRegistry.h>
#import <Lynx/LynxPropsProcessor.h>

@implementation LynxExplorerInput

LYNX_LAZY_REGISTER_UI("explorer-input")

- (void)layoutDidFinished {
  self.view.padding = self.padding;
  }

LYNX_PROP_SETTER("value", setValue, NSString *) {
self.view.text = value;
}

- (UITextField *)createView {
  UITextField *textField = [[LynxTextField alloc] init];
  //...
  textField.delegate = self;
  return textField;
  }

@end

@implementation LynxTextField

- (UIEditingInteractionConfiguration)editingInteractionConfiguration API_AVAILABLE(ios(13.0)) {
  return UIEditingInteractionConfigurationNone;
  }

- (void)setPadding:(UIEdgeInsets)padding {
  _padding = padding;
  [self setNeedsLayout];
  }

- (CGRect)textRectForBounds:(CGRect)bounds {
  CGFloat x = self.padding.left;
  CGFloat y = self.padding.top;
  CGFloat width = bounds.size.width - self.padding.left - self.padding.right;
  CGFloat height = bounds.size.height - self.padding.top - self.padding.bottom;

  return CGRectMake(x, y, width, height);
  }

- (CGRect)editingRectForBounds:(CGRect)bounds {
  return [self textRectForBounds:bounds];
  }
  @end
#处理事件绑定(可选)
在某些场景中,前端可能需要响应自定义元件的事件。例如,当用户在文本框中输入内容时,前端可能需要获取并处理这些输入数据。
以下示例演示了如何实现从 <explorer-input> 元件向前端发送文本输入事件,以及前端如何监听该事件。
#客户端事件发送
客户端通过监听原生视图的文本输入回调,当文本变更时使用 [self.context.eventEmitter dispatchCustomEvent:eventInfo] 将事件发送到前端,以便前端进行相应的处理。
#import "LynxExplorerInput.h"
#import <Lynx/LynxComponentRegistry.h>
#import <Lynx/LynxPropsProcessor.h>

@implementation LynxExplorerInput

LYNX_LAZY_REGISTER_UI("explorer-input")

- (UITextField *)createView {
  UITextField *textField = [[LynxTextField alloc] init];
  //...
  textField.delegate = self;
  [[NSNotificationCenter defaultCenter] addObserver:self
                                        selector:@selector(textFieldDidChange:)
                                        name:UITextFieldTextDidChangeNotification
                                        object:textField];
  return textField;
}

- (void)emitEvent:(NSString *)name detail:(NSDictionary *)detail {
  LynxCustomEvent *eventInfo = [[LynxDetailEvent alloc] initWithName:name
                                                          targetSign:[self sign]
                                                              detail:detail];
  [self.context.eventEmitter dispatchCustomEvent:eventInfo];
}

- (void)textFieldDidChange:(NSNotification *)notification {
  [self emitEvent:@"input"
           detail:@{
             @"value": [self.view text] ?: @"",
           }];
}

- (void)layoutDidFinished {
    self.view.padding = self.padding;
}

LYNX_PROP_SETTER("value", setValue, NSString *) {
    self.view.text = value;
}


@end


@implementation LynxTextField

- (UIEditingInteractionConfiguration)editingInteractionConfiguration API_AVAILABLE(ios(13.0)) {
  return UIEditingInteractionConfigurationNone;
}

- (void)setPadding:(UIEdgeInsets)padding {
  _padding = padding;
  [self setNeedsLayout];
}

- (CGRect)textRectForBounds:(CGRect)bounds {
  CGFloat x = self.padding.left;
  CGFloat y = self.padding.top;
  CGFloat width = bounds.size.width - self.padding.left - self.padding.right;
  CGFloat height = bounds.size.height - self.padding.top - self.padding.bottom;

  return CGRectMake(x, y, width, height);
}

- (CGRect)editingRectForBounds:(CGRect)bounds {
  return [self textRectForBounds:bounds];
}
@end
#前端 DSL 事件绑定
在前端,需要绑定相应的文本框输入事件。通过以下代码,前端将监听客户端发送的事件,并根据需要处理输入的数据。
const handleInput = (e) => {
  const currentValue = e.detail.value.trim();
  setInputValue(currentValue);
};

<explorer-input
  className="input-box"
  style={{ width: '100px', height: '100px' }}
  bindinput={handleInput}
  value={inputValue}
/>;注意:前端 DSL 使用
bindxxx进行事件绑定,例如bindinput绑定input事件。
#支持直接操作元件(可选)
在某些情况下,前端可能需要通过命令式 API 直接操作自定义元件,你可以通过 LYNX_UI_METHOD 让元件支持这些操作。
#前端调用示例
以下代码展示了如何在前端通过 SelectorQuery 调用 focus 方法让 <explorer-input> 元件获取焦点:
lynx
  .createSelectorQuery()
  .select('#input-id')
  .invoke({
    method: 'focus',
    params: {},
    success: function (res) {
      console.log('lynx', 'request focus success');
    },
    fail: function (res: { code: number; data: any }) {
      console.log('lynx', 'request focus fail');
    },
  })
.exec();#客户端实现
在客户端,需要使用 LYNX_UI_METHOD 为自定义元件添加 focus 方法,确保它能够正确处理前端的调用,
#import "LynxExplorerInput.h"
#import <Lynx/LynxComponentRegistry.h>
#import <Lynx/LynxPropsProcessor.h>
#import <Lynx/LynxUIMethodProcessor.h>


@implementation LynxExplorerInput

LYNX_LAZY_REGISTER_UI("explorer-input")

LYNX_UI_METHOD(focus) {
    if ([self.view becomeFirstResponder]) {
        callback(kUIMethodSuccess, nil);
    } else {
        callback(kUIMethodUnknown, @"fail to focus");
    }
}

- (UITextField *)createView {
  UITextField *textField = [[LynxTextField alloc] init];
  //...
  textField.delegate = self;
  [[NSNotificationCenter defaultCenter] addObserver:self
                                        selector:@selector(textFieldDidChange:)
                                        name:UITextFieldTextDidChangeNotification
                                        object:textField];
  return textField;
}

- (void)emitEvent:(NSString *)name detail:(NSDictionary *)detail {
  LynxCustomEvent *eventInfo = [[LynxDetailEvent alloc] initWithName:name
                                                          targetSign:[self sign]
                                                              detail:detail];
  [self.context.eventEmitter dispatchCustomEvent:eventInfo];
}

- (void)textFieldDidChange:(NSNotification *)notification {
  [self emitEvent:@"input"
           detail:@{
             @"value": [self.view text] ?: @"",
           }];
}

- (void)layoutDidFinished {
    self.view.padding = self.padding;
}

LYNX_PROP_SETTER("value", setValue, NSString *) {
    self.view.text = value;
}


@end


@implementation LynxTextField

- (UIEditingInteractionConfiguration)editingInteractionConfiguration API_AVAILABLE(ios(13.0)) {
  return UIEditingInteractionConfigurationNone;
}

- (void)setPadding:(UIEdgeInsets)padding {
  _padding = padding;
  [self setNeedsLayout];
}

- (CGRect)textRectForBounds:(CGRect)bounds {
  CGFloat x = self.padding.left;
  CGFloat y = self.padding.top;
  CGFloat width = bounds.size.width - self.padding.left - self.padding.right;
  CGFloat height = bounds.size.height - self.padding.top - self.padding.bottom;

  return CGRectMake(x, y, width, height);
}

- (CGRect)editingRectForBounds:(CGRect)bounds {
  return [self textRectForBounds:bounds];
}
@end
#方法回调返回值
在实现 focus 方法时,元件开发者需要向前端返回一个状态码,以表明操作是否成功。例如,前端调用可能会失败,此时应返回相应的错误状态,以便前端在 fail 回调进行处理。
Lynx Engine 预定义了一些常见的错误码,元件开发者可以在方法回调中返回相应的状态码:
enum LynxUIMethodErrorCode {
  kUIMethodSuccess = 0, // 调用成功
  kUIMethodUnknown, // 未知错误
  kUIMethodNodeNotFound, // 无法找到对应的元件
  kUIMethodMethodNotFound, // 该元件上没有对应的 Method
  kUIMethodParamInvalid, // 方法参数无效
  kUIMethodSelectorNotSupported, // 该选择器暂时不支持
};#自定义元件的实现分为几个步骤,包括:声明并注册元件、创建原生视图、处理样式与属性、事件绑定等。接下来以一个简单的自定义输入框元件 <explorer-input> 为例,简要介绍自定义元件的实现流程。
完整实现参见 LynxExplorer/input 模块查看。通过编译运行 LynxExplorer 示例项目可实时预览自定义元件效果。
#集成 LynxProcessor 模块
在build.gradle(.kts)文件中添加下面的配置:
compileOnly project('org.lynxsdk.lynx:lynx-processor:4.1.0')
annotationProcessor project('org.lynxsdk.lynx:lynx-processor:4.1.0')
plugins {
alias(libs.plugins.android.application)
alias(libs.plugins.jetbrains.kotlin.android)
id("kotlin-kapt")
}
//dependency
kapt('org.lynxsdk.lynx:lynx-processor:4.1.0')
implementation("androidx.appcompat:appcompat:1.7.0")#声明并注册元件
#声明自定义元件
下面是 <explorer-input> 自定义元件的实现,需要继承自 LynxUI。
import com.lynx.tasm.behavior.LynxContext;
import com.lynx.tasm.behavior.ui.LynxUI;
import androidx.appcompat.widget.AppCompatEditText;


public class LynxExplorerInput extends LynxUI<AppCompatEditText> {

  public LynxExplorerInput(LynxContext context) {
    super(context);
  }
  //...

}
import com.lynx.tasm.behavior.LynxContext
import com.lynx.tasm.behavior.ui.LynxUI
import androidx.appcompat.widget.AppCompatEditText


class LynxExplorerInput(context: LynxContext) : LynxUI<AppCompatEditText>(context) {

   //...

}
#注册自定义元件
元件注册有两种方式:全局注册和局部注册。
#全局注册
全局注册的元件可以在多个 LynxView 实例中共享。
import com.lynx.tasm.LynxEnv;
import com.lynx.tasm.behavior.Behavior;

LynxEnv.inst().addBehavior(new Behavior("explorer-input"){
      @Override
      public LynxExplorerInput createUI(LynxContext context) {
        return new LynxExplorerInput(context);
      }
    });
import com.lynx.tasm.LynxEnv
import com.lynx.tasm.behavior.Behavior

LynxEnv.inst().addBehavior(object : Behavior("explorer-input") {
    override fun createUI(context: LynxContext): LynxExplorerInput {
        return LynxExplorerInput(context)
    }
})
#局部注册
局部注册的元件仅适用于当前 LynxView 实例。
LynxViewBuilder lynxViewBuilder = new LynxViewBuilder();
lynxViewBuilder.addBehavior(new Behavior("explorer-input") {
      @Override
      public LynxExplorerInput createUI(LynxContext context) {
        return new LynxExplorerInput(context);
      }
    });
    val lynxViewBuilder = LynxViewBuilder()
    lynxViewBuilder.addBehavior(object : Behavior("explorer-input") {
      override fun createUI(context: LynxContext): LynxExplorerInput {
        return LynxExplorerInput(context)
      }
    })
其中,"explorer-input" 对应前端 DSL 的标签名称。当 Lynx Engine 解析到该标签时,会查找已注册的原生元件并创建实例。
#创建原生 View 实例
每个自定义元件都需要实现 createView 方法,该方法返回一个与之对应的原生 View 实例。
以下是 <explorer-input> 元件的实现:
import android.content.Context;
import androidx.appcompat.widget.AppCompatEditText;
import com.lynx.tasm.behavior.LynxContext;
import com.lynx.tasm.behavior.ui.LynxUI;

public class LynxExplorerInput extends LynxUI<AppCompatEditText> {

  public LynxExplorerInput(LynxContext context) {
    super(context);
  }

  @Override
  protected AppCompatEditText createView(Context context) {
    AppCompatEditText view = new AppCompatEditText(context);
    //...
    return view;
  }

}
import android.content.Context
import androidx.appcompat.widget.AppCompatEditText
import com.lynx.tasm.behavior.LynxContext
import com.lynx.tasm.behavior.ui.LynxUI


class LynxExplorerInput(context: LynxContext) : LynxUI<AppCompatEditText>(context) {

  override fun createView(context: Context): AppCompatEditText {
    return AppCompatEditText(context).apply {
      //...
    }
  }
}
#处理前端更新的样式和属性
你可以使用 @LynxProp 注解来监听前端传入的属性变化,并更新原生视图。例如,处理 <explorer-input> 元件的 value 属性:
import android.content.Context;
import androidx.appcompat.widget.AppCompatEditText;
import com.lynx.tasm.behavior.LynxContext;
import com.lynx.tasm.behavior.LynxProp;
import com.lynx.tasm.behavior.ui.LynxUI;

public class LynxExplorerInput extends LynxUI<AppCompatEditText> {

  public LynxExplorerInput(LynxContext context) {
    super(context);
  }

  @LynxProp(name = "value")
  public void setValue(String value) {
    if (!value.equals(mView.getText().toString())) {
      mView.setText(value);
    }
  }

  @Override
  protected AppCompatEditText createView(Context context) {
    AppCompatEditText view = new AppCompatEditText(context);
    //...
    return view;
  }


}
import android.content.Context
import androidx.appcompat.widget.AppCompatEditText
import com.lynx.tasm.behavior.LynxContext
import com.lynx.tasm.behavior.LynxProp
import com.lynx.tasm.behavior.ui.LynxUI

class LynxExplorerInput(context: LynxContext) : LynxUI<AppCompatEditText>(context) {

  override fun createView(context: Context): AppCompatEditText {
    return AppCompatEditText(context).apply {
      //...
    }
  }

  @LynxProp(name = "value")
  fun setValue(value: String) {
    if (value != mView.text.toString()) {
      mView.setText(value)
    }
  }
}
#处理排版信息(可选)
#处理 Lynx Engine 的排版结果
通常,Lynx Engine 会自动计算并更新 View 的排版信息,无需开发者手动处理。但在某些特殊情况下,例如需要对 View 进行额外调整时,
可以在 onLayoutUpdated 回调中获取最新的排版信息,并应用自定义逻辑。
import android.content.Context;
import androidx.appcompat.widget.AppCompatEditText;
import com.lynx.tasm.behavior.LynxContext;
import com.lynx.tasm.behavior.LynxProp;
import com.lynx.tasm.behavior.ui.LynxUI;

public class LynxExplorerInput extends LynxUI<AppCompatEditText> {

  public LynxExplorerInput(LynxContext context) {
    super(context);
  }

  @Override
  public void onLayoutUpdated() {
    super.onLayoutUpdated();
    int paddingTop = mPaddingTop + mBorderTopWidth;
    int paddingBottom = mPaddingBottom + mBorderBottomWidth;
    int paddingLeft = mPaddingLeft + mBorderLeftWidth;
    int paddingRight = mPaddingRight + mBorderRightWidth;
    mView.setPadding(paddingLeft, paddingTop, paddingRight, paddingBottom);
  }

  @Override
  protected AppCompatEditText createView(Context context) {
    AppCompatEditText view = new AppCompatEditText(context);
    //...
    return view;
  }

  @LynxProp(name = "value")
  public void setValue(String value) {
    if (!value.equals(mView.getText().toString())) {
      mView.setText(value);
    }
  }

}
import android.content.Context
import androidx.appcompat.widget.AppCompatEditText
import com.lynx.tasm.behavior.LynxContext
import com.lynx.tasm.behavior.LynxProp
import com.lynx.tasm.behavior.ui.LynxUI


class LynxExplorerInput(context: LynxContext) : LynxUI<AppCompatEditText>(context) {

  override fun onLayoutUpdated() {
    super.onLayoutUpdated()
    val paddingTop = mPaddingTop + mBorderTopWidth
    val paddingBottom = mPaddingBottom + mBorderBottomWidth
    val paddingLeft = mPaddingLeft + mBorderLeftWidth
    val paddingRight = mPaddingRight + mBorderRightWidth
    mView.setPadding(paddingLeft, paddingTop, paddingRight, paddingBottom)
  }

  override fun createView(context: Context): AppCompatEditText {
    return AppCompatEditText(context).apply {
      //...
    }
  }

  @LynxProp(name = "value")
  fun setValue(value: String) {
    if (value != mView.text.toString()) {
      mView.setText(value)
    }
  }
}
#处理事件绑定(可选)
在某些场景中,前端可能需要响应自定义元件的事件。例如,当用户在文本框中输入内容时,前端可能需要获取并处理这些输入数据。
以下示例演示了如何实现从 <explorer-input> 元件向前端发送文本输入事件,以及前端如何监听该事件。
#客户端事件发送
客户端通过监听原生视图的文本输入回调,当文本变更时使用 getEventEmitter().sendCustomEvent(detail) 将事件发送到前端,以便前端进行相应的处理。
import android.content.Context;
import android.text.Editable;
import android.text.TextWatcher;
import androidx.appcompat.widget.AppCompatEditText;
import com.lynx.tasm.behavior.LynxContext;
import com.lynx.tasm.behavior.LynxProp;
import com.lynx.tasm.behavior.ui.LynxUI;
import com.lynx.tasm.event.LynxCustomEvent;
import java.util.HashMap;
import java.util.Map;

public class LynxExplorerInput extends LynxUI<AppCompatEditText> {

  private void emitEvent(String name, Map<String, Object> value) {
    LynxCustomEvent detail = new LynxCustomEvent(getSign(), name);
    if (value != null) {
      for (Map.Entry<String, Object> entry : value.entrySet()) {
        detail.addDetail(entry.getKey(), entry.getValue());
      }
    }
    getLynxContext().getEventEmitter().sendCustomEvent(detail);
  }

  @Override
  protected AppCompatEditText createView(Context context) {
    AppCompatEditText view = new AppCompatEditText(context);
    view.addTextChangedListener(new TextWatcher() {
      @Override
      public void afterTextChanged(Editable s) {
        emitEvent("input", new HashMap<String, Object>() {
          {
            put("value", s.toString());
          }
        });
      }

      @Override
      public void beforeTextChanged(CharSequence s, int start, int count, int after) {}

      @Override
      public void onTextChanged(CharSequence s, int start, int before, int count) {
      }
    });
    return view;

  }

  public LynxExplorerInput(LynxContext context) {
    super(context);
  }

  @Override
  public void onLayoutUpdated() {
    super.onLayoutUpdated();
    int paddingTop = mPaddingTop + mBorderTopWidth;
    int paddingBottom = mPaddingBottom + mBorderBottomWidth;
    int paddingLeft = mPaddingLeft + mBorderLeftWidth;
    int paddingRight = mPaddingRight + mBorderRightWidth;
    mView.setPadding(paddingLeft, paddingTop, paddingRight, paddingBottom);
  }

  @LynxProp(name = "value")
  public void setValue(String value) {
    if (!value.equals(mView.getText().toString())) {
      mView.setText(value);
    }
  }

}
import android.content.Context
import android.text.Editable
import android.text.TextWatcher
import androidx.appcompat.widget.AppCompatEditText
import com.lynx.tasm.behavior.LynxContext
import com.lynx.tasm.behavior.LynxProp
import com.lynx.tasm.behavior.ui.LynxUI
import com.lynx.tasm.event.LynxCustomEvent


class LynxExplorerInput(context: LynxContext) : LynxUI<AppCompatEditText>(context) {

  override fun createView(context: Context): AppCompatEditText {
    return AppCompatEditText(context).apply {
      addTextChangedListener(object : TextWatcher {
        override fun beforeTextChanged(s: CharSequence?, start: Int, count: Int, after: Int) {}

        override fun onTextChanged(s: CharSequence?, start: Int, before: Int, count: Int) {}

        override fun afterTextChanged(s: Editable?) {
          emitEvent("input", mapOf("value" to (s?.toString() ?: "")))
        }
      })
    }
  }

  private fun emitEvent(name: String, value: Map<String, Any>?) {
    val detail = LynxCustomEvent(sign, name)
    value?.forEach { (key, v) ->
      detail.addDetail(key, v)
    }
    lynxContext.eventEmitter.sendCustomEvent(detail)
  }


  override fun onLayoutUpdated() {
    super.onLayoutUpdated()
    val paddingTop = mPaddingTop + mBorderTopWidth
    val paddingBottom = mPaddingBottom + mBorderBottomWidth
    val paddingLeft = mPaddingLeft + mBorderLeftWidth
    val paddingRight = mPaddingRight + mBorderRightWidth
    mView.setPadding(paddingLeft, paddingTop, paddingRight, paddingBottom)
  }

  @LynxProp(name = "value")
  fun setValue(value: String) {
    if (value != mView.text.toString()) {
      mView.setText(value)
    }
  }
}
#前端 DSL 事件绑定
在前端,需要绑定相应的文本框输入事件。通过以下代码,前端将监听客户端发送的事件,并根据需要处理输入的数据。
const handleInput = (e) => {
  const currentValue = e.detail.value.trim();
  setInputValue(currentValue);
};

<explorer-input
  className="input-box"
  style={{ width: '100px', height: '100px' }}
  bindinput={handleInput}
  value={inputValue}
/>;注意:前端 DSL 使用
bindxxx进行事件绑定,例如bindinput绑定input事件。
#支持直接操作元件(可选)
在某些情况下,前端可能需要通过命令式 API 直接操作自定义元件,你可以通过 @LynxUIMethod 让元件支持这些操作。
#前端调用示例
以下代码展示了如何在前端通过 SelectorQuery 调用 focus 方法让 <explorer-input> 元件获取焦点:
lynx
  .createSelectorQuery()
  .select('#input-id')
  .invoke({
    method: 'focus',
    params: {},
    success: function (res) {
      console.log('lynx', 'request focus success');
    },
    fail: function (res) {
      console.log('lynx', 'request focus fail');
    },
  })
.exec();#客户端实现
在客户端,需要使用 @LynxUIMethod 为自定义元件添加 focus 方法,确保它能够正确处理前端的调用,
import android.content.Context;
import android.text.Editable;
import android.text.TextWatcher;
import android.view.inputmethod.InputMethodManager;
import androidx.appcompat.widget.AppCompatEditText;
import com.lynx.react.bridge.Callback;
import com.lynx.react.bridge.ReadableMap;
import com.lynx.tasm.behavior.LynxContext;
import com.lynx.tasm.behavior.LynxProp;
import com.lynx.tasm.behavior.LynxUIMethod;
import com.lynx.tasm.behavior.LynxUIMethodConstants;
import com.lynx.tasm.behavior.ui.LynxUI;
import com.lynx.tasm.event.LynxCustomEvent;

import java.util.HashMap;
import java.util.Map;

public class LynxExplorerInput extends LynxUI<AppCompatEditText> {

  private boolean showSoftInput() {
    InputMethodManager imm = (InputMethodManager) getLynxContext().getSystemService(Context.INPUT_METHOD_SERVICE);
    return imm.showSoftInput(mView,
      InputMethodManager.SHOW_IMPLICIT, null);
  }

  @LynxUIMethod
  public void focus(ReadableMap params, Callback callback) {
    if (mView.requestFocus()) {
      if (showSoftInput()) {
        callback.invoke(LynxUIMethodConstants.SUCCESS);
      } else {
        callback.invoke(LynxUIMethodConstants.UNKNOWN, "fail to show keyboard");
      }
    } else {
      callback.invoke(LynxUIMethodConstants.UNKNOWN, "fail to focus");
    }
  }


  private void emitEvent(String name, Map<String, Object> value) {
    LynxCustomEvent detail = new LynxCustomEvent(getSign(), name);
    if (value != null) {
      for (Map.Entry<String, Object> entry : value.entrySet()) {
        detail.addDetail(entry.getKey(), entry.getValue());
      }
    }
    getLynxContext().getEventEmitter().sendCustomEvent(detail);
  }

  @Override
  protected AppCompatEditText createView(Context context) {
    AppCompatEditText view = new AppCompatEditText(context);
    view.addTextChangedListener(new TextWatcher() {
      @Override
      public void afterTextChanged(Editable s) {
        emitEvent("input", new HashMap<String, Object>() {
          {
            put("value", s.toString());
          }
        });
      }

      @Override
      public void beforeTextChanged(CharSequence s, int start, int count, int after) {
      }

      @Override
      public void onTextChanged(CharSequence s, int start, int before, int count) {
      }
    });
    return view;

  }

  public LynxExplorerInput(LynxContext context) {
    super(context);
  }

  @Override
  public void onLayoutUpdated() {
    super.onLayoutUpdated();
    int paddingTop = mPaddingTop + mBorderTopWidth;
    int paddingBottom = mPaddingBottom + mBorderBottomWidth;
    int paddingLeft = mPaddingLeft + mBorderLeftWidth;
    int paddingRight = mPaddingRight + mBorderRightWidth;
    mView.setPadding(paddingLeft, paddingTop, paddingRight, paddingBottom);
  }

  @LynxProp(name = "value")
  public void setValue(String value) {
    if (!value.equals(mView.getText().toString())) {
      mView.setText(value);
    }
  }

}
import android.content.Context
import android.text.Editable
import android.text.TextWatcher
import android.view.inputmethod.InputMethodManager
import androidx.appcompat.widget.AppCompatEditText
import com.lynx.react.bridge.Callback
import com.lynx.react.bridge.ReadableMap
import com.lynx.tasm.behavior.LynxContext
import com.lynx.tasm.behavior.LynxProp
import com.lynx.tasm.behavior.LynxUIMethod
import com.lynx.tasm.behavior.LynxUIMethodConstants
import com.lynx.tasm.behavior.ui.LynxUI
import com.lynx.tasm.event.LynxCustomEvent


class LynxExplorerInput(context: LynxContext) : LynxUI<AppCompatEditText>(context) {

  private fun showSoftInput(): Boolean {
    val imm = lynxContext.getSystemService(Context.INPUT_METHOD_SERVICE) as InputMethodManager
    return imm.showSoftInput(mView, InputMethodManager.SHOW_IMPLICIT, null)
  }

  @LynxUIMethod
  fun focus(params: ReadableMap, callback: Callback) {
    if (mView.requestFocus()) {
      if (showSoftInput()) {
        callback.invoke(LynxUIMethodConstants.SUCCESS)
      } else {
        callback.invoke(LynxUIMethodConstants.UNKNOWN, "fail to show keyboard")
      }
    } else {
      callback.invoke(LynxUIMethodConstants.UNKNOWN, "fail to focus")
    }
  }

  override fun createView(context: Context): AppCompatEditText {
    return AppCompatEditText(context).apply {
      addTextChangedListener(object : TextWatcher {
        override fun beforeTextChanged(s: CharSequence?, start: Int, count: Int, after: Int) {}

        override fun onTextChanged(s: CharSequence?, start: Int, before: Int, count: Int) {}

        override fun afterTextChanged(s: Editable?) {
          emitEvent("input", mapOf("value" to (s?.toString() ?: "")))
        }
      })
    }
  }

  private fun emitEvent(name: String, value: Map<String, Any>?) {
    val detail = LynxCustomEvent(sign, name)
    value?.forEach { (key, v) ->
      detail.addDetail(key, v)
    }
    lynxContext.eventEmitter.sendCustomEvent(detail)
  }

  override fun onLayoutUpdated() {
    super.onLayoutUpdated()
    val paddingTop = mPaddingTop + mBorderTopWidth
    val paddingBottom = mPaddingBottom + mBorderBottomWidth
    val paddingLeft = mPaddingLeft + mBorderLeftWidth
    val paddingRight = mPaddingRight + mBorderRightWidth
    mView.setPadding(paddingLeft, paddingTop, paddingRight, paddingBottom)
  }

  @LynxProp(name = "value")
  fun setValue(value: String) {
    if (value != mView.text.toString()) {
      mView.setText(value)
    }
  }
}
#方法回调返回值
在实现 focus 方法时,元件开发者需要向前端返回一个状态码,以表明操作是否成功。例如,前端调用可能会失败,此时应返回相应的错误状态,以便前端在 fail 回调进行处理。
Lynx Engine 预定义了一些常见的错误码,元件开发者可以在方法回调中返回相应的状态码:
enum LynxUIMethodErrorCode {
  kUIMethodSuccess, // 调用成功
  kUIMethodUnknown, // 未知错误
  kUIMethodNodeNotFound, // 无法找到对应的元件
  kUIMethodMethodNotFound, // 该元件上没有对应的 Method
  kUIMethodParamInvalid, // 方法参数无效
  kUIMethodSelectorNotSupported, // 该选择器暂时不支持
}
自定义元件的实现分为几个步骤,包括:声明并注册元件、创建原生视图、处理样式与属性、事件绑定等。接下来以一个简单的自定义输入框元件 <explorer-input> 为例,简要介绍自定义元件的实现流程。
完整实现参见 LynxExplorer/input 模块查看。通过编译运行 LynxExplorer 示例项目可实时预览自定义元件效果。
#声明并注册元件
#声明自定义元件
下面是 <explorer-input> 自定义元件的实现,需要继承自 UIBase。
import { UIBase, EventHandlerArray, LynxUIMethodConstants } from '@lynx/lynx';

@ComponentV2
struct InputView {
  build() {
    Stack() {
      TextInput({})
    }
    .width('100%')
    .height('100%')
  }
}

@Builder
export function buildInput(ui: UIBase) {
  if (ui as LynxExplorerInput) {
    InputView();
  }
}

export class LynxExplorerInput extends UIBase {
  readonly builder: WrappedBuilder<[UIBase]> = wrapBuilder<[UIBase]>(buildInput);
}#注册自定义元件
元件注册有两种方式:全局注册和局部注册。
#全局注册
全局注册的元件可以在多个 LynxView 实例中共享。
import { BUILTIN_BEHAVIORS } from '@lynx/lynx';

export class CustomElement {
  private static initialized = false;

  static initialize() {
    if (CustomElement.initialized) {
      return;
    }
    BUILTIN_BEHAVIORS.set(
      'explorer-input',
      new Behavior(LynxExplorerInput, undefined),
    );
    CustomElement.initialized = true;
  }
}

export default class EntryAbility extends UIAbility {
  onCreate(want: Want, launchParam: AbilityConstant.LaunchParam) {
    CustomElement.initialize();
  }
}#局部注册
局部注册的元件仅适用于当前 LynxView 实例。组件名和对应的组件实例通过 BehaviorRegistryMap 关联。Behavior 定义了具体的组件的实现信息 ,包括 UI Class 和 ShadowNode Class
export class Behavior {
  uiClass?: Function;
  shadowNodeClass?: Function;
  customData?: Object;
  type?: NodeType;
}
对应的参数说明:
uiClass: 该组件对应的 UI 类,UI 类用来执行绘制相关;
shadowNodeClass: 可选参数,该组件对应的 ShadowNode 类;如果有实现,表示该节点可以给 Lynx 排版引擎提供测量能力(比如 text 节点);
customData: 可选参数,一些自定义数据;
type: 可选参数,指定了这个组件的类型,一般可以不用传,目前定义了以下三种类型:
- COMMON 表示有 UI 节点
- VIRTUAL 表示仅有 ShadowNode,没有 UI
- CUSTOM 表示既有 UI 也有 ShadowNode
import {
  Behavior,
  BehaviorRegistryMap,
} from '@lynx/lynx';
import { LynxExplorerInput } from '../component/LynxExplorerInput';

build() {
  LynxView({
    ...
    behaviors: new Map([['explorer-input', new Behavior(LynxExplorerInput, undefined)]]),
    ...
  }).height('100%')
  ...
}其中,"explorer-input" 对应前端 DSL 的标签名称。当 Lynx Engine 解析到该标签时,会查找已注册的原生元件并创建实例。
#创建原生 Component 实例
每个自定义元件都需要实现 Builder 方法,该方法返回一个与之对应的原生 Component 实例。
以下是 <explorer-input> 元件的实现:
@ObservedV2
class InputParams {
  constructor(ui: LynxExplorerInput) {
    this.ui = ui;
  }

  @Trace inputText: string = '';
  @Trace placeholder: string = '';
  ui: LynxExplorerInput;
}

@ComponentV2
struct InputView {
  @Param @Require inputParams: InputParams;

  build() {
    Stack() {
      TextInput({
        controller: this.inputParams.ui.controller,
        text: this.inputParams.inputText,
        placeholder: this.inputParams.placeholder
      })
      .id(this.inputParams.ui.sign.toString())
      .style(TextContentStyle.DEFAULT)
      .focusable(true)
    }
    .width('100%')
    .height('100%')
  }
}

@Builder
export function buildInput(ui: UIBase) {
  if (ui as LynxExplorerInput) {
    InputView({ inputParams: (ui as LynxExplorerInput).inputParams });
  }
}

export class LynxExplorerInput extends UIBase {
  controller: TextInputController = new TextInputController();
  inputParams: InputParams = new InputParams(this)
  focused: boolean = false;
  readonly builder: WrappedBuilder<[UIBase]> = wrapBuilder<[UIBase]>(buildInput);
}#处理前端更新的样式和属性
你可以通过继承并重写 update(props: Object, events?: EventHandlerArray[]) 来监听前端传入的属性变化,并更新原生视图。例如,处理 <explorer-input> 元件的 value 属性:
export class LynxExplorerInput extends UIBase {
  controller: TextInputController = new TextInputController();
  inputParams: InputParams = new InputParams(this);
  focused: boolean = false;
  readonly builder: WrappedBuilder<[UIBase]> =
    wrapBuilder<[UIBase]>(buildInput);

  static PropSetter: Map<string, Function> = new Map([
    [
      'value',
      (ui: LynxExplorerInput, value: Object) => {
        ui.updateInputTextIfNecessary(value, true);
      },
    ],
    [
      'placeholder',
      (ui: LynxExplorerInput, value: Object) => {
        ui.inputParams.placeholder = value as string;
      },
    ],
    [
      'text-color',
      (ui: LynxExplorerInput, value: Object) => {
        ui.inputParams.fontColor = value as string;
      },
    ],
  ]);

  update(prop: Record<string, Object>, events?: EventHandlerArray[]): void {
    for (const entry of Object.entries(prop)) {
      LynxExplorerInput.PropSetter.get(entry[0])?.(this, entry[1]);
    }
  }
}#处理排版信息(可选)
#处理 Lynx Engine 的排版结果
通常,Lynx Engine 会自动计算并更新 Component 的排版信息,无需开发者手动处理。但在某些特殊情况下,例如需要对 Component 进行额外调整时,
可以在组件的 layout 中获取最新的排版信息,并应用自定义逻辑。
export class LynxExplorerInput extends UIBase {
  controller: TextInputController = new TextInputController();
  inputParams: InputParams = new InputParams(this)
  focused: boolean = false;
  readonly builder: WrappedBuilder<[UIBase]> = wrapBuilder<[UIBase]>(buildInput);

  update(prop: Record<string, Object>, events?: EventHandlerArray[]): void {
    ...
  }

  layout(x: number, y: number, width: number, height: number, paddingLeft: number,
  paddingTop: number, paddingRight: number, paddingBottom: number, marginLeft: number, marginTop: number,
  marginRight: number, marginBottom: number, sticky?: number[]): void {
   ...
   // 一般来说不用特意处理!
 }
}#自定义 measure(可选)
如果一个组件的大小需要由组件自身决定,那么需要实现一个 ShadowNode 用来提供 Measure 的能力,并返回给Lynx排版引擎。最典型的例子是 text 组件,其大小可由文本内容计算后得出。
注意:只支持给叶子结点 Component 提供 ShadowNode 能力!!
#声明并实现 ShadowNode
下面是 <LynxExplorerInputShadowNode> 的实现,需要继承自 ShadowNode。
import { ShadowNode, MeasureMode, IContext } from '@lynx/lynx';

export class LynxExplorerInputShadowNode extends ShadowNode {
  constructor(context: IContext) {
    super(context);
    this.setMeasureFunc(this.measure, null);
  }

  measure(width: number, widthMode: number, height: number, heightMode: number): [number, number, number] {
    let res = 0;
    ...
    return [width, res, 0];
  }
}#处理前端更新的样式和属性
通过继承并重写 ShadowNode 的 updateProps(props: Record<string, Object>) 方法,来监听前端传入的属性变化,并更新原生视图。
import { ShadowNode, MeasureMode, IContext } from '@lynx/lynx';

export class LynxExplorerInputShadowNode extends ShadowNode {
  constructor(context: IContext) {
    super(context);
    this.setMeasureFunc(this.measure, null);
  }

  override updateProps(props: Record<string, Object>) {
    // props相关处理
    if (prop['text-maxline'] !== undefined) {
      this.maxLength = prop['max-length'] as number;
    }
    ...
    // 调用super方法
    super.update(props, events);
  }

  measure(width: number, widthMode: number, height: number, heightMode: number): [number, number, number] {
    let res = 0;
    ...
    return [width, res, 0];
  }
}#重写 measure 方法,返回自定义大小
通过继承并重写 ShadowNode 的 measure,计算并返回对应的 size 给排版引擎
import { ShadowNode, MeasureMode, IContext } from '@lynx/lynx';

export class LynxExplorerInputShadowNode extends ShadowNode {
  constructor(context: IContext) {
    super(context);
    this.setMeasureFunc(this.measure, null);
  }

  override updateProps(props: Record<string, Object>) {
    // props相关处理
    if (prop['text-maxline'] !== undefined) {
      this.maxLength = prop['max-length'] as number;
    }
    ...
    // 调用super方法
    super.update(props, events);
  }

  override measure(width: number, widthMode: number, height: number, heightMode: number): [number, number, number] {
    let res = height;
    if (heightMode === MeasureMode.DEFINITE) {
      res = height;
    } else if (heightMode === MeasureMode.AT_MOST) {
      res = Math.min(res, height);
    }
    return [width, res, 0];
  }
}
对应的参数说明:
width: 宽度限制;
widthMode: 宽度约束模式, 类型是 MeasureMode;
height: 高度限制;
heightMode: 高度约束模式, 类型是 MeasureMode;
返回值说明:
返回值是一个数组,需要返回 3 个值:宽度、高度、Baseline(影响 vertical 对齐,默认传0)
#UI 与 ShadowNode 的通信
目前只能把 ShadowNode 的测算结果传递给 UI 去绘制,ShadowNode 实现 setExtraDataFunc(func: () => Object): void,在这里提供了返回给 UI 的 getExtraBundle 方法。
import { ShadowNode, MeasureMode, IContext } from '@lynx/lynx';

export class LynxExplorerInputShadowNode extends ShadowNode {
  constructor(context: IContext) {
    super(context);
    this.setMeasureFunc(this.measure, null);
    this.setExtraDataFunc(this.getExtraBundle);
  }

  getExtraBundle(): Object {
    return "This is from extra bundle"
  }

  override updateProps(props: Record<string, Object>) {
    // props相关处理
    if (prop['text-maxline'] !== undefined) {
      this.maxLength = prop['max-length'] as number;
    }
    ...
    // 调用super方法
    super.update(props, events);
  }

  override measure(width: number, widthMode: number, height: number, heightMode: number): [number, number, number] {
    let res = height;
    if (heightMode === MeasureMode.DEFINITE) {
      res = height;
    } else if (heightMode === MeasureMode.AT_MOST) {
      res = Math.min(res, height);
    }
    return [width, res, 0];
  }
}
对应的 UI 继承并重写 UIBase 的 updateExtraData 方法,则可以在 Layout 流程之后,接收到 ShadowNode 传递的 ExtraBundle。
import { UIBase, EventHandlerArray, LynxUIMethodConstants } from '@lynx/lynx';
...
@Builder
export function buildInput(ui: UIBase) {
  if (ui as LynxExplorerInput) {
    InputView();
  }
}

export class LynxExplorerInput extends UIBase {
  readonly builder: WrappedBuilder<[UIBase]> = wrapBuilder<[UIBase]>(buildInput);

override updateExtraData(data: Object): void {
...
}
}
#处理事件绑定(可选)
在某些场景中,前端可能需要响应自定义元件的事件。例如,当用户在文本框中输入内容时,前端可能需要获取并处理这些输入数据。
以下示例演示了如何实现从 <explorer-input> 元件向前端发送文本输入事件,以及前端如何监听该事件。
#客户端事件发送
客户端通过监听原生视图的文本输入回调,当文本变更时使用 UIBase 的 sendCustomEvent(name: string, params: Object, paramName?: string) 将事件发送到前端,以便前端进行相应的处理。
@ComponentV2
struct InputView {
  @Param @Require inputParams: InputParams;

  build() {
    Stack() {
      TextInput({
        controller: this.inputParams.ui.controller,
        text: this.inputParams.inputText,
        placeholder: this.inputParams.placeholder
      })
      .id(this.inputParams.ui.sign.toString())
      .style(TextContentStyle.DEFAULT)
      .focusable(true)
      .onChange((value: string) => {
        // update input text
        this.inputParams.inputText = value;
        this.inputParams.ui.sendCustomEvent('input', {
          value: value,
          cursor: this.inputParams.ui.controller.getCaretOffset()
            .index,
          compositing: false
        } as InputEvent, 'detail');
      })
    }
    .width('100%')
    .height('100%')
  }
}

export class LynxExplorerInput extends UIBase {
  controller: TextInputController = new TextInputController();
  inputParams: InputParams = new InputParams(this)
  focused: boolean = false;
  readonly builder: WrappedBuilder<[UIBase]> = wrapBuilder<[UIBase]>(buildInput);

  update(prop: Record<string, Object>, events?: EventHandlerArray[]): void {
    ...
  }

  layout(x: number, y: number, width: number, height: number, paddingLeft: number,
    paddingTop: number, paddingRight: number, paddingBottom: number, marginLeft: number, marginTop: number,
    marginRight: number, marginBottom: number, sticky?: number[]): void {
   ...
 }
}
#前端 DSL 事件绑定
在前端,需要绑定相应的文本框输入事件。通过以下代码,前端将监听客户端发送的事件,并根据需要处理输入的数据。
const handleInput = (e) => {
  const currentValue = e.detail.value.trim();
  setInputValue(currentValue);
};

<explorer-input
  className="input-box"
  style={{ width: '100px', height: '100px' }}
  bindinput={handleInput}
  value={inputValue}
/>;注意:前端 DSL 使用
bindxxx进行事件绑定,例如bindinput绑定input事件。
#支持直接操作元件(可选)
在某些情况下,前端可能需要通过命令式 API 直接操作自定义元件,你可以通过 LYNX_UI_METHOD 让元件支持这些操作。
#前端调用示例
以下代码展示了如何在前端通过 SelectorQuery 调用 focus 方法让 <explorer-input> 元件获取焦点:
lynx
  .createSelectorQuery()
  .select('#input-id')
  .invoke({
    method: 'focus',
    params: {},
    success: function (res) {
      console.log('lynx', 'request focus success');
    },
    fail: function (res: { code: number; data: any }) {
      console.log('lynx', 'request focus fail');
    },
  })
.exec();#客户端实现
在客户端,需要重写 UIBase 的 invokeMethod 为自定义元件添加 focus 方法,确保它能够正确处理前端的调用。
export class LynxExplorerInput extends UIBase {
  controller: TextInputController = new TextInputController();
  inputParams: InputParams = new InputParams(this);
  focused: boolean = false;
  readonly builder: WrappedBuilder<[UIBase]> =
    wrapBuilder<[UIBase]>(buildInput);

  focus(callback: (code: number, res: Object) => void) {
    focusControl.requestFocus(this.sign.toString());
    this.focused = true;
    this.setFocusedUI();
    callback(LynxUIMethodConstants.SUCCESS, new Object());
  }

  override invokeMethod(
    method: string,
    params: Object,
    callback: (code: number, res: Object) => void,
  ): boolean {
    switch (method) {
      case 'focus':
        this.focus(callback);
        break;
      default:
        return false;
    }
    return true;
  }
}#方法回调返回值
在实现 focus 方法时,元件开发者需要向前端返回一个状态码,以表明操作是否成功。例如,前端调用可能会失败,此时应返回相应的错误状态,以便前端在 fail 回调进行处理。
Lynx Engine 预定义了一些常见的错误码,元件开发者可以在方法回调中返回相应的状态码:
enum LynxUIMethodErrorCode {
  kUIMethodSuccess = 0, // 调用成功
  kUIMethodUnknown, // 未知错误
  kUIMethodNodeNotFound, // 无法找到对应的元件
  kUIMethodMethodNotFound, // 该元件上没有对应的 Method
  kUIMethodParamInvalid, // 方法参数无效
  kUIMethodSelectorNotSupported, // 该选择器暂时不支持
}
自定义 web 中元件的方式可以直接参考 Web Components
自定义元素的实现分为几个步骤,包括:声明并注册元素、创建原生视图、处理布局、在 Lynx 应用代码中使用等。Desktops 平台通过 Lynx C/C++ API 实现原生元素。接下来以一个简单的自定义输入框元素 <explorer-input> 为例,介绍自定义元素的实现流程。
下文用到的扩展头文件,包括 capi/lynx_view_capi.h、lynx_native_view.h 和 lynx/registration.h,由 npm 包 @lynx-js/lynx-library-headers 提供。在原生库工程中安装该包,把它的 include/ 目录加入 include 路径即可;由 create-lynx-library 生成的 CMake 已经完成了这一步。
#声明并注册元素
#声明自定义元素
把所有 Desktops 渲染后端共享的行为放在元素头文件中。各平台渲染后端继承这个类,只实现展示相关的部分。
#pragma once

#include <functional>
#include <string>

#if __has_include(<lynx_extension.h>)
#include <lynx_extension.h>
#elif __has_include(<lynx/extension.h>)
#include <lynx/extension.h>
#endif

#include <lynx_native_view.h>

class ExplorerInputElementView : public lynx::pub::LynxNativeView {
 public:
  explicit ExplorerInputElementView(void* opaque)
      : lynx_view_(static_cast<lynx_view_t*>(opaque)) {}

  void OnPropertiesChanged(const lynx::pub::LynxValue& attrs,
                           const lynx::pub::LynxValue& events) override {
    (void)events;
    if (!attrs.HasProperty("value")) {
      return;
    }
    SetValue(attrs.GetProperty("value").StdString());
  }

  void OnMethodInvoked(
      const char* method,
      const lynx::pub::LynxValue& params,
      std::function<void(int, lynx::pub::LynxValue&&)> callback) override {
    if (method != nullptr && std::string(method) == "setValue") {
      if (!params.HasProperty("value")) {
        callback(kInvalidParameter,
                 lynx::pub::LynxValue(
                     lynx::pub::LynxValue::kCreateAsNullTag));
        return;
      }
      SetValue(params.GetProperty("value").StdString());
      callback(kSuccess,
               lynx::pub::LynxValue(
                   lynx::pub::LynxValue::kCreateAsNullTag));
      return;
    }

    callback(kMethodNotFound,
             lynx::pub::LynxValue(lynx::pub::LynxValue::kCreateAsNullTag));
  }

 protected:
  lynx_view_t* lynx_view() const { return lynx_view_; }
  const std::string& value() const { return value_; }

  virtual void OnValueChanged(const std::string& value) { (void)value; }

 private:
  void SetValue(const std::string& value) {
    value_ = value;
    OnValueChanged(value_);
  }

  lynx_view_t* lynx_view_ = nullptr;
  std::string value_ = "explorer-input";
};#注册自定义元素
Desktops 原生元素通过 LYNX_REGISTER_ELEMENT 注册。这是一种进程级静态注册:原生库被编译进宿主应用或被宿主进程加载后,静态注册会让该标签成为 Lynx runtime 中可用的 Lynx 元素。
最后一个参数传 nullptr 时,创建函数收到的 opaque 是当前 lynx_view_t*,可以用它解析平台宿主窗口:
#include <lynx/registration.h>

#include "shared/elements/ExplorerInputElement.h"

lynx_native_view_t* CreateExplorerInputElementNativeView(void* opaque);

LYNX_REGISTER_ELEMENT(
    "ExplorerInputElementModule",
    "explorer-input",
    CreateExplorerInputElementNativeView,
    false,
nullptr)其中,"explorer-input" 对应前端 DSL 的标签名称。当 Lynx Engine 解析到该标签时,会查找已注册的原生元素并创建实例。
#创建原生视图实例
每个自定义元素都会被创建为一个 LynxNativeView。上面的声明、属性处理、方法处理和静态注册对所有 Desktops 实现都是共享的。渲染后端决定视图创建之后持有什么:Native UI 持有平台控件,Texture 持有 Lynx 管理的 Surface。
下面的示例使用同一个注册创建函数名称展示两种可选渲染后端实现。实际构建时选择一种渲染后端,让 CreateExplorerInputElementNativeView 只解析到一个实现。
#选择合成后端
Native UI 和 Texture 元素具有不同的合成行为:
| 后端 | 呈现方式 | 合成行为 |
|---|---|---|
| Native UI | NSView 或子 HWND 等平台控件 | 保留原生输入、输入法和无障碍能力,但普通 Lynx CSS z-index 无法可靠地让 Lynx 渲染内容与平台控件交错。 |
| Texture | 由 Lynx 获取并呈现的 IOSurface 或 D3D 共享纹理 | 参与 Lynx 渲染树的裁剪、变换和常规层叠,但元素需要自行转发输入和输入法行为。 |
对于 Native UI 元素,应通过 lynx_view_get_native_window(...) 从当前 lynx_view_t 获取 renderer 宿主,然后将平台控件作为其子节点挂载。这样可以在多窗口应用中保持正确的窗口归属,并保证控件仍位于 Lynx overlay slice 能够覆盖的原生子树中。顶层平台表面需要单独的宿主集成,不属于这一合成模型。
Native UI 渲染后端会挂载一个平台控件,并在 OnLayoutChanged 中更新它的位置和尺寸。对于 <explorer-input>,实现会挂载一个最小输入控件。
Native UI 后端挂载的平台视图或子窗口位于 Clay 主渲染表面之上,因此普通 Lynx z-index 无法可靠地覆盖它们。应将平台控件保留在对应 lynx_view_t 返回的 renderer 宿主中,并将需要重叠显示的 Lynx 内容放入 <cover-view>。如果界面需要任意裁剪、变换,或与普通 Lynx 内容交错,请改用 Texture 后端。
macOS 上可以挂载一个 NSTextField:
#import <Cocoa/Cocoa.h>

#include "shared/elements/ExplorerInputElement.h"

namespace {

using MainThreadBlock = void (^)(void);

void RunOnMainThreadSync(MainThreadBlock block) {
  if ([NSThread isMainThread]) {
    block();
    return;
  }
  dispatch_sync(dispatch_get_main_queue(), block);
}

NSString* NSStringFromStdString(const std::string& value) {
  NSString* result = [NSString stringWithUTF8String:value.c_str()];
  return result != nil ? result : @"";
}

}  // namespace

class ExplorerInputElementNativeUIView : public ExplorerInputElementView {
 public:
  explicit ExplorerInputElementNativeUIView(void* opaque)
      : ExplorerInputElementView(opaque) {
    RunOnMainThreadSync(^{
      input_ = [[NSTextField alloc] initWithFrame:NSZeroRect];
      input_.placeholderString = @"explorer-input";
      input_.stringValue = NSStringFromStdString(value());
      input_.editable = YES;
      input_.selectable = YES;
      input_.bezeled = YES;
      input_.bezelStyle = NSTextFieldRoundedBezel;
      input_.textColor = [NSColor blackColor];
    });
  }

  ~ExplorerInputElementNativeUIView() override {
    RunOnMainThreadSync(^{
      [input_ removeFromSuperview];
      input_ = nil;
    });
  }

  bool IsSurfaceEnabled() override { return false; }

  void OnDetach() override {
    RunOnMainThreadSync(^{
      [input_ removeFromSuperview];
    });
  }

  void OnLayoutChanged(
      float left,
      float top,
      float width,
      float height,
      float pixel_ratio) override {
    (void)pixel_ratio;
    RunOnMainThreadSync(^{
      auto* lynx_parent =
          (__bridge NSView*)lynx_view_get_native_window(lynx_view());
      if (lynx_parent == nil || input_ == nil) {
        return;
      }

      // Keep the control inside this LynxView's renderer subtree. Clay owns a
      // sibling overlay host above that subtree for slices such as
      // <cover-view>, so the extension must not discover or reorder the
      // private overlay view itself.
      NSView* parent = lynx_parent;
      if (input_.superview != parent) {
        [input_ removeFromSuperview];
        [parent addSubview:input_];
      }

      const NSRect frame_in_lynx = NSMakeRect(left, top, width, height);
      input_.frame = [lynx_parent convertRect:frame_in_lynx toView:parent];
    });
  }

 private:
  void OnValueChanged(const std::string& value) override {
    std::string text = value;
    RunOnMainThreadSync(^{
      if (input_ != nil) {
        input_.stringValue = NSStringFromStdString(text);
      }
    });
  }

  NSTextField* input_ = nil;
};

lynx_native_view_t* CreateExplorerInputElementNativeView(void* opaque) {
  auto* view = new ExplorerInputElementNativeUIView(opaque);
  return view->native_view();
}
Windows 上可以挂载一个 EDIT 控件:
#include <algorithm>
#include <string>

#ifndef WIN32_LEAN_AND_MEAN
#define WIN32_LEAN_AND_MEAN
#endif
#ifndef NOMINMAX
#define NOMINMAX
#endif

#include <windows.h>

#include "shared/elements/ExplorerInputElement.h"

namespace {

constexpr wchar_t kHostClassName[] = L"ExplorerInputElementNativeUIHost";

int Scale(float value, float pixel_ratio) {
  const float ratio = pixel_ratio > 0 ? pixel_ratio : 1;
  return static_cast<int>(value * ratio);
}

std::wstring Utf8ToWide(const char* value) {
  if (value == nullptr || value[0] == '\0') {
    return L"";
  }
  const int size = MultiByteToWideChar(CP_UTF8, 0, value, -1, nullptr, 0);
  if (size <= 0) {
    return L"";
  }
  std::wstring result(static_cast<size_t>(size), L'\0');
  const int converted =
      MultiByteToWideChar(CP_UTF8, 0, value, -1, result.data(), size);
  if (converted <= 0) {
    return L"";
  }
  result.resize(static_cast<size_t>(converted - 1));
  return result;
}

bool EnsureHostClassRegistered() {
  static bool registered = false;
  if (registered) {
    return true;
  }

  WNDCLASSEXW window_class{};
  window_class.cbSize = sizeof(window_class);
  window_class.lpfnWndProc = DefWindowProcW;
  window_class.hInstance = GetModuleHandleW(nullptr);
  window_class.hCursor = LoadCursor(nullptr, IDC_ARROW);
  window_class.hbrBackground = reinterpret_cast<HBRUSH>(COLOR_WINDOW + 1);
  window_class.lpszClassName = kHostClassName;
  registered = RegisterClassExW(&window_class) != 0 ||
      GetLastError() == ERROR_CLASS_ALREADY_EXISTS;
  return registered;
}

}  // namespace

class ExplorerInputElementNativeUIView : public ExplorerInputElementView {
 public:
  explicit ExplorerInputElementNativeUIView(void* opaque)
      : ExplorerInputElementView(opaque) {}

  ~ExplorerInputElementNativeUIView() override {
    if (input_ != nullptr) {
      DestroyWindow(input_);
      input_ = nullptr;
    }
    if (host_ != nullptr) {
      DestroyWindow(host_);
      host_ = nullptr;
    }
  }

  bool IsSurfaceEnabled() override { return false; }

  void OnDetach() override {
    if (host_ != nullptr) {
      ShowWindow(host_, SW_HIDE);
    }
  }

  void OnLayoutChanged(
      float left,
      float top,
      float width,
      float height,
      float pixel_ratio) override {
    HWND parent = static_cast<HWND>(
        lynx_view_get_native_window(lynx_view()));
    if (parent == nullptr || !EnsureHostClassRegistered()) {
      return;
    }

    const int x = Scale(left, pixel_ratio);
    const int y = Scale(top, pixel_ratio);
    const int w = std::max(1, Scale(width, pixel_ratio));
    const int h = std::max(1, Scale(height, pixel_ratio));
    if (host_ == nullptr) {
      host_ = CreateWindowExW(
          0,
          kHostClassName,
          L"",
          WS_CHILD | WS_CLIPCHILDREN | WS_CLIPSIBLINGS,
          x,
          y,
          w,
          h,
          parent,
          nullptr,
          GetModuleHandleW(nullptr),
          nullptr);
    }

    if (host_ == nullptr) {
      return;
    }

    if (input_ == nullptr) {
      const std::wstring text = Utf8ToWide(value().c_str());
      input_ = CreateWindowExW(
          0,
          L"EDIT",
          text.c_str(),
          WS_CHILD | WS_VISIBLE | WS_TABSTOP | ES_AUTOHSCROLL,
          0,
          0,
          w,
          h,
          host_,
          nullptr,
          GetModuleHandleW(nullptr),
          nullptr);
    }

    if (input_ == nullptr) {
      return;
    }

    SetWindowPos(
        host_,
        // Keep native UI below child overlay windows created for <cover-view>.
        HWND_BOTTOM,
        x,
        y,
        w,
        h,
        SWP_SHOWWINDOW | SWP_NOACTIVATE);
    SetWindowPos(input_, HWND_TOP, 0, 0, w, h, SWP_SHOWWINDOW);
  }

 private:
  void OnValueChanged(const std::string& value) override {
    if (input_ == nullptr) {
      return;
    }
    const std::wstring text = Utf8ToWide(value.c_str());
    SetWindowTextW(input_, text.c_str());
  }

  HWND host_ = nullptr;
  HWND input_ = nullptr;
};

lynx_native_view_t* CreateExplorerInputElementNativeView(void* opaque) {
  auto* view = new ExplorerInputElementNativeUIView(opaque);
  return view->native_view();
}
用 Texture 实现文本输入是可行的,但会涉及文本编辑、光标、选区和 IME 处理,示例会很长。下面的示例只聚焦 Texture 链路:绘制一块原生纹理,并复用 ExplorerInputElementView 中共享的 value 属性和 setValue UI 方法。
共享的 Texture 渲染后端是跨平台的。它负责启用 Surface 渲染路径、维护布局尺寸,并调用各平台渲染后端实现的 DrawExplorerInputElementTextureSurface。
#include <algorithm>

#include "shared/elements/ExplorerInputElement.h"

bool DrawExplorerInputElementTextureSurface(
    lynx_surface_handle_t* handle,
    int width_px,
    int height_px,
    const char* message);

namespace {

constexpr float kYFlipTransform[3 * 3] = {1, 0, 0, 0, -1, 1, 0, 0, 1};

class ExplorerInputElementTextureView : public ExplorerInputElementView {
 public:
  explicit ExplorerInputElementTextureView(void* opaque)
      : ExplorerInputElementView(opaque) {}

  bool IsSurfaceEnabled() override { return true; }

  lynx_surface_buffer_mode_t SurfaceBufferMode() override {
    return kTripleBuffer;
  }

  void OnAttach() override {
    attached_ = true;
    Render();
  }

  void OnDetach() override { attached_ = false; }

  void OnLayoutChanged(
      float left,
      float top,
      float width,
      float height,
      float pixel_ratio) override {
    (void)left;
    (void)top;
    const float ratio = pixel_ratio > 0 ? pixel_ratio : 1;
    width_px_ = std::max(1, static_cast<int>(width * ratio + 0.5f));
    height_px_ = std::max(1, static_cast<int>(height * ratio + 0.5f));
    Render();
  }

 private:
  void OnValueChanged(const std::string& value) override {
    (void)value;
    Render();
  }

  void Render() {
    if (!attached_ || width_px_ <= 0 || height_px_ <= 0) {
      return;
    }

    lynx_surface_handle_t* surface = AcquireSurface(width_px_, height_px_);
    if (surface == nullptr) {
      return;
    }

    if (DrawExplorerInputElementTextureSurface(
            surface,
            width_px_,
            height_px_,
            value().c_str())) {
      PresentSurface(width_px_, height_px_, kYFlipTransform, surface);
    }
  }

  bool attached_ = false;
  int width_px_ = 0;
  int height_px_ = 0;
};

}  // namespace

lynx_native_view_t* CreateExplorerInputElementNativeView(void* opaque) {
  auto* view = new ExplorerInputElementTextureView(opaque);
  return view->native_view();
}
macOS 上可以绘制到 IOSurface-backed surface。这个示例会把收到的 value 映射成彩色条,调用 setValue 后纹理会产生可见变化:
#include <lynx_extension.h>

#import <CoreGraphics/CoreGraphics.h>
#import <IOSurface/IOSurface.h>

#include <algorithm>
#include <cstring>

bool DrawExplorerInputElementTextureSurface(
    lynx_surface_handle_t* handle,
    int width_px,
    int height_px,
    const char* message) {
  if (handle == nullptr || width_px <= 0 || height_px <= 0) {
    return false;
  }

  IOSurfaceRef surface = reinterpret_cast<IOSurfaceRef>(handle);
  uint32_t seed = 0;
  if (IOSurfaceLock(surface, 0, &seed) != kIOReturnSuccess) {
    return false;
  }

  void* base = IOSurfaceGetBaseAddress(surface);
  const size_t bytes_per_row = IOSurfaceGetBytesPerRow(surface);
  CGColorSpaceRef color_space = CGColorSpaceCreateDeviceRGB();
  CGContextRef context = CGBitmapContextCreate(
      base,
      width_px,
      height_px,
      8,
      bytes_per_row,
      color_space,
      kCGBitmapByteOrder32Little | kCGImageAlphaPremultipliedFirst);
  CGColorSpaceRelease(color_space);

  if (context == nullptr) {
    IOSurfaceUnlock(surface, 0, &seed);
    return false;
  }

  CGContextSetRGBFillColor(context, 1, 1, 1, 1);
  CGContextFillRect(context, CGRectMake(0, 0, width_px, height_px));

  const char* label = message != nullptr && message[0] != '\0'
                          ? message
                          : "explorer-input";
  const size_t count = std::min<size_t>(std::strlen(label), 12);
  for (size_t i = 0; i < count; ++i) {
    const unsigned char value = static_cast<unsigned char>(label[i]);
    CGContextSetRGBFillColor(
        context,
        ((value * 37) % 255) / 255.0,
        ((value * 67) % 255) / 255.0,
        ((value * 97) % 255) / 255.0,
        1.0);
    CGContextFillRect(
        context,
        CGRectMake(8 + i * 14, 8, 10, std::max(1, height_px - 16)));
  }

  CGContextRelease(context);
  IOSurfaceUnlock(surface, 0, &seed);
  return true;
}
Windows 上的 surface handle 是 D3D shared handle。将它导入为 ID3D11Texture2D,更新像素,再由 ExplorerInputElementTextureView 提交回 Lynx:
#include <lynx_extension.h>

#ifndef WIN32_LEAN_AND_MEAN
#define WIN32_LEAN_AND_MEAN
#endif
#ifndef NOMINMAX
#define NOMINMAX
#endif

#include <d3d11.h>
#include <windows.h>
#include <wrl/client.h>

#include <algorithm>
#include <cstdint>
#include <cstring>
#include <vector>

using Microsoft::WRL::ComPtr;

namespace {

std::vector<std::uint32_t> DrawMessagePixels(
    int width_px,
    int height_px,
    const char* message) {
  std::vector<std::uint32_t> pixels(
      static_cast<size_t>(width_px) * height_px,
      0xffffffff);

  const char* label = message != nullptr && message[0] != '\0'
                          ? message
                          : "explorer-input";
  const size_t count = std::min<size_t>(std::strlen(label), 12);
  for (size_t i = 0; i < count; ++i) {
    const unsigned char value = static_cast<unsigned char>(label[i]);
    const std::uint32_t color =
        0xff000000 |
        (((value * 37) % 255) << 16) |
        (((value * 67) % 255) << 8) |
        ((value * 97) % 255);
    const int x0 = 8 + static_cast<int>(i) * 14;
    const int x1 = std::min(width_px, x0 + 10);
    for (int y = 8; y < std::max(8, height_px - 8); ++y) {
      for (int x = x0; x < x1; ++x) {
        pixels[static_cast<size_t>(y) * width_px + x] = color;
      }
    }
  }
  return pixels;
}

}  // namespace

bool DrawExplorerInputElementTextureSurface(
    lynx_surface_handle_t* handle,
    int width_px,
    int height_px,
    const char* message) {
  if (handle == nullptr || width_px <= 0 || height_px <= 0) {
    return false;
  }

  ComPtr<ID3D11Device> device;
  ComPtr<ID3D11DeviceContext> context;
  D3D_FEATURE_LEVEL feature_level = D3D_FEATURE_LEVEL_11_0;
  auto hr = D3D11CreateDevice(
      nullptr,
      D3D_DRIVER_TYPE_HARDWARE,
      nullptr,
      0,
      nullptr,
      0,
      D3D11_SDK_VERSION,
      device.GetAddressOf(),
      &feature_level,
      context.GetAddressOf());
  if (FAILED(hr)) {
    return false;
  }

  ComPtr<ID3D11Texture2D> texture;
  hr = device->OpenSharedResource(
      reinterpret_cast<HANDLE>(handle),
      IID_PPV_ARGS(texture.GetAddressOf()));
  if (FAILED(hr) || !texture) {
    return false;
  }

  const auto pixels = DrawMessagePixels(width_px, height_px, message);
  context->UpdateSubresource(
      texture.Get(),
      0,
      nullptr,
      pixels.data(),
      static_cast<UINT>(width_px * sizeof(std::uint32_t)),
      0);
  context->Flush();
  return true;
}
生产代码还需要和当前 Windows 图形后端匹配,并处理导入纹理暴露的同步原语。
#构建并使用元素
准备好原生代码后,将它编译进宿主应用或可被宿主加载的 Desktops 原生库。如果包里同时包含 Native UI 和 Texture 两套渲染后端实现,需要在构建系统中选择一种,让注册创建函数只解析到一个实现。
原生库被链接或加载后,即可使用注册好的 Lynx 元素:
<explorer-input style={{ width: '100px', height: '100px' }} value="hello" />#处理前端更新的样式和属性
通过重写 OnPropertiesChanged 接收前端传入的属性和事件信息。attrs 中包含最新属性,events 中包含元素上声明的事件绑定。
void OnPropertiesChanged(const lynx::pub::LynxValue& attrs,
                         const lynx::pub::LynxValue& events) override {
  (void)events;
  if (!attrs.HasProperty("value")) {
    return;
  }
  SetValue(attrs.GetProperty("value").StdString());
}#处理排版信息(可选)
#处理 Lynx Engine 的排版结果
Lynx Engine 会通过 OnLayoutChanged 传递元素的排版结果。可以在这个回调中移动或缩放平台视图,也可以在渲染前调整 Texture 渲染表面的尺寸。
void OnLayoutChanged(
    float left,
    float top,
    float width,
    float height,
    float pixel_ratio) override {
  // Convert the Lynx layout result to platform coordinates and update the
  // native view frame or texture size.
}#处理事件绑定(可选)
在某些场景中,前端可能需要响应自定义元素的事件。例如,当用户在输入框中输入内容时,原生元素可以触发 input 事件。
#客户端事件发送
使用 TriggerEvent 从原生元素向 Lynx 应用代码发送自定义事件。
void EmitInputEvent(const std::string& value) {
  lynx::pub::LynxValue detail(lynx::pub::LynxValue::kCreateAsMapTag);
  detail.SetProperty("value", lynx::pub::LynxValue(value));
  TriggerEvent("input", std::move(detail));
}#前端 DSL 事件绑定
前端绑定对应事件后,即可监听并处理原生元素发送的数据。
const handleInput = (e) => {
  const currentValue = e.detail.value.trim();
  setInputValue(currentValue);
};

<explorer-input
  style={{ width: '100px', height: '100px' }}
  bindinput={handleInput}
  value={inputValue}
/>;注意:前端 DSL 使用
bindxxx进行事件绑定,例如bindinput绑定input事件。
#支持直接操作元素(可选)
在某些情况下,前端可能需要通过命令式 API 直接操作自定义元素。Desktops 上可以通过实现 OnMethodInvoked 处理这些调用。
#前端调用示例
以下代码展示了如何在前端通过 SelectorQuery 调用 setValue 方法更新 <explorer-input> 元素:
lynx
  .createSelectorQuery()
  .select('#input-id')
  .invoke({
    method: 'setValue',
    params: { value: 'updated value' },
    success: function (res) {
      console.log('lynx', 'set value success');
    },
    fail: function (res) {
      console.log('lynx', 'set value fail');
    },
  })
.exec();#客户端实现
在客户端,重写 OnMethodInvoked 处理方法调用,并通过回调向前端返回状态码。
void OnMethodInvoked(
    const char* method,
    const lynx::pub::LynxValue& params,
    std::function<void(int, lynx::pub::LynxValue&&)> callback) override {
  if (method != nullptr && std::string(method) == "setValue") {
    SetValue(params.GetProperty("value").StdString());
    callback(kSuccess,
             lynx::pub::LynxValue(lynx::pub::LynxValue::kCreateAsNullTag));
    return;
  }

  callback(kMethodNotFound,
           lynx::pub::LynxValue(lynx::pub::LynxValue::kCreateAsNullTag));
}#方法回调返回值
实现方法时,需要向前端返回状态码,以便前端在对应回调中处理成功或失败。
LynxNativeView 定义了几类常见状态码:
static constexpr int kSuccess = 0;
static constexpr int kUnknown = 1;
static constexpr int kMethodNotFound = 3;
static constexpr int kInvalidParameter = 4;
static constexpr int kInvalidStateError = 7;#使用你的自定义元件
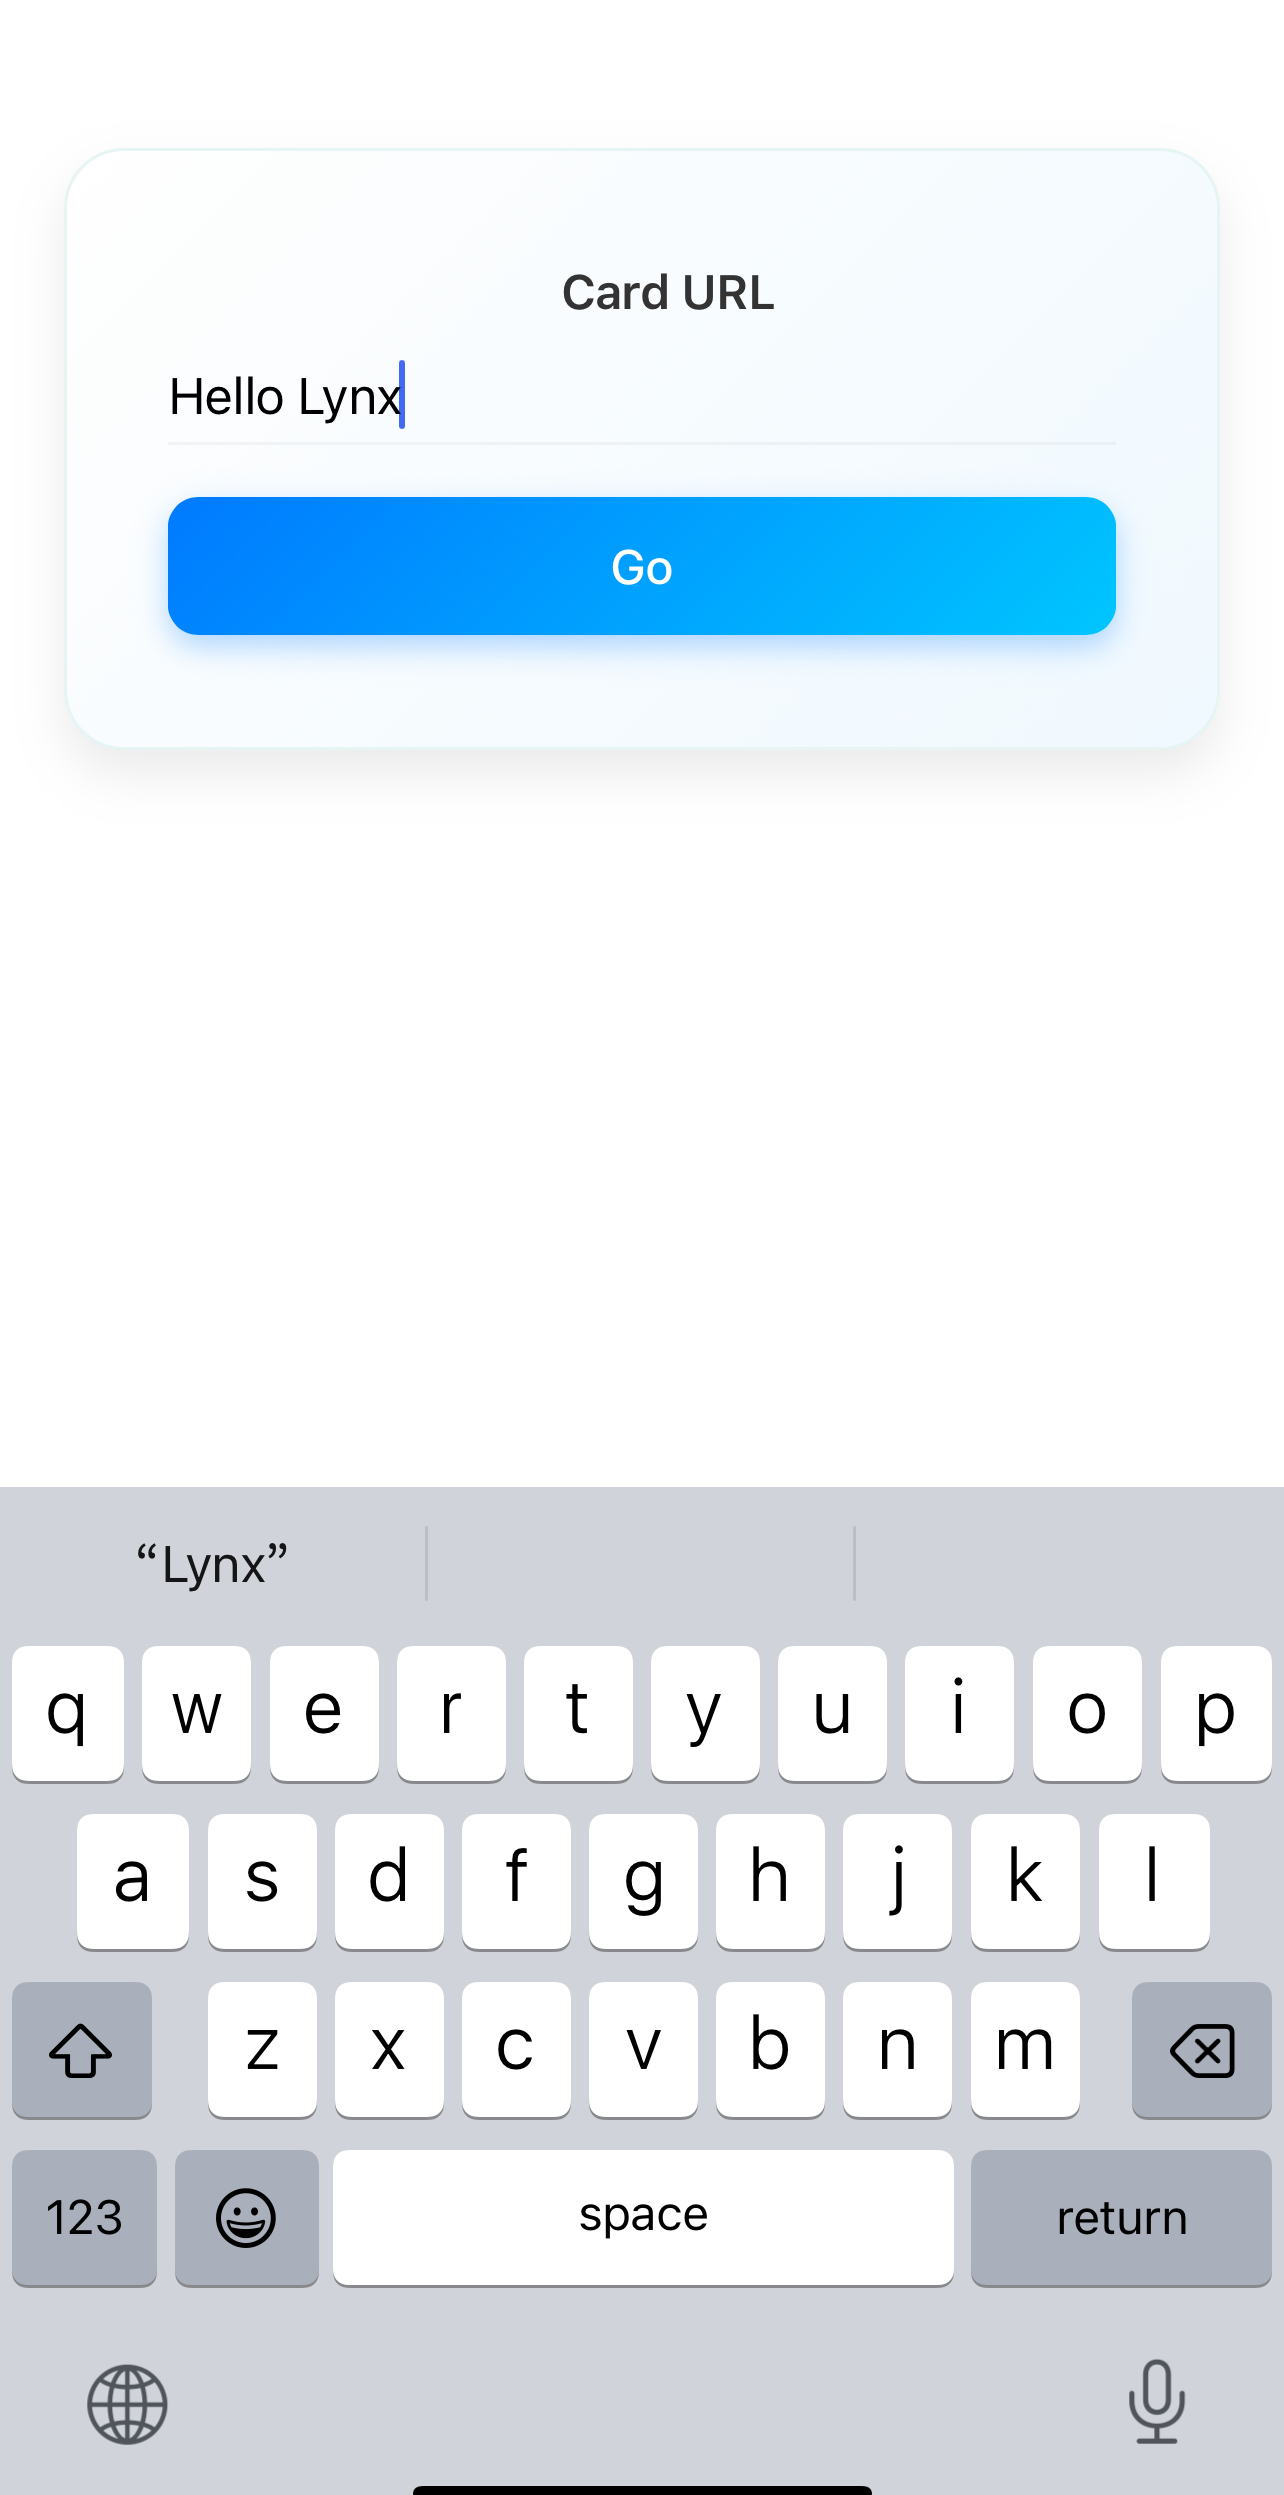
一旦你完成了自定义元件的开发,你可以像使用内置元件一样使用它。下面是一个 <explorer-input> 元件的简单使用示例: