#自定义元件
如果内置元件无法满足你的需求,你可以通过自定义元件来扩展 Lynx 的能力。本节将向你展示如何在 Android, iOS 和 HarmonyOS 平台上创建和注册自定义元件。
#构建你的原生代码
自定义元件的实现分为几个步骤,包括:声明并注册元件、创建原生视图、处理样式与属性、事件绑定等。接下来以一个简单的自定义输入框元件 <explorer-input> 为例,简要介绍自定义元件的实现流程。
完整实现参见 LynxExplorer/input 模块查看。通过编译运行 LynxExplorer 示例项目可实时预览自定义元件效果。
#声明并注册元件
#声明自定义元件
下面是 <explorer-input> 自定义元件的实现,需要继承自 LynxUI。
#import <Lynx/LynxUI.h>

NS_ASSUME_NONNULL_BEGIN

@interface LynxTextField : UITextField

@property(nonatomic, assign) UIEdgeInsets padding;

@end

@interface LynxExplorerInput : LynxUI <LynxTextField *> <UITextFieldDelegate>

@end

NS_ASSUME_NONNULL_END
#import "LynxExplorerInput.h"

@implementation LynxExplorerInput

//...

@end


@implementation LynxTextField

- (UIEditingInteractionConfiguration)editingInteractionConfiguration API_AVAILABLE(ios(13.0)) {
  return UIEditingInteractionConfigurationNone;
}

- (void)setPadding:(UIEdgeInsets)padding {
  _padding = padding;
  [self setNeedsLayout];
}

- (CGRect)textRectForBounds:(CGRect)bounds {
  CGFloat x = self.padding.left;
  CGFloat y = self.padding.top;
  CGFloat width = bounds.size.width - self.padding.left - self.padding.right;
  CGFloat height = bounds.size.height - self.padding.top - self.padding.bottom;

  return CGRectMake(x, y, width, height);
}

- (CGRect)editingRectForBounds:(CGRect)bounds {
  return [self textRectForBounds:bounds];
}
@end
#注册自定义元件
元件注册有两种方式:全局注册和局部注册。
#全局注册
全局注册的元件可以在多个 LynxView 实例中共享。
#import "LynxExplorerInput.h"
#import <Lynx/LynxComponentRegistry.h>

@implementation LynxExplorerInput

LYNX_LAZY_REGISTER_UI("explorer-input")

@end


@implementation LynxTextField

- (UIEditingInteractionConfiguration)editingInteractionConfiguration API_AVAILABLE(ios(13.0)) {
  return UIEditingInteractionConfigurationNone;
}

- (void)setPadding:(UIEdgeInsets)padding {
  _padding = padding;
  [self setNeedsLayout];
}

- (CGRect)textRectForBounds:(CGRect)bounds {
  CGFloat x = self.padding.left;
  CGFloat y = self.padding.top;
  CGFloat width = bounds.size.width - self.padding.left - self.padding.right;
  CGFloat height = bounds.size.height - self.padding.top - self.padding.bottom;

  return CGRectMake(x, y, width, height);
}

- (CGRect)editingRectForBounds:(CGRect)bounds {
  return [self textRectForBounds:bounds];
}
@end#局部注册
局部注册的元件仅适用于当前 LynxView 实例。
#import <Lynx/LynxEnv.h>
#import <Lynx/LynxView.h>

  LynxView *lynxView = [[LynxView alloc] initWithBuilderBlock:^(LynxViewBuilder *builder) {
    builder.config =
        [[LynxConfig alloc] initWithProvider:[LynxEnv sharedInstance].config.templateProvider];
    [builder.config registerUI:[LynxExplorerInput class] withName:@"explorer-input"];
  }];
其中,"explorer-input" 对应前端 DSL 的标签名称。当 Lynx Engine 解析到该标签时,会查找已注册的原生元件并创建实例。
#创建原生 View 实例
每个自定义元件都需要实现 createView 方法,该方法返回一个与之对应的原生 View 实例。
以下是 <explorer-input> 元件的实现:
#import "LynxExplorerInput.h"
#import <Lynx/LynxComponentRegistry.h>


@implementation LynxExplorerInput

LYNX_LAZY_REGISTER_UI("explorer-input")


- (UITextField *)createView {
  UITextField *textField = [[LynxTextField alloc] init];
  //...
  textField.delegate = self;
  return textField;
}


@end


@implementation LynxTextField

- (UIEditingInteractionConfiguration)editingInteractionConfiguration API_AVAILABLE(ios(13.0)) {
  return UIEditingInteractionConfigurationNone;
}

- (void)setPadding:(UIEdgeInsets)padding {
  _padding = padding;
  [self setNeedsLayout];
}

- (CGRect)textRectForBounds:(CGRect)bounds {
  CGFloat x = self.padding.left;
  CGFloat y = self.padding.top;
  CGFloat width = bounds.size.width - self.padding.left - self.padding.right;
  CGFloat height = bounds.size.height - self.padding.top - self.padding.bottom;

  return CGRectMake(x, y, width, height);
}

- (CGRect)editingRectForBounds:(CGRect)bounds {
  return [self textRectForBounds:bounds];
}
@end
#处理前端更新的样式和属性
你可以使用 LYNX_PROP_SETTER 宏来监听前端传入的属性变化,并更新原生视图。例如,处理 <explorer-input> 元件的 value 属性:
#import "LynxExplorerInput.h"
#import <Lynx/LynxComponentRegistry.h>
#import <Lynx/LynxPropsProcessor.h>

@implementation LynxExplorerInput

LYNX_LAZY_REGISTER_UI("explorer-input")

LYNX_PROP_SETTER("value", setValue, NSString *) {
    self.view.text = value;
}

- (UITextField *)createView {
  UITextField *textField = [[LynxTextField alloc] init];
  //...
  textField.delegate = self;
  return textField;
}


@end


@implementation LynxTextField

- (UIEditingInteractionConfiguration)editingInteractionConfiguration API_AVAILABLE(ios(13.0)) {
  return UIEditingInteractionConfigurationNone;
}

- (void)setPadding:(UIEdgeInsets)padding {
  _padding = padding;
  [self setNeedsLayout];
}

- (CGRect)textRectForBounds:(CGRect)bounds {
  CGFloat x = self.padding.left;
  CGFloat y = self.padding.top;
  CGFloat width = bounds.size.width - self.padding.left - self.padding.right;
  CGFloat height = bounds.size.height - self.padding.top - self.padding.bottom;

  return CGRectMake(x, y, width, height);
}

- (CGRect)editingRectForBounds:(CGRect)bounds {
  return [self textRectForBounds:bounds];
}
@end
#处理排版信息(可选)
#处理 Lynx Engine 的排版结果
通常,Lynx Engine 会自动计算并更新 View 的排版信息,无需开发者手动处理。但在某些特殊情况下,例如需要对 View 进行额外调整时,
可以在 layoutDidFinished 回调中获取最新的排版信息,并应用自定义逻辑。
#import "LynxExplorerInput.h"
#import <Lynx/LynxComponentRegistry.h>
#import <Lynx/LynxPropsProcessor.h>

@implementation LynxExplorerInput

LYNX_LAZY_REGISTER_UI("explorer-input")

- (void)layoutDidFinished {
  self.view.padding = self.padding;
  }

LYNX_PROP_SETTER("value", setValue, NSString \*) {
self.view.text = value;
}

- (UITextField *)createView {
  UITextField *textField = [[LynxTextField alloc] init];
  //...
  textField.delegate = self;
  return textField;
  }

@end

@implementation LynxTextField

- (UIEditingInteractionConfiguration)editingInteractionConfiguration API_AVAILABLE(ios(13.0)) {
  return UIEditingInteractionConfigurationNone;
  }

- (void)setPadding:(UIEdgeInsets)padding {
  \_padding = padding;
  [self setNeedsLayout];
  }

- (CGRect)textRectForBounds:(CGRect)bounds {
  CGFloat x = self.padding.left;
  CGFloat y = self.padding.top;
  CGFloat width = bounds.size.width - self.padding.left - self.padding.right;
  CGFloat height = bounds.size.height - self.padding.top - self.padding.bottom;

  return CGRectMake(x, y, width, height);
  }

- (CGRect)editingRectForBounds:(CGRect)bounds {
  return [self textRectForBounds:bounds];
  }
  @end
#处理事件绑定(可选)
在某些场景中,前端可能需要响应自定义元件的事件。例如,当用户在文本框中输入内容时,前端可能需要获取并处理这些输入数据。
以下示例演示了如何实现从 <explorer-input> 元件向前端发送文本输入事件,以及前端如何监听该事件。
#客户端事件发送
客户端通过监听原生视图的文本输入回调,当文本变更时使用 [self.context.eventEmitter dispatchCustomEvent:eventInfo] 将事件发送到前端,以便前端进行相应的处理。
#import "LynxExplorerInput.h"
#import <Lynx/LynxComponentRegistry.h>
#import <Lynx/LynxPropsProcessor.h>

@implementation LynxExplorerInput

LYNX_LAZY_REGISTER_UI("explorer-input")

- (UITextField *)createView {
  UITextField *textField = [[LynxTextField alloc] init];
  //...
  textField.delegate = self;
  [[NSNotificationCenter defaultCenter] addObserver:self
                                        selector:@selector(textFieldDidChange:)
                                        name:UITextFieldTextDidChangeNotification
                                        object:textField];
  return textField;
}

- (void)emitEvent:(NSString *)name detail:(NSDictionary *)detail {
  LynxCustomEvent *eventInfo = [[LynxDetailEvent alloc] initWithName:name
                                                          targetSign:[self sign]
                                                              detail:detail];
  [self.context.eventEmitter dispatchCustomEvent:eventInfo];
}

- (void)textFieldDidChange:(NSNotification *)notification {
  [self emitEvent:@"input"
           detail:@{
             @"value": [self.view text] ?: @"",
           }];
}

- (void)layoutDidFinished {
    self.view.padding = self.padding;
}

LYNX_PROP_SETTER("value", setValue, NSString *) {
    self.view.text = value;
}


@end


@implementation LynxTextField

- (UIEditingInteractionConfiguration)editingInteractionConfiguration API_AVAILABLE(ios(13.0)) {
  return UIEditingInteractionConfigurationNone;
}

- (void)setPadding:(UIEdgeInsets)padding {
  _padding = padding;
  [self setNeedsLayout];
}

- (CGRect)textRectForBounds:(CGRect)bounds {
  CGFloat x = self.padding.left;
  CGFloat y = self.padding.top;
  CGFloat width = bounds.size.width - self.padding.left - self.padding.right;
  CGFloat height = bounds.size.height - self.padding.top - self.padding.bottom;

  return CGRectMake(x, y, width, height);
}

- (CGRect)editingRectForBounds:(CGRect)bounds {
  return [self textRectForBounds:bounds];
}
@end
#前端 DSL 事件绑定
在前端,需要绑定相应的文本框输入事件。通过以下代码,前端将监听客户端发送的事件,并根据需要处理输入的数据。
const handleInput = (e) => {
  const currentValue = e.detail.value.trim();
  setInputValue(currentValue);
};

<explorer-input
  className="input-box"
  bindinput={handleInput}
  value={inputValue}
/>;注意:前端 DSL 使用
bindxxx进行事件绑定,例如bindinput绑定input事件。
#支持直接操作元件(可选)
在某些情况下,前端可能需要通过命令式 API 直接操作自定义元件,你可以通过 LYNX_UI_METHOD 让元件支持这些操作。
#前端调用示例
以下代码展示了如何在前端通过 SelectorQuery 调用 focus 方法让 <explorer-input> 元件获取焦点:
lynx
  .createSelectorQuery()
  .select('#input-id')
  .invoke({
    method: 'focus',
    params: {},
    success: function (res) {
      console.log('lynx', 'request focus success');
    },
    fail: function (res : {code: number, data: any}) {
      console.log('lynx', 'request focus fail');
    },
  })
.exec();#客户端实现
在客户端,需要使用 LYNX_UI_METHOD 为自定义元件添加 focus 方法,确保它能够正确处理前端的调用,
#import "LynxExplorerInput.h"
#import <Lynx/LynxComponentRegistry.h>
#import <Lynx/LynxPropsProcessor.h>
#import <Lynx/LynxUIMethodProcessor.h>


@implementation LynxExplorerInput

LYNX_LAZY_REGISTER_UI("explorer-input")

LYNX_UI_METHOD(focus) {
    if ([self.view becomeFirstResponder]) {
        callback(kUIMethodSuccess, nil);
    } else {
        callback(kUIMethodUnknown, @"fail to focus");
    }
}

- (UITextField *)createView {
  UITextField *textField = [[LynxTextField alloc] init];
  //...
  textField.delegate = self;
  [[NSNotificationCenter defaultCenter] addObserver:self
                                        selector:@selector(textFieldDidChange:)
                                        name:UITextFieldTextDidChangeNotification
                                        object:textField];
  return textField;
}

- (void)emitEvent:(NSString *)name detail:(NSDictionary *)detail {
  LynxCustomEvent *eventInfo = [[LynxDetailEvent alloc] initWithName:name
                                                          targetSign:[self sign]
                                                              detail:detail];
  [self.context.eventEmitter dispatchCustomEvent:eventInfo];
}

- (void)textFieldDidChange:(NSNotification *)notification {
  [self emitEvent:@"input"
           detail:@{
             @"value": [self.view text] ?: @"",
           }];
}

- (void)layoutDidFinished {
    self.view.padding = self.padding;
}

LYNX_PROP_SETTER("value", setValue, NSString *) {
    self.view.text = value;
}


@end


@implementation LynxTextField

- (UIEditingInteractionConfiguration)editingInteractionConfiguration API_AVAILABLE(ios(13.0)) {
  return UIEditingInteractionConfigurationNone;
}

- (void)setPadding:(UIEdgeInsets)padding {
  _padding = padding;
  [self setNeedsLayout];
}

- (CGRect)textRectForBounds:(CGRect)bounds {
  CGFloat x = self.padding.left;
  CGFloat y = self.padding.top;
  CGFloat width = bounds.size.width - self.padding.left - self.padding.right;
  CGFloat height = bounds.size.height - self.padding.top - self.padding.bottom;

  return CGRectMake(x, y, width, height);
}

- (CGRect)editingRectForBounds:(CGRect)bounds {
  return [self textRectForBounds:bounds];
}
@end
#方法回调返回值
在实现 focus 方法时,元件开发者需要向前端返回一个状态码,以表明操作是否成功。例如,前端调用可能会失败,此时应返回相应的错误状态,以便前端在 fail 回调进行处理。
Lynx Engine 预定义了一些常见的错误码,元件开发者可以在方法回调中返回相应的状态码:
enum LynxUIMethodErrorCode {
  kUIMethodSuccess = 0, // 调用成功
  kUIMethodUnknown, // 未知错误
  kUIMethodNodeNotFound, // 无法找到对应的元件
  kUIMethodMethodNotFound, // 该元件上没有对应的 Method
  kUIMethodParamInvalid, // 方法参数无效
  kUIMethodSelectorNotSupported, // 该选择器暂时不支持
};自定义元件的实现分为几个步骤,包括:声明并注册元件、创建原生视图、处理样式与属性、事件绑定等。接下来以一个简单的自定义输入框�元件 <explorer-input> 为例,简要介绍自定义元件的实现流程。
完整实现参见 LynxExplorer/input 模块查看。通过编译运行 LynxExplorer 示例项目可实时预览自定义元件效果。
#集成 LynxProcessor 模块
在build.gradle文件中添加下面的配置:
kapt project('org.lynxsdk.lynx:lynx-processor:3.4.1')
compileOnly project('org.lynxsdk.lynx:lynx-processor:3.4.1')
annotationProcessor project('org.lynxsdk.lynx:lynx-processor:3.4.1')#声明并注册元件
#声明自定义元件
下面是 <explorer-input> 自定义元件的实现,需要继承自 LynxUI。
import com.lynx.tasm.behavior.LynxContext;
import com.lynx.tasm.behavior.ui.LynxUI;
import androidx.appcompat.widget.AppCompatEditText;


public class LynxExplorerInput extends LynxUI<AppCompatEditText> {

  public LynxExplorerInput(LynxContext context) {
    super(context);
  }
  //...

}
#注册自定义元件
元件注册有两种方式:全局注册和局部注册。
#全局注册
全局注册的元件可以在多个 LynxView 实例中共享。
import com.lynx.tasm.LynxEnv;
import com.lynx.tasm.behavior.Behavior;

LynxEnv.inst().addBehavior(new Behavior("explorer-input"){
      @Override
      public LynxExplorerInput createUI(LynxContext context) {
        return new LynxExplorerInput(context);
      }
    });
#局部注册
局部注册的元件仅适用于当前 LynxView 实例。
LynxViewBuilder lynxViewBuilder = new LynxViewBuilder();
lynxViewBuilder.addBehavior(new Behavior("explorer-input") {
      @Override
      public LynxExplorerInput createUI(LynxContext context) {
        return new LynxExplorerInput(context);
      }
    });
其中,"explorer-input" 对应前端 DSL 的标签名称。当 Lynx Engine 解析到该标签时,会查找已注册的原生元件并创建实例。
#创建原生 View 实例
每个自定义元件都需要实现 createView 方法,该方法返回一个与之对应的原生 View 实例。
以下是 <explorer-input> 元件的实现:
import android.content.Context;
import androidx.appcompat.widget.AppCompatEditText;
import com.lynx.tasm.behavior.LynxContext;
import com.lynx.tasm.behavior.ui.LynxUI;

public class LynxExplorerInput extends LynxUI<AppCompatEditText> {

  public LynxExplorerInput(LynxContext context) {
    super(context);
  }

  @Override
  protected AppCompatEditText createView(Context context) {
    AppCompatEditText view = new AppCompatEditText(context);
    //...
    return view;
  }

}
#处�理前端更新的样式和属性
你可以使用 @LynxProp 注解来监听前端传入的属性变化,并更新原生视图。例如,处理 <explorer-input> 元件的 value 属性:
import android.content.Context;
import androidx.appcompat.widget.AppCompatEditText;
import com.lynx.tasm.behavior.LynxContext;
import com.lynx.tasm.behavior.LynxProp;
import com.lynx.tasm.behavior.ui.LynxUI;

public class LynxExplorerInput extends LynxUI<AppCompatEditText> {

  public LynxExplorerInput(LynxContext context) {
    super(context);
  }

  @LynxProp(name = "value")
  public void setValue(String value) {
    if (!value.equals(mView.getText().toString())) {
      mView.setText(value);
    }
  }

  @Override
  protected AppCompatEditText createView(Context context) {
    AppCompatEditText view = new AppCompatEditText(context);
    //...
    return view;
  }


}
#处理排版信息(可选)
#处理 Lynx Engine 的排版结果
通常,Lynx Engine 会自动计算并更新 View 的排版信息,无需开发者手动处理。但在某些特殊情况下,例如需要对 View 进行额外调整时,
可以在 onLayoutUpdated 回调中获取最新的排版信息,并应用自定义逻辑。
import android.content.Context;
import androidx.appcompat.widget.AppCompatEditText;
import com.lynx.tasm.behavior.LynxContext;
import com.lynx.tasm.behavior.LynxProp;
import com.lynx.tasm.behavior.ui.LynxUI;

public class LynxExplorerInput extends LynxUI<AppCompatEditText> {

  public LynxExplorerInput(LynxContext context) {
    super(context);
  }

  @Override
  public void onLayoutUpdated() {
    super.onLayoutUpdated();
    int paddingTop = mPaddingTop + mBorderTopWidth;
    int paddingBottom = mPaddingBottom + mBorderBottomWidth;
    int paddingLeft = mPaddingLeft + mBorderLeftWidth;
    int paddingRight = mPaddingRight + mBorderRightWidth;
    mView.setPadding(paddingLeft, paddingTop, paddingRight, paddingBottom);
  }

  @Override
  protected AppCompatEditText createView(Context context) {
    AppCompatEditText view = new AppCompatEditText(context);
    //...
    return view;
  }

  @LynxProp(name = "value")
  public void setValue(String value) {
    if (!value.equals(mView.getText().toString())) {
      mView.setText(value);
    }
  }

}
#处理事件绑定(可选)
在某些场景中,前端可能需要响应自定义元件的事件。例如,当用户在文本框中输入内容时,前端可能需要获取并处理这些输入数据。
以下示例演示了如何实现从 <explorer-input> 元件向前端发送文本输入事件,以及前端如何监听该事件。
#客户端事件发送
客户端通过监听原生视图的文本输入回调,当文本变更时使用 getEventEmitter().sendCustomEvent(detail) 将事件发送到前端,以便前端进行相应的处理。
import android.content.Context;
import android.text.Editable;
import android.text.TextWatcher;
import androidx.appcompat.widget.AppCompatEditText;
import com.lynx.tasm.behavior.LynxContext;
import com.lynx.tasm.behavior.LynxProp;
import com.lynx.tasm.behavior.ui.LynxUI;
import com.lynx.tasm.event.LynxCustomEvent;
import java.util.HashMap;
import java.util.Map;

public class LynxExplorerInput extends LynxUI<AppCompatEditText> {

  private void emitEvent(String name, Map<String, Object> value) {
    LynxCustomEvent detail = new LynxCustomEvent(getSign(), name);
    if (value != null) {
      for (Map.Entry<String, Object> entry : value.entrySet()) {
        detail.addDetail(entry.getKey(), entry.getValue());
      }
    }
    getLynxContext().getEventEmitter().sendCustomEvent(detail);
  }

  @Override
  protected AppCompatEditText createView(Context context) {
    AppCompatEditText view = new AppCompatEditText(context);
    view.addTextChangedListener(new TextWatcher() {
      @Override
      public void afterTextChanged(Editable s) {
        emitEvent("input", new HashMap<String, Object>() {
          {
            put("value", s.toString());
          }
        });
      }

      @Override
      public void beforeTextChanged(CharSequence s, int start, int count, int after) {}

      @Override
      public void onTextChanged(CharSequence s, int start, int before, int count) {
      }
    });
    return view;

  }

  public LynxExplorerInput(LynxContext context) {
    super(context);
  }

  @Override
  public void onLayoutUpdated() {
    super.onLayoutUpdated();
    int paddingTop = mPaddingTop + mBorderTopWidth;
    int paddingBottom = mPaddingBottom + mBorderBottomWidth;
    int paddingLeft = mPaddingLeft + mBorderLeftWidth;
    int paddingRight = mPaddingRight + mBorderRightWidth;
    mView.setPadding(paddingLeft, paddingTop, paddingRight, paddingBottom);
  }

  @LynxProp(name = "value")
  public void setValue(String value) {
    if (!value.equals(mView.getText().toString())) {
      mView.setText(value);
    }
  }

}
#前端 DSL 事件绑定
在前端,需要绑定相应的文本框输入事件。通过以下代码,前端将监听客户端发送的事件,并根据需要处理输入的数据。
const handleInput = (e) => {
  const currentValue = e.detail.value.trim();
  setInputValue(currentValue);
};

<explorer-input
  className="input-box"
  bindinput={handleInput}
  value={inputValue}
/>;注意:前端 DSL 使用
bindxxx进行事件绑定,例如bindinput绑定input事件。
#支持直接操作元件(可选)
在某些情况下,前端可能需要通过命令式 API 直接操作自定义元件,你�可以通过 @LynxUIMethod 让元件支持这些操作。
#前端调用示例
以下代码展示了如何在前端通过 SelectorQuery 调用 focus 方法让 <explorer-input> 元件获取焦点:
lynx
  .createSelectorQuery()
  .select('#input-id')
  .invoke({
    method: 'focus',
    params: {},
    success: function (res) {
      console.log('lynx', 'request focus success');
    },
    fail: function (res) {
      console.log('lynx', 'request focus fail');
    },
  })
.exec();#客户端实现
在客户端,需要使用 @LynxUIMethod 为自定义元件添加 focus 方法,确保它能够正确处理前端的调用,
import android.content.Context;
import android.text.Editable;
import android.text.TextWatcher;
import android.view.inputmethod.InputMethodManager;
import androidx.appcompat.widget.AppCompatEditText;
import com.lynx.react.bridge.Callback;
import com.lynx.react.bridge.ReadableMap;
import com.lynx.tasm.behavior.LynxContext;
import com.lynx.tasm.behavior.LynxProp;
import com.lynx.tasm.behavior.LynxUIMethod;
import com.lynx.tasm.behavior.LynxUIMethodConstants;
import com.lynx.tasm.behavior.ui.LynxUI;
import com.lynx.tasm.event.LynxCustomEvent;

import java.util.HashMap;
import java.util.Map;

public class LynxExplorerInput extends LynxUI<AppCompatEditText> {

  private boolean showSoftInput() {
    InputMethodManager imm = (InputMethodManager) getLynxContext().getSystemService(Context.INPUT_METHOD_SERVICE);
    return imm.showSoftInput(mView,
      InputMethodManager.SHOW_IMPLICIT, null);
  }

  @LynxUIMethod
  public void focus(ReadableMap params, Callback callback) {
    if (mView.requestFocus()) {
      if (showSoftInput()) {
        callback.invoke(LynxUIMethodConstants.SUCCESS);
      } else {
        callback.invoke(LynxUIMethodConstants.UNKNOWN, "fail to show keyboard");
      }
    } else {
      callback.invoke(LynxUIMethodConstants.UNKNOWN, "fail to focus");
    }
  }


  private void emitEvent(String name, Map<String, Object> value) {
    LynxCustomEvent detail = new LynxCustomEvent(getSign(), name);
    if (value != null) {
      for (Map.Entry<String, Object> entry : value.entrySet()) {
        detail.addDetail(entry.getKey(), entry.getValue());
      }
    }
    getLynxContext().getEventEmitter().sendCustomEvent(detail);
  }

  @Override
  protected AppCompatEditText createView(Context context) {
    AppCompatEditText view = new AppCompatEditText(context);
    view.addTextChangedListener(new TextWatcher() {
      @Override
      public void afterTextChanged(Editable s) {
        emitEvent("input", new HashMap<String, Object>() {
          {
            put("value", s.toString());
          }
        });
      }

      @Override
      public void beforeTextChanged(CharSequence s, int start, int count, int after) {
      }

      @Override
      public void onTextChanged(CharSequence s, int start, int before, int count) {
      }
    });
    return view;

  }

  public LynxExplorerInput(LynxContext context) {
    super(context);
  }

  @Override
  public void onLayoutUpdated() {
    super.onLayoutUpdated();
    int paddingTop = mPaddingTop + mBorderTopWidth;
    int paddingBottom = mPaddingBottom + mBorderBottomWidth;
    int paddingLeft = mPaddingLeft + mBorderLeftWidth;
    int paddingRight = mPaddingRight + mBorderRightWidth;
    mView.setPadding(paddingLeft, paddingTop, paddingRight, paddingBottom);
  }

  @LynxProp(name = "value")
  public void setValue(String value) {
    if (!value.equals(mView.getText().toString())) {
      mView.setText(value);
    }
  }

}
#方法回调返回值
在实现 focus 方法时,元件开发者需要向前端返回一个状态码,以表明操作是否成功。例如,前端调用可能会失败,此时应返回相应的错误状态,以便前端在 fail 回调进行处理。
Lynx Engine 预定义了一些常见的错误码,元件开发者可以在方法回调中返回相应的状态码:
enum LynxUIMethodErrorCode {
  kUIMethodSuccess, // 调用成功
  kUIMethodUnknown, // 未知错误
  kUIMethodNodeNotFound, // 无法找到对应的元件
  kUIMethodMethodNotFound, // 该元件上没有对应的 Method
  kUIMethodParamInvalid, // 方法参数无效
  kUIMethodSelectorNotSupported, // 该选择器暂时不支持
}
自定义元件的实现分为几个步骤,包括:声明并注册元件、创建原生视图、处理样式与属性、事件绑定等。接下来以一个简单的自定义输入框元件 <explorer-input> 为例,简要介绍自定义元件的实现流程。
完整实现参见 LynxExplorer/input 模块查看。通过编译运行 LynxExplorer 示例项目可实时预览自定义元件效果。
#声明并注册元件
#声明自定义元件
下面是 <explorer-input> 自定义元件的实现,需要继承自 UIBase。
import { UIBase, EventHandlerArray, LynxUIMethodConstants } from '@lynx/lynx';

@ComponentV2
struct InputView {
  build() {
    Stack() {
      TextInput({})
    }
    .width('100%')
    .height('100%')
  }
}

@Builder
export function buildInput(ui: UIBase) {
  if (ui as LynxExplorerInput) {
    InputView();
  }
}

export class LynxExplorerInput extends UIBase {
  readonly builder: WrappedBuilder<[UIBase]> = wrapBuilder<[UIBase]>(buildInput);
}#注册自定义元件
元件注册有两种方式:全局注册和局部注册。
#全局注册
全局注册的元件可以在多个 LynxView 实例中共享。
import { BUILTIN_BEHAVIORS } from '@lynx/lynx';

export class CustomElement {
  private static initialized = false;

  static initialize() {
    if (CustomElement.initialized) {
      return;
    }
    BUILTIN_BEHAVIORS.set(
      'explorer-input',
      new Behavior(LynxExplorerInput, undefined),
    );
    CustomElement.initialized = true;
  }
}

export default class EntryAbility extends UIAbility {
  onCreate(want: Want, launchParam: AbilityConstant.LaunchParam) {
    CustomElement.initialize();
  }
}#局部注册
局部注册的元件仅适用于当前 LynxView 实例。组件名和对应的组件实例通过 BehaviorRegistryMap 关联。Behavior 定义了具体的组件的实现信息 ,包括 UI Class 和 ShadowNode Class
export class Behavior {
  uiClass?: Function;
  shadowNodeClass?: Function;
  customData?: Object;
  type?: NodeType;
}
对应的参数说明:
uiClass: 该组件对应的 UI 类,UI 类用来执行绘制相关;
shadowNodeClass: 可选参数,该组件对应的 ShadowNode 类;如果有实现,表示该节点可以给 Lynx 排版引擎提供测量能力(比如 text 节点);
customData: 可选参数,一些自定义数据;
type: 可选参数,指定了这个组件的类型,一般可以不用传,目前定义了以下三种类型:
- COMMON 表示有 UI 节点
- VIRTUAL 表示仅有 ShadowNode,没有 UI
- CUSTOM 表示既有 UI 也有 ShadowNode
import {
  Behavior,
  BehaviorRegistryMap,
} from '@lynx/lynx';
import { LynxExplorerInput } from '../component/LynxExplorerInput';

build() {
  LynxView({
    ...
    behaviors: new Map([['explorer-input', new Behavior(LynxExplorerInput, undefined)]]),
    ...
  }).height('100%')
  ...
}其中,"explorer-input" 对应前端 DSL 的标签名称。当 Lynx Engine 解析到该标签时,会查找已注册的原生元件并创建实例。
#创建原生 Component 实例
每个自定义元件都需要实现 Builder 方法,该方法返回一个与之对应的原生 Component 实例。
以下是 <explorer-input> 元件的实现:
@ObservedV2
class InputParams {
  constructor(ui: LynxExplorerInput) {
    this.ui = ui;
  }

  @Trace inputText: string = '';
  @Trace placeholder: string = '';
  ui: LynxExplorerInput;
}

@ComponentV2
struct InputView {
  @Param @Require inputParams: InputParams;

  build() {
    Stack() {
      TextInput({
        controller: this.inputParams.ui.controller,
        text: this.inputParams.inputText,
        placeholder: this.inputParams.placeholder
      })
      .id(this.inputParams.ui.sign.toString())
      .style(TextContentStyle.DEFAULT)
      .focusable(true)
    }
    .width('100%')
    .height('100%')
  }
}

@Builder
export function buildInput(ui: UIBase) {
  if (ui as LynxExplorerInput) {
    InputView({ inputParams: (ui as LynxExplorerInput).inputParams });
  }
}

export class LynxExplorerInput extends UIBase {
  controller: TextInputController = new TextInputController();
  inputParams: InputParams = new InputParams(this)
  focused: boolean = false;
  readonly builder: WrappedBuilder<[UIBase]> = wrapBuilder<[UIBase]>(buildInput);
}#处理前端更新的样式和属性
你可以通过继承并重写 update(props: Object, events?: EventHandlerArray[]) 来监听前端传入的属性变化,并更新原生视图。例如,处理 <explorer-input> 元件的 value 属性:
export class LynxExplorerInput extends UIBase {
  controller: TextInputController = new TextInputController();
  inputParams: InputParams = new InputParams(this);
  focused: boolean = false;
  readonly builder: WrappedBuilder<[UIBase]> =
    wrapBuilder<[UIBase]>(buildInput);

  static PropSetter: Map<string, Function> = new Map([
    [
      'value',
      (ui: LynxExplorerInput, value: Object) => {
        ui.updateInputTextIfNecessary(value, true);
      },
    ],
    [
      'placeholder',
      (ui: LynxExplorerInput, value: Object) => {
        ui.inputParams.placeholder = value as string;
      },
    ],
    [
      'text-color',
      (ui: LynxExplorerInput, value: Object) => {
        ui.inputParams.fontColor = value as string;
      },
    ],
  ]);

  update(prop: Record<string, Object>, events?: EventHandlerArray[]): void {
    for (const entry of Object.entries(prop)) {
      LynxExplorerInput.PropSetter.get(entry[0])?.(this, entry[1]);
    }
  }
}#处理排版信息(可选)
#处理 Lynx Engine 的排版结果
通常,Lynx Engine 会自动计算并更新 Component 的排版信息,无需开发者手动处理。但在某些特殊情况下,例如需要对 Component 进行额外调整时,
可以在组件的 layout 中获取最新的排版信息,并应用自定义逻辑。
export class LynxExplorerInput extends UIBase {
  controller: TextInputController = new TextInputController();
  inputParams: InputParams = new InputParams(this)
  focused: boolean = false;
  readonly builder: WrappedBuilder<[UIBase]> = wrapBuilder<[UIBase]>(buildInput);

  update(prop: Record<string, Object>, events?: EventHandlerArray[]): void {
    ...
  }

  layout(x: number, y: number, width: number, height: number, paddingLeft: number,
  paddingTop: number, paddingRight: number, paddingBottom: number, marginLeft: number, marginTop: number,
  marginRight: number, marginBottom: number, sticky?: number[]): void {
   ...
   // 一般来说不用特意处理!
 }
}#自定义 measure(可选)
如果一个组件的大小需要由组件自身决定,那么需要实现一个 ShadowNode 用来提供 Measure 的能力,并返回给Lynx排版引擎。最典型的例子是 text 组件,其大小可由文本内容计算后得出。
注意:只支持给叶子��结点 Component 提供 ShadowNode 能力!!
#声明并实现 ShadowNode
下面是 <LynxExplorerInputShadowNode> 的实现,需要继承自 ShadowNode。
import { ShadowNode, MeasureMode, IContext } from '@lynx/lynx';

export class LynxExplorerInputShadowNode extends ShadowNode {
  constructor(context: IContext) {
    super(context);
    this.setMeasureFunc(this.measure, null);
  }

  measure(width: number, widthMode: number, height: number, heightMode: number): [number, number, number] {
    let res = 0;
    ...
    return [width, res, 0];
  }
}#处理前端更新的样式和属性
通过继承并重写 ShadowNode 的 updateProps(props: Record<string, Object>) 方法,来监听前端传入的属性变化,并更新原生视图。
import { ShadowNode, MeasureMode, IContext } from '@lynx/lynx';

export class LynxExplorerInputShadowNode extends ShadowNode {
  constructor(context: IContext) {
    super(context);
    this.setMeasureFunc(this.measure, null);
  }

  override updateProps(props: Record<string, Object>) {
    // props相关处理
    if (prop['text-maxline'] !== undefined) {
      this.maxLength = prop['max-length'] as number;
    }
    ...
    // 调用super方法
    super.update(props, events);
  }

  measure(width: number, widthMode: number, height: number, heightMode: number): [number, number, number] {
    let res = 0;
    ...
    return [width, res, 0];
  }
}#重写 measure 方法,返回自定义大小
通过继承并重写 ShadowNode 的 measure,计算并返回对应的 size 给排版引擎
import { ShadowNode, MeasureMode, IContext } from '@lynx/lynx';

export class LynxExplorerInputShadowNode extends ShadowNode {
  constructor(context: IContext) {
    super(context);
    this.setMeasureFunc(this.measure, null);
  }

  override updateProps(props: Record<string, Object>) {
    // props相关处理
    if (prop['text-maxline'] !== undefined) {
      this.maxLength = prop['max-length'] as number;
    }
    ...
    // 调用super方法
    super.update(props, events);
  }

  override measure(width: number, widthMode: number, height: number, heightMode: number): [number, number, number] {
    let res = height;
    if (heightMode === MeasureMode.DEFINITE) {
      res = height;
    } else if (heightMode === MeasureMode.AT_MOST) {
      res = Math.min(res, height);
    }
    return [width, res, 0];
  }
}
对应的参数说明:
width: 宽度限制;
widthMode: 宽度约束模式, 类型是 MeasureMode;
height: 高度限制;
heightMode: 高度约束模式, 类型是 MeasureMode;
返回值说明:
返回值是一个数组,需要返回 3 个值:宽度、高度、Baseline(影响 vertical 对齐,默认传0)
#UI 与 ShadowNode 的通信
目前只能把 ShadowNode 的测算结果传递给 UI 去绘制,ShadowNode 实现 setExtraDataFunc(func: () => Object): void,在这里提供了返回给 UI 的 getExtraBundle 方法。
import { ShadowNode, MeasureMode, IContext } from '@lynx/lynx';

export class LynxExplorerInputShadowNode extends ShadowNode {
  constructor(context: IContext) {
    super(context);
    this.setMeasureFunc(this.measure, null);
    this.setExtraDataFunc(this.getExtraBundle);
  }

  getExtraBundle(): Object {
    return "This is from extra bundle"
  }

  override updateProps(props: Record<string, Object>) {
    // props相关处理
    if (prop['text-maxline'] !== undefined) {
      this.maxLength = prop['max-length'] as number;
    }
    ...
    // 调用super方法
    super.update(props, events);
  }

  override measure(width: number, widthMode: number, height: number, heightMode: number): [number, number, number] {
    let res = height;
    if (heightMode === MeasureMode.DEFINITE) {
      res = height;
    } else if (heightMode === MeasureMode.AT_MOST) {
      res = Math.min(res, height);
    }
    return [width, res, 0];
  }
}
对应的 UI 继承并重写 UIBase 的 updateExtraData 方法,则可以在 Layout 流程之后,接收到 ShadowNode 传递的 ExtraBundle。
import { UIBase, EventHandlerArray, LynxUIMethodConstants } from '@lynx/lynx';
...
@Builder
export function buildInput(ui: UIBase) {
  if (ui as LynxExplorerInput) {
    InputView();
  }
}

export class LynxExplorerInput extends UIBase {
  readonly builder: WrappedBuilder<[UIBase]> = wrapBuilder<[UIBase]>(buildInput);

override updateExtraData(data: Object): void {
...
}
}
#处理事件绑定(可选)
在某些场景中,前端可能需要响应自定义元件的事件。例如,当用户在文本框中输入内容时,前端可能需要获取并处理这些输入数据。
以下示例演示了如何实现从 <explorer-input> 元件向前端发送文本输入事件,以及前端如何监听该事件。
#客户端事件发送
客户端通过监听原生视图的文本输入回调,当文本变更时使用 UIBase 的 sendCustomEvent(name: string, params: Object, paramName?: string) 将事件发送到前端,以便前端进行相应的处理。
@ComponentV2
struct InputView {
  @Param @Require inputParams: InputParams;

  build() {
    Stack() {
      TextInput({
        controller: this.inputParams.ui.controller,
        text: this.inputParams.inputText,
        placeholder: this.inputParams.placeholder
      })
      .id(this.inputParams.ui.sign.toString())
      .style(TextContentStyle.DEFAULT)
      .focusable(true)
      .onChange((value: string) => {
        // update input text
        this.inputParams.inputText = value;
        this.inputParams.ui.sendCustomEvent('input', {
          value: value,
          cursor: this.inputParams.ui.controller.getCaretOffset()
            .index,
          compositing: false
        } as InputEvent, 'detail');
      })
    }
    .width('100%')
    .height('100%')
  }
}

export class LynxExplorerInput extends UIBase {
  controller: TextInputController = new TextInputController();
  inputParams: InputParams = new InputParams(this)
  focused: boolean = false;
  readonly builder: WrappedBuilder<[UIBase]> = wrapBuilder<[UIBase]>(buildInput);

  update(prop: Record<string, Object>, events?: EventHandlerArray[]): void {
    ...
  }

  layout(x: number, y: number, width: number, height: number, paddingLeft: number,
    paddingTop: number, paddingRight: number, paddingBottom: number, marginLeft: number, marginTop: number,
    marginRight: number, marginBottom: number, sticky?: number[]): void {
   ...
 }
}
#前端 DSL 事件绑定
在前端,需要绑定相应的文本框输入事件。通过以下代码,前端将监听客户端发送的事件,并根据需要处理输入的数据。
const handleInput = (e) => {
  const currentValue = e.detail.value.trim();
  setInputValue(currentValue);
};

<explorer-input
  className="input-box"
  bindinput={handleInput}
  value={inputValue}
/>;注意:前端 DSL 使用
bindxxx进行事件绑定,例如bindinput绑定input事件。
#支持直接操作元件(可选)
在某些情况下,前端可能需要通过命令式 API 直接操作自定义元件,你可以通过 LYNX_UI_METHOD 让元件支持这些操作。
#前端调用示例
以下代码展示了如何在前端通过 SelectorQuery 调用 focus 方法让 <explorer-input> 元件获取焦点:
lynx
  .createSelectorQuery()
  .select('#input-id')
  .invoke({
    method: 'focus',
    params: {},
    success: function (res) {
      console.log('lynx', 'request focus success');
    },
    fail: function (res : {code: number, data: any}) {
      console.log('lynx', 'request focus fail');
    },
  })
.exec();#客户端实现
在客户端,需要重写 UIBase 的 invokeMethod 为自定义元件添加 focus 方法,确保它能够正确处理前端的调用。
export class LynxExplorerInput extends UIBase {
  controller: TextInputController = new TextInputController();
  inputParams: InputParams = new InputParams(this);
  focused: boolean = false;
  readonly builder: WrappedBuilder<[UIBase]> =
    wrapBuilder<[UIBase]>(buildInput);

  focus(callback: (code: number, res: Object) => void) {
    focusControl.requestFocus(this.sign.toString());
    this.focused = true;
    this.setFocusedUI();
    callback(LynxUIMethodConstants.SUCCESS, new Object());
  }

  override invokeMethod(
    method: string,
    params: Object,
    callback: (code: number, res: Object) => void,
  ): boolean {
    switch (method) {
      case 'focus':
        this.focus(callback);
        break;
      default:
        return false;
    }
    return true;
  }
}#方法回调返回值
在实现 focus 方法时,元件开发者需要向前端返回一个状态码,以表明操作是否成功。例如,前端调用可能会失败,此时应返回相应的错误状态,以便前端在 fail 回调进行处理。
Lynx Engine 预定义了一些常见的错误码,元件开发者可以在方法回调中返回相应的状态码:
enum LynxUIMethodErrorCode {
  kUIMethodSuccess = 0, // 调用成功
  kUIMethodUnknown, // 未知错误
  kUIMethodNodeNotFound, // 无法找到对应的元件
  kUIMethodMethodNotFound, // 该元件上没有对应的 Method
  kUIMethodParamInvalid, // 方法参数无效
  kUIMethodSelectorNotSupported, // 该选择器暂时不支持
}
自定义 web 中元件的方式可以直接参考 Web Components
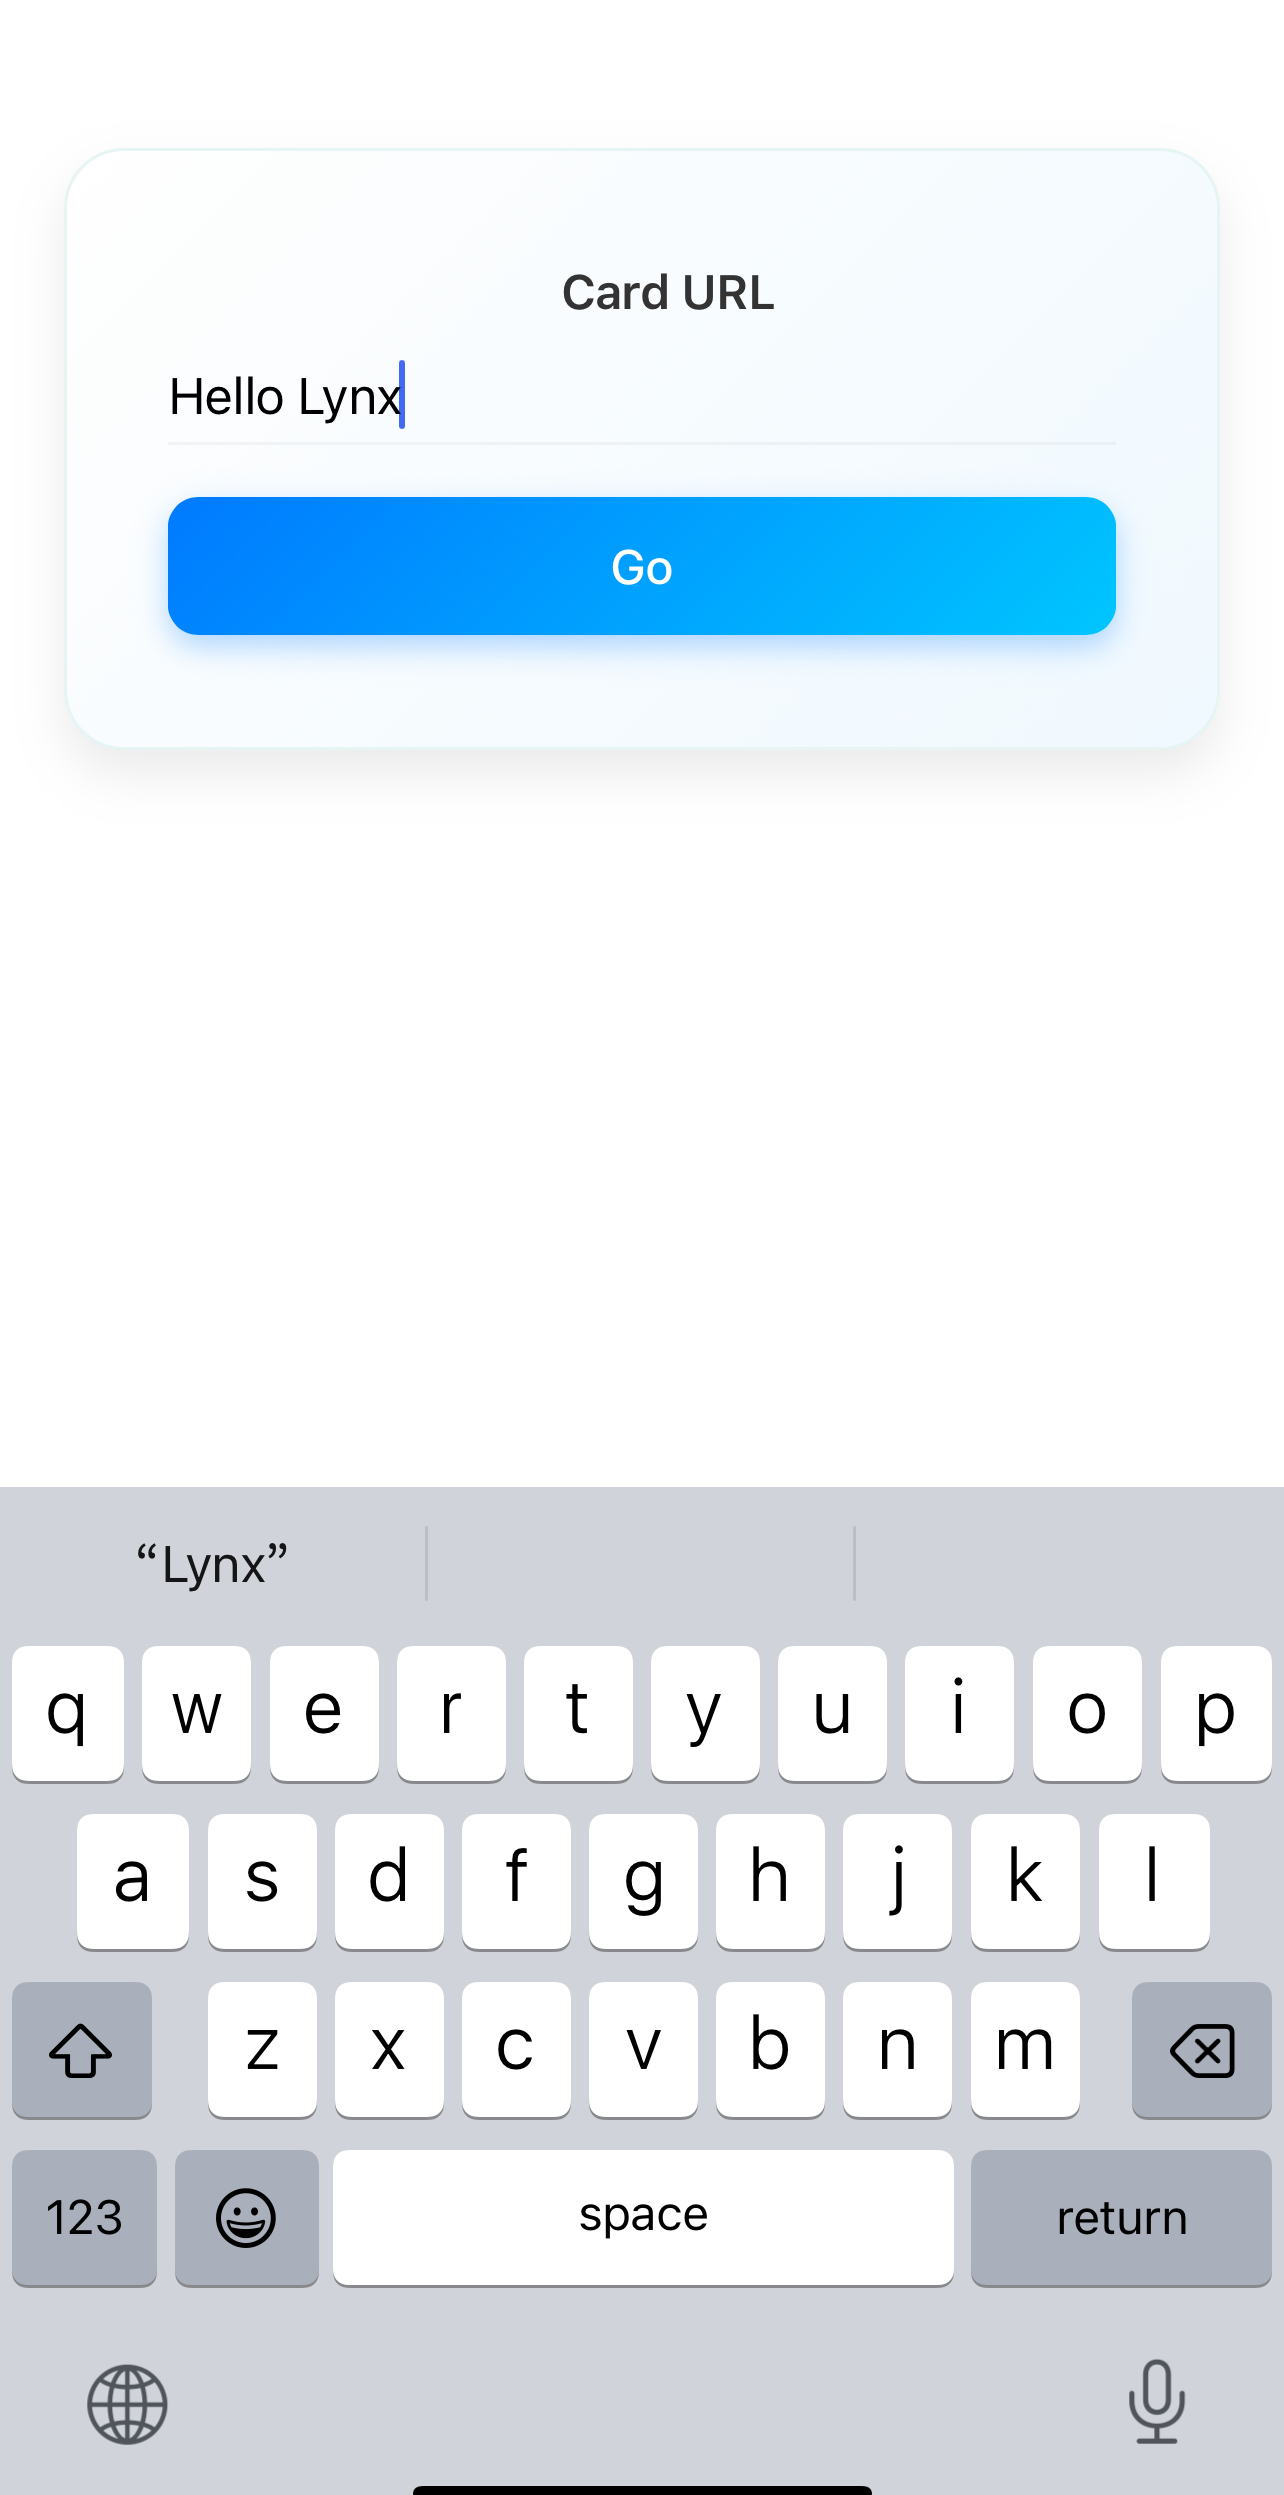
#使用你的自定义元件
一旦你完成了自定义元件的开发,你可以像使用内置元件一样使用它。下面是一个 <explorer-input> 元件的简单使用示例: