#Custom Element
If the built-in elements do not meet your requirements, you can extend Lynx's capabilities by creating custom native elements. This section will guide you through creating and registering custom elements on Android, iOS and HarmonyOS platforms.
#Building your Native Code
The implementation of custom native elements can be broken down into several steps, including: declaring and registering elements, creating native views, handling styles and properties, event binding, etc. Let's take a simple custom input element <explorer-input> as an example to briefly introduce the implementation process of custom elements.
The complete implementation can be found in the LynxExplorer/input module. You can compile and run the LynxExplorer sample project to preview element behavior in real-time.
#Declare and Register Elements
#Declare Custom Elements
A declared custom element needs to inherit from LynxUI. Below is the implementation of the <explorer-input> element:
#import <Lynx/LynxUI.h>

NS_ASSUME_NONNULL_BEGIN

@interface LynxTextField : UITextField

@property(nonatomic, assign) UIEdgeInsets padding;

@end

@interface LynxExplorerInput : LynxUI <LynxTextField *> <UITextFieldDelegate>

@end

NS_ASSUME_NONNULL_END
#import "LynxExplorerInput.h"

@implementation LynxExplorerInput

//...

@end


@implementation LynxTextField

- (UIEditingInteractionConfiguration)editingInteractionConfiguration API_AVAILABLE(ios(13.0)) {
  return UIEditingInteractionConfigurationNone;
}

- (void)setPadding:(UIEdgeInsets)padding {
  _padding = padding;
  [self setNeedsLayout];
}

- (CGRect)textRectForBounds:(CGRect)bounds {
  CGFloat x = self.padding.left;
  CGFloat y = self.padding.top;
  CGFloat width = bounds.size.width - self.padding.left - self.padding.right;
  CGFloat height = bounds.size.height - self.padding.top - self.padding.bottom;

  return CGRectMake(x, y, width, height);
}

- (CGRect)editingRectForBounds:(CGRect)bounds {
  return [self textRectForBounds:bounds];
}
@end#Register Custom Element
Elements can be registered in two ways: globally and locally.
#Global Registration
Globally registered elements can be shared across multiple LynxView instances.
#import "LynxExplorerInput.h"
#import <Lynx/LynxComponentRegistry.h>

@implementation LynxExplorerInput

LYNX_LAZY_REGISTER_UI("explorer-input")

@end


@implementation LynxTextField

- (UIEditingInteractionConfiguration)editingInteractionConfiguration API_AVAILABLE(ios(13.0)) {
  return UIEditingInteractionConfigurationNone;
}

- (void)setPadding:(UIEdgeInsets)padding {
  _padding = padding;
  [self setNeedsLayout];
}

- (CGRect)textRectForBounds:(CGRect)bounds {
  CGFloat x = self.padding.left;
  CGFloat y = self.padding.top;
  CGFloat width = bounds.size.width - self.padding.left - self.padding.right;
  CGFloat height = bounds.size.height - self.padding.top - self.padding.bottom;

  return CGRectMake(x, y, width, height);
}

- (CGRect)editingRectForBounds:(CGRect)bounds {
  return [self textRectForBounds:bounds];
}
@end#Local Registration
Locally registered elements are only applicable to the current LynxView instance.
#import <Lynx/LynxEnv.h>
#import <Lynx/LynxView.h>

  LynxView *lynxView = [[LynxView alloc] initWithBuilderBlock:^(LynxViewBuilder *builder) {
    builder.config =
        [[LynxConfig alloc] initWithProvider:[LynxEnv sharedInstance].config.templateProvider];
    [builder.config registerUI:[LynxExplorerInput class] withName:@"explorer-input"];
  }];
Where "explorer-input" corresponds to the tag name in the front-end DSL. When Lynx Engine parses this tag, it will look for the registered native element and create an instance.
#Create Native View Instance
Each custom element needs to implement the createView method, which returns a corresponding native View instance.
Here is the implementation for the <explorer-input> element:
#import "LynxExplorerInput.h"
#import <Lynx/LynxComponentRegistry.h>

@implementation LynxExplorerInput

LYNX_LAZY_REGISTER_UI("explorer-input")

- (UITextField *)createView {
  UITextField *textField = [[LynxTextField alloc] init];
  //...
  textField.delegate = self;
  return textField;
}

@end

@implementation LynxTextField

- (UIEditingInteractionConfiguration)editingInteractionConfiguration API_AVAILABLE(ios(13.0)) {
  return UIEditingInteractionConfigurationNone;
}

- (void)setPadding:(UIEdgeInsets)padding {
  _padding = padding;
  [self setNeedsLayout];
}

- (CGRect)textRectForBounds:(CGRect)bounds {
  CGFloat x = self.padding.left;
  CGFloat y = self.padding.top;
  CGFloat width = bounds.size.width - self.padding.left - self.padding.right;
  CGFloat height = bounds.size.height - self.padding.top - self.padding.bottom;

  return CGRectMake(x, y, width, height);
}

- (CGRect)editingRectForBounds:(CGRect)bounds {
  return [self textRectForBounds:bounds];
}
@end#Handle Front-End Style and Property Updates
You can use the LYNX_PROP_SETTER macro to listen for property changes passed from the front end and update the native view. For example, handling the value property of the <explorer-input> element:
#import "LynxExplorerInput.h"
#import <Lynx/LynxComponentRegistry.h>
#import <Lynx/LynxPropsProcessor.h>

@implementation LynxExplorerInput

LYNX_LAZY_REGISTER_UI("explorer-input")

LYNX_PROP_SETTER("value", setValue, NSString *) {
    self.view.text = value;
}

- (UITextField *)createView {
  UITextField *textField = [[LynxTextField alloc] init];
  //...
  textField.delegate = self;
  return textField;
}

@end

@implementation LynxTextField

- (UIEditingInteractionConfiguration)editingInteractionConfiguration API_AVAILABLE(ios(13.0)) {
  return UIEditingInteractionConfigurationNone;
}

- (void)setPadding:(UIEdgeInsets)padding {
  _padding = padding;
  [self setNeedsLayout];
}

- (CGRect)textRectForBounds:(CGRect)bounds {
  CGFloat x = self.padding.left;
  CGFloat y = self.padding.top;
  CGFloat width = bounds.size.width - self.padding.left - self.padding.right;
  CGFloat height = bounds.size.height - self.padding.top - self.padding.bottom;

  return CGRectMake(x, y, width, height);
}

- (CGRect)editingRectForBounds:(CGRect)bounds {
  return [self textRectForBounds:bounds];
}
@end#Handle Layout Information (Optional)
#Handle Lynx Engine Layout Results
Typically, Lynx Engine automatically calculates and updates the View layout information, so developers do not need to manually handle this. However, in some special cases, such as when additional adjustments to the View are required, you can obtain the latest layout information in the layoutDidFinished callback and apply custom logic.
#import "LynxExplorerInput.h"
#import <Lynx/LynxComponentRegistry.h>
#import <Lynx/LynxPropsProcessor.h>

@implementation LynxExplorerInput

LYNX_LAZY_REGISTER_UI("explorer-input")

- (void)layoutDidFinished {
  self.view.padding = self.padding;
  }

LYNX_PROP_SETTER("value", setValue, NSString \*) {
self.view.text = value;
}

- (UITextField *)createView {
  UITextField *textField = [[LynxTextField alloc] init];
  //...
  textField.delegate = self;
  return textField;
  }

@end

@implementation LynxTextField

- (UIEditingInteractionConfiguration)editingInteractionConfiguration API_AVAILABLE(ios(13.0)) {
  return UIEditingInteractionConfigurationNone;
  }

- (void)setPadding:(UIEdgeInsets)padding {
  \_padding = padding;
  [self setNeedsLayout];
  }

- (CGRect)textRectForBounds:(CGRect)bounds {
  CGFloat x = self.padding.left;
  CGFloat y = self.padding.top;
  CGFloat width = bounds.size.width - self.padding.left - self.padding.right;
  CGFloat height = bounds.size.height - self.padding.top - self.padding.bottom;

  return CGRectMake(x, y, width, height);
  }

- (CGRect)editingRectForBounds:(CGRect)bounds {
  return [self textRectForBounds:bounds];
  }
  @end
#Handle Event Binding (Optional)
In some scenarios, the front-end may need to respond to events from custom elements. For example, when the user types in the input box, the front-end might
need to capture and process the input data.
Here is an example of how to send a text input event from the <explorer-input> element to the front-end and how the front-end listens for the event.
#Client-Side Event Sending
The client listens to text input callbacks from the native view, and when the text changes, it uses [self.context.eventEmitter dispatchCustomEvent:eventInfo] to send the event to the front-end for handling.
#import "LynxExplorerInput.h"
#import <Lynx/LynxComponentRegistry.h>
#import <Lynx/LynxPropsProcessor.h>

@implementation LynxExplorerInput

LYNX_LAZY_REGISTER_UI("explorer-input")

- (UITextField *)createView {
  UITextField *textField = [[LynxTextField alloc] init];
  //...
  textField.delegate = self;
  [[NSNotificationCenter defaultCenter] addObserver:self
                                        selector:@selector(textFieldDidChange:)
                                        name:UITextFieldTextDidChangeNotification
                                        object:textField];
  return textField;
}

- (void)emitEvent:(NSString *)name detail:(NSDictionary *)detail {
  LynxCustomEvent *eventInfo = [[LynxDetailEvent alloc] initWithName:name
                                                          targetSign:[self sign]
                                                              detail:detail];
  [self.context.eventEmitter dispatchCustomEvent:eventInfo];
}

- (void)textFieldDidChange:(NSNotification *)notification {
  [self emitEvent:@"input"
           detail:@{
             @"value": [self.view text] ?: @"",
           }];
}

- (void)layoutDidFinished {
    self.view.padding = self.padding;
}

LYNX_PROP_SETTER("value", setValue, NSString *) {
    self.view.text = value;
}

@end

@implementation LynxTextField

- (UIEditingInteractionConfiguration)editingInteractionConfiguration API_AVAILABLE(ios(13.0)) {
  return UIEditingInteractionConfigurationNone;
}

- (void)setPadding:(UIEdgeInsets)padding {
  _padding = padding;
  [self setNeedsLayout];
}

- (CGRect)textRectForBounds:(CGRect)bounds {
  CGFloat x = self.padding.left;
  CGFloat y = self.padding.top;
  CGFloat width = bounds.size.width - self.padding.left - self.padding.right;
  CGFloat height = bounds.size.height - self.padding.top - self.padding.bottom;

  return CGRectMake(x, y, width, height);
}

- (CGRect)editingRectForBounds:(CGRect)bounds {
  return [self textRectForBounds:bounds];
}
@end#Front-End DSL Event Binding
On the front-end, bind the corresponding input event to listen for and handle the text input data sent by the client.
const handleInput = (e) => {
  const currentValue = e.detail.value.trim();
  setInputValue(currentValue);
};

<explorer-input
  className="input-box"
  bindinput={handleInput}
  value={inputValue}
/>;Note: The front-end DSL uses
bindxxxfor event binding, such asbindinputto bind theinputevent.
#Support Direct Element Manipulation (Optional)
In some cases, the front-end may need to directly manipulate custom elements via imperative APIs. You can make elements support such operations with LYNX_UI_METHOD.
#Front-End Call Example
The following code shows how to use SelectorQuery to call the focus method and focus the <explorer-input> element:
lynx
  .createSelectorQuery()
  .select('#input-id')
  .invoke({
    method: 'focus',
    params: {},
    success: function (res) {
      console.log('lynx', 'request focus success');
    },
    fail: function (res) {
      console.log('lynx', 'request focus fail');
    },
  })
.exec();#Client-Side Implementation
On the client side, use LYNX_UI_METHOD to add a focus method to the custom element to handle the front-end call.
#import "LynxExplorerInput.h"
#import <Lynx/LynxComponentRegistry.h>
#import <Lynx/LynxPropsProcessor.h>
#import <Lynx/LynxUIMethodProcessor.h>

@implementation LynxExplorerInput

LYNX_LAZY_REGISTER_UI("explorer-input")

LYNX_UI_METHOD(focus) {
    if ([self.view becomeFirstResponder]) {
        callback(kUIMethodSuccess, nil);
    } else {
        callback(kUIMethodUnknown, @"fail to focus");
    }
}

- (UITextField *)createView {
  UITextField *textField = [[LynxTextField alloc] init];
  //...
  textField.delegate = self;
  [[NSNotificationCenter defaultCenter] addObserver:self
                                        selector:@selector(textFieldDidChange:)
                                        name:UITextFieldTextDidChangeNotification
                                        object:textField];
  return textField;
}

- (void)emitEvent:(NSString *)name detail:(NSDictionary *)detail {
  LynxCustomEvent *eventInfo = [[LynxDetailEvent alloc] initWithName:name
                                                          targetSign:[self sign]
                                                              detail:detail];
  [self.context.eventEmitter dispatchCustomEvent:eventInfo];
}

- (void)textFieldDidChange:(NSNotification *)notification {
  [self emitEvent:@"input"
           detail:@{
             @"value": [self.view text] ?: @"",
           }];
}

- (void)layoutDidFinished {
    self.view.padding = self.padding;
}

LYNX_PROP_SETTER("value", setValue, NSString *) {
    self.view.text = value;
}

@end

@implementation LynxTextField

- (UIEditingInteractionConfiguration)editingInteractionConfiguration API_AVAILABLE(ios(13.0)) {
  return UIEditingInteractionConfigurationNone;
}

- (void)setPadding:(UIEdgeInsets)padding {
  _padding = padding;
  [self setNeedsLayout];
}

- (CGRect)textRectForBounds:(CGRect)bounds {
  CGFloat x = self.padding.left;
  CGFloat y = self.padding.top;
  CGFloat width = bounds.size.width - self.padding.left - self.padding.right;
  CGFloat height = bounds.size.height - self.padding.top - self.padding.bottom;

  return CGRectMake(x, y, width, height);
}

- (CGRect)editingRectForBounds:(CGRect)bounds {
  return [self textRectForBounds:bounds];
}
@end#Method Callback Return Values
When implementing the focus method, component developers need to return a status code to the frontend to indicate whether the operation was successful. For instance, the frontend call might fail, in which case an appropriate error status should be returned so that the frontend can handle it in the fail callback.
Lynx Engine defines several common error codes, and developers can return the appropriate status code in the method callback:
enum LynxUIMethodErrorCode {
  kUIMethodSuccess = 0, // Succeeded
  kUIMethodUnknown, // Unknown error
  kUIMethodNodeNotFound, // Cannot find corresponding element
  kUIMethodMethodNotFound, // No corresponding method on this element
  kUIMethodParamInvalid, // Invalid method parameters
  kUIMethodSelectorNotSupported, // Selector not supported
};#Custom Native element Implementation Process
The implementation of custom native elements involves several steps, including: declaring and registering the element, creating native views, handling styles and properties, event binding, etc. Let's take a simple custom input element <explorer-input> as an example to briefly introduce the implementation process of a custom element. The complete code can be viewed in LynxExplorer.
The complete implementation can be found in the LynxExplorer/input module. You can compile and run the LynxExplorer sample project to preview element behavior in real-time.
#Integrate the LynxProcessor Module
Add the following to your module's build.gradle(.kts) file:
compileOnly project('org.lynxsdk.lynx:lynx-processor:4.0.0')
annotationProcessor project('org.lynxsdk.lynx:lynx-processor:4.0.0')
plugins {
alias(libs.plugins.android.application)
alias(libs.plugins.jetbrains.kotlin.android)
id("kotlin-kapt")
}
//dependency
kapt('org.lynxsdk.lynx:lynx-processor:4.0.0')
implementation("androidx.appcompat:appcompat:1.7.0")#Declaring and Registering the Element
#Declare the Custom Element
The declared custom element needs to inherit from LynxUI.
import com.lynx.tasm.behavior.LynxContext;
import com.lynx.tasm.behavior.ui.LynxUI;
import androidx.appcompat.widget.AppCompatEditText;


public class LynxExplorerInput extends LynxUI<AppCompatEditText> {

  public LynxExplorerInput(LynxContext context) {
    super(context);
  }
  //...

}
import com.lynx.tasm.behavior.LynxContext
import com.lynx.tasm.behavior.ui.LynxUI
import androidx.appcompat.widget.AppCompatEditText


class LynxExplorerInput(context: LynxContext) : LynxUI<AppCompatEditText>(context) {

   //...

}
#Register the Custom Element
There are two ways to register elements: global registration and local registration.
#Global Registration
Globally registered elements can be shared among multiple LynxView instances.
import com.lynx.tasm.LynxEnv;
import com.lynx.tasm.behavior.Behavior;

LynxEnv.inst().addBehavior(new Behavior("explorer-input"){
      @Override
      public LynxExplorerInput createUI(LynxContext context) {
        return new LynxExplorerInput(context);
      }
    });
import com.lynx.tasm.LynxEnv
import com.lynx.tasm.behavior.Behavior

LynxEnv.inst().addBehavior(object : Behavior("explorer-input") {
    override fun createUI(context: LynxContext): LynxExplorerInput {
        return LynxExplorerInput(context)
    }
})
#Local Registration
Locally registered elements are only available for the current LynxView instance.
LynxViewBuilder lynxViewBuilder = new LynxViewBuilder();
lynxViewBuilder.addBehavior(new Behavior("explorer-input") {
      @Override
      public LynxExplorerInput createUI(LynxContext context) {
        return new LynxExplorerInput(context);
      }
    });
    val lynxViewBuilder = LynxViewBuilder()
    lynxViewBuilder.addBehavior(object : Behavior("explorer-input") {
      override fun createUI(context: LynxContext): LynxExplorerInput {
        return LynxExplorerInput(context)
      }
    })
Where explorer-input" corresponds to the tag name in the front-end DSL. When the Lynx Engine encounters this tag, it will look for the registered native element and create an instance.
#Create the Native View Instance
Each custom element needs to implement the createView method, which returns the corresponding native View instance.
Here’s the implementation for the <explorer-input> element:
import android.content.Context;
import androidx.appcompat.widget.AppCompatEditText;
import com.lynx.tasm.behavior.LynxContext;
import com.lynx.tasm.behavior.ui.LynxUI;

public class LynxExplorerInput extends LynxUI<AppCompatEditText> {

  public LynxExplorerInput(LynxContext context) {
    super(context);
  }

  @Override
  protected AppCompatEditText createView(Context context) {
    AppCompatEditText view = new AppCompatEditText(context);
    //...
    return view;
  }

}
import android.content.Context
import androidx.appcompat.widget.AppCompatEditText
import com.lynx.tasm.behavior.LynxContext
import com.lynx.tasm.behavior.ui.LynxUI


class LynxExplorerInput(context: LynxContext) : LynxUI<AppCompatEditText>(context) {

  override fun createView(context: Context): AppCompatEditText {
    return AppCompatEditText(context).apply {
      //...
    }
  }
}
#Handle Front-End Style and Property Updates
You can use the @LynxProp annotation to listen for property changes passed from the front-end and update the native view accordingly. For example, handling the value property of the <explorer-input> element:
import android.content.Context;
import androidx.appcompat.widget.AppCompatEditText;
import com.lynx.tasm.behavior.LynxContext;
import com.lynx.tasm.behavior.LynxProp;
import com.lynx.tasm.behavior.ui.LynxUI;

public class LynxExplorerInput extends LynxUI<AppCompatEditText> {

  public LynxExplorerInput(LynxContext context) {
    super(context);
  }

  @LynxProp(name = "value")
  public void setValue(String value) {
    if (!value.equals(mView.getText().toString())) {
      mView.setText(value);
    }
  }

  @Override
  protected AppCompatEditText createView(Context context) {
    AppCompatEditText view = new AppCompatEditText(context);
    //...
    return view;
  }


}
import android.content.Context
import androidx.appcompat.widget.AppCompatEditText
import com.lynx.tasm.behavior.LynxContext
import com.lynx.tasm.behavior.LynxProp
import com.lynx.tasm.behavior.ui.LynxUI

class LynxExplorerInput(context: LynxContext) : LynxUI<AppCompatEditText>(context) {

  override fun createView(context: Context): AppCompatEditText {
    return AppCompatEditText(context).apply {
      //...
    }
  }

  @LynxProp(name = "value")
  fun setValue(value: String) {
    if (value != mView.text.toString()) {
      mView.setText(value)
    }
  }
}
#Handle Layout Information (Optional)
#Handle the Layout Result from the Lynx Engine
Usually, the Lynx Engine will automatically calculate and update the View layout information, so developers don’t need to handle this manually. However, in some special cases, such as when extra adjustments are needed for the View, you can retrieve the latest layout information in the onLayoutUpdated callback and apply custom logic.
import android.content.Context;
import androidx.appcompat.widget.AppCompatEditText;
import com.lynx.tasm.behavior.LynxContext;
import com.lynx.tasm.behavior.LynxProp;
import com.lynx.tasm.behavior.ui.LynxUI;

public class LynxExplorerInput extends LynxUI<AppCompatEditText> {

  public LynxExplorerInput(LynxContext context) {
    super(context);
  }

  @Override
  public void onLayoutUpdated() {
    super.onLayoutUpdated();
    int paddingTop = mPaddingTop + mBorderTopWidth;
    int paddingBottom = mPaddingBottom + mBorderBottomWidth;
    int paddingLeft = mPaddingLeft + mBorderLeftWidth;
    int paddingRight = mPaddingRight + mBorderRightWidth;
    mView.setPadding(paddingLeft, paddingTop, paddingRight, paddingBottom);
  }

  @Override
  protected AppCompatEditText createView(Context context) {
    AppCompatEditText view = new AppCompatEditText(context);
    //...
    return view;
  }

  @LynxProp(name = "value")
  public void setValue(String value) {
    if (!value.equals(mView.getText().toString())) {
      mView.setText(value);
    }
  }

}
import android.content.Context
import androidx.appcompat.widget.AppCompatEditText
import com.lynx.tasm.behavior.LynxContext
import com.lynx.tasm.behavior.LynxProp
import com.lynx.tasm.behavior.ui.LynxUI


class LynxExplorerInput(context: LynxContext) : LynxUI<AppCompatEditText>(context) {

  override fun onLayoutUpdated() {
    super.onLayoutUpdated()
    val paddingTop = mPaddingTop + mBorderTopWidth
    val paddingBottom = mPaddingBottom + mBorderBottomWidth
    val paddingLeft = mPaddingLeft + mBorderLeftWidth
    val paddingRight = mPaddingRight + mBorderRightWidth
    mView.setPadding(paddingLeft, paddingTop, paddingRight, paddingBottom)
  }

  override fun createView(context: Context): AppCompatEditText {
    return AppCompatEditText(context).apply {
      //...
    }
  }

  @LynxProp(name = "value")
  fun setValue(value: String) {
    if (value != mView.text.toString()) {
      mView.setText(value)
    }
  }
}
#Event Binding
Event handling in native elements is usually done using the @LynxEvent annotation, which binds events between the front-end and native elements. For example, let’s implement a custom onChange event for the <explorer-input> element:
import android.content.Context;
import android.text.Editable;
import android.text.TextWatcher;
import androidx.appcompat.widget.AppCompatEditText;
import com.lynx.tasm.behavior.LynxContext;
import com.lynx.tasm.behavior.LynxProp;
import com.lynx.tasm.behavior.ui.LynxUI;
import com.lynx.tasm.event.LynxCustomEvent;
import java.util.HashMap;
import java.util.Map;

public class LynxExplorerInput extends LynxUI<AppCompatEditText> {

  private void emitEvent(String name, Map<String, Object> value) {
    LynxCustomEvent detail = new LynxCustomEvent(getSign(), name);
    if (value != null) {
      for (Map.Entry<String, Object> entry : value.entrySet()) {
        detail.addDetail(entry.getKey(), entry.getValue());
      }
    }
    getLynxContext().getEventEmitter().sendCustomEvent(detail);
  }

  @Override
  protected AppCompatEditText createView(Context context) {
    AppCompatEditText view = new AppCompatEditText(context);
    view.addTextChangedListener(new TextWatcher() {
      @Override
      public void afterTextChanged(Editable s) {
        emitEvent("input", new HashMap<String, Object>() {
          {
            put("value", s.toString());
          }
        });
      }

      @Override
      public void beforeTextChanged(CharSequence s, int start, int count, int after) {}

      @Override
      public void onTextChanged(CharSequence s, int start, int before, int count) {
      }
    });
    return view;

  }

  public LynxExplorerInput(LynxContext context) {
    super(context);
  }

  @Override
  public void onLayoutUpdated() {
    super.onLayoutUpdated();
    int paddingTop = mPaddingTop + mBorderTopWidth;
    int paddingBottom = mPaddingBottom + mBorderBottomWidth;
    int paddingLeft = mPaddingLeft + mBorderLeftWidth;
    int paddingRight = mPaddingRight + mBorderRightWidth;
    mView.setPadding(paddingLeft, paddingTop, paddingRight, paddingBottom);
  }

  @LynxProp(name = "value")
  public void setValue(String value) {
    if (!value.equals(mView.getText().toString())) {
      mView.setText(value);
    }
  }

}
import android.content.Context
import android.text.Editable
import android.text.TextWatcher
import androidx.appcompat.widget.AppCompatEditText
import com.lynx.tasm.behavior.LynxContext
import com.lynx.tasm.behavior.LynxProp
import com.lynx.tasm.behavior.ui.LynxUI
import com.lynx.tasm.event.LynxCustomEvent


class LynxExplorerInput(context: LynxContext) : LynxUI<AppCompatEditText>(context) {

  override fun createView(context: Context): AppCompatEditText {
    return AppCompatEditText(context).apply {
      addTextChangedListener(object : TextWatcher {
        override fun beforeTextChanged(s: CharSequence?, start: Int, count: Int, after: Int) {}

        override fun onTextChanged(s: CharSequence?, start: Int, before: Int, count: Int) {}

        override fun afterTextChanged(s: Editable?) {
          emitEvent("input", mapOf("value" to (s?.toString() ?: "")))
        }
      })
    }
  }

  private fun emitEvent(name: String, value: Map<String, Any>?) {
    val detail = LynxCustomEvent(sign, name)
    value?.forEach { (key, v) ->
      detail.addDetail(key, v)
    }
    lynxContext.eventEmitter.sendCustomEvent(detail)
  }


  override fun onLayoutUpdated() {
    super.onLayoutUpdated()
    val paddingTop = mPaddingTop + mBorderTopWidth
    val paddingBottom = mPaddingBottom + mBorderBottomWidth
    val paddingLeft = mPaddingLeft + mBorderLeftWidth
    val paddingRight = mPaddingRight + mBorderRightWidth
    mView.setPadding(paddingLeft, paddingTop, paddingRight, paddingBottom)
  }

  @LynxProp(name = "value")
  fun setValue(value: String) {
    if (value != mView.text.toString()) {
      mView.setText(value)
    }
  }
}
#Front-End DSL Event Binding
On the front-end, you need to bind the relevant input events for the text box. With the following code, the front-end will listen for events sent by the client and process the input data as needed.
const handleInput = (e) => {
  const currentValue = e.detail.value.trim();
  setInputValue(currentValue);
};

<explorer-input
  className="input-box"
  bindinput={handleInput}
  value={inputValue}
/>;Note: Front-end DSL uses
bindxxxfor event binding, such asbindinputfor binding theinputevent.
#Supporting Direct Element Manipulation (Optional)
In some cases, the front-end may need to directly manipulate custom elements using imperative APIs. You can enable such operations on elements by using @LynxUIMethod.
#Front-End Example Call
The following code demonstrates how to use the SelectorQuery API to call the focus method and make the <explorer-input> element gain focus:
lynx
  .createSelectorQuery()
  .select('#input-id')
  .invoke({
    method: 'focus',
    params: {},
    success: function (res) {
      console.log('lynx', 'request focus success');
    },
    fail: function (res) {
      console.log('lynx', 'request focus fail');
    },
  })
.exec();#Client-Side Implementation
On the client side, you need to add the focus method to your custom element using @LynxUIMethod, ensuring it can correctly handle the front-end call.
import android.content.Context;
import android.text.Editable;
import android.text.TextWatcher;
import android.view.inputmethod.InputMethodManager;
import androidx.appcompat.widget.AppCompatEditText;
import com.lynx.react.bridge.Callback;
import com.lynx.react.bridge.ReadableMap;
import com.lynx.tasm.behavior.LynxContext;
import com.lynx.tasm.behavior.LynxProp;
import com.lynx.tasm.behavior.LynxUIMethod;
import com.lynx.tasm.behavior.LynxUIMethodConstants;
import com.lynx.tasm.behavior.ui.LynxUI;
import com.lynx.tasm.event.LynxCustomEvent;

import java.util.HashMap;
import java.util.Map;

public class LynxExplorerInput extends LynxUI<AppCompatEditText> {

  private boolean showSoftInput() {
    InputMethodManager imm = (InputMethodManager) getLynxContext().getSystemService(Context.INPUT_METHOD_SERVICE);
    return imm.showSoftInput(mView,
      InputMethodManager.SHOW_IMPLICIT, null);
  }

  @LynxUIMethod
  public void focus(ReadableMap params, Callback callback) {
    if (mView.requestFocus()) {
      if (showSoftInput()) {
        callback.invoke(LynxUIMethodConstants.SUCCESS);
      } else {
        callback.invoke(LynxUIMethodConstants.UNKNOWN, "fail to show keyboard");
      }
    } else {
      callback.invoke(LynxUIMethodConstants.UNKNOWN, "fail to focus");
    }
  }

  private void emitEvent(String name, Map<String, Object> value) {
    LynxCustomEvent detail = new LynxCustomEvent(getSign(), name);
    if (value != null) {
      for (Map.Entry<String, Object> entry : value.entrySet()) {
        detail.addDetail(entry.getKey(), entry.getValue());
      }
    }
    getLynxContext().getEventEmitter().sendCustomEvent(detail);
  }

  @Override
  protected AppCompatEditText createView(Context context) {
    AppCompatEditText view = new AppCompatEditText(context);
    view.addTextChangedListener(new TextWatcher() {
      @Override
      public void afterTextChanged(Editable s) {
        emitEvent("input", new HashMap<String, Object>() {
          {
            put("value", s.toString());
          }
        });
      }

      @Override
      public void beforeTextChanged(CharSequence s, int start, int count, int after) {
      }

      @Override
      public void onTextChanged(CharSequence s, int start, int before, int count) {
      }
    });
    return view;
  }

  public LynxExplorerInput(LynxContext context) {
    super(context);
  }

  @Override
  public void onLayoutUpdated() {
    super.onLayoutUpdated();
    int paddingTop = mPaddingTop + mBorderTopWidth;
    int paddingBottom = mPaddingBottom + mBorderBottomWidth;
    int paddingLeft = mPaddingLeft + mBorderLeftWidth;
    int paddingRight = mPaddingRight + mBorderRightWidth;
    mView.setPadding(paddingLeft, paddingTop, paddingRight, paddingBottom);
  }

  @LynxProp(name = "value")
  public void setValue(String value) {
    if (!value.equals(mView.getText().toString())) {
      mView.setText(value);
    }
  }
}
import android.content.Context
import android.text.Editable
import android.text.TextWatcher
import android.view.inputmethod.InputMethodManager
import androidx.appcompat.widget.AppCompatEditText
import com.lynx.react.bridge.Callback
import com.lynx.react.bridge.ReadableMap
import com.lynx.tasm.behavior.LynxContext
import com.lynx.tasm.behavior.LynxProp
import com.lynx.tasm.behavior.LynxUIMethod
import com.lynx.tasm.behavior.LynxUIMethodConstants
import com.lynx.tasm.behavior.ui.LynxUI
import com.lynx.tasm.event.LynxCustomEvent


class LynxExplorerInput(context: LynxContext) : LynxUI<AppCompatEditText>(context) {

  private fun showSoftInput(): Boolean {
    val imm = lynxContext.getSystemService(Context.INPUT_METHOD_SERVICE) as InputMethodManager
    return imm.showSoftInput(mView, InputMethodManager.SHOW_IMPLICIT, null)
  }

  @LynxUIMethod
  fun focus(params: ReadableMap, callback: Callback) {
    if (mView.requestFocus()) {
      if (showSoftInput()) {
        callback.invoke(LynxUIMethodConstants.SUCCESS)
      } else {
        callback.invoke(LynxUIMethodConstants.UNKNOWN, "fail to show keyboard")
      }
    } else {
      callback.invoke(LynxUIMethodConstants.UNKNOWN, "fail to focus")
    }
  }

  override fun createView(context: Context): AppCompatEditText {
    return AppCompatEditText(context).apply {
      addTextChangedListener(object : TextWatcher {
        override fun beforeTextChanged(s: CharSequence?, start: Int, count: Int, after: Int) {}

        override fun onTextChanged(s: CharSequence?, start: Int, before: Int, count: Int) {}

        override fun afterTextChanged(s: Editable?) {
          emitEvent("input", mapOf("value" to (s?.toString() ?: "")))
        }
      })
    }
  }

  private fun emitEvent(name: String, value: Map<String, Any>?) {
    val detail = LynxCustomEvent(sign, name)
    value?.forEach { (key, v) ->
      detail.addDetail(key, v)
    }
    lynxContext.eventEmitter.sendCustomEvent(detail)
  }

  override fun onLayoutUpdated() {
    super.onLayoutUpdated()
    val paddingTop = mPaddingTop + mBorderTopWidth
    val paddingBottom = mPaddingBottom + mBorderBottomWidth
    val paddingLeft = mPaddingLeft + mBorderLeftWidth
    val paddingRight = mPaddingRight + mBorderRightWidth
    mView.setPadding(paddingLeft, paddingTop, paddingRight, paddingBottom)
  }

  @LynxProp(name = "value")
  fun setValue(value: String) {
    if (value != mView.text.toString()) {
      mView.setText(value)
    }
  }
}
#Method Callback Return Values
When implementing the focus method, component developers need to return a status code to the frontend to indicate whether the operation was successful. For instance, the frontend call might fail, in which case an appropriate error status should be returned so that the frontend can handle it in the fail callback.
Lynx Engine predefines some common error codes, and the element developer can return the appropriate status code in the method callback:
enum LynxUIMethodErrorCode {
  kUIMethodSuccess, // Succeeded
  kUIMethodUnknown, // Unknown error
  kUIMethodNodeNotFound, // Cannot find corresponding element
  kUIMethodMethodNotFound, // No corresponding method on this element
  kUIMethodParamInvalid, // Invalid method parameters
  kUIMethodSelectorNotSupported, // Selector not supported
}
The implementation of custom native elements can be broken down into several steps, including: declaring and registering elements, creating native views, handling styles and properties, event binding, etc. Let's take a simple custom input element <explorer-input> as an example to briefly introduce the implementation process of custom elements.
The complete implementation can be found in the LynxExplorer/input module. You can compile and run the LynxExplorer sample project to preview element behavior in real-time.
#Declare and Register Elements
#Declare Custom Elements
A declared custom element needs to inherit from UIBase. Below is the implementation of the <explorer-input> element:
import { UIBase, EventHandlerArray, LynxUIMethodConstants } from '@lynx/lynx';

@ComponentV2
struct InputView {
  build() {
    Stack() {
      TextInput({})
    }
    .width('100%')
    .height('100%')
  }
}

@Builder
export function buildInput(ui: UIBase) {
  if (ui as LynxExplorerInput) {
    InputView();
  }
}

export class LynxExplorerInput extends UIBase {
  readonly builder: WrappedBuilder<[UIBase]> = wrapBuilder<[UIBase]>(buildInput);
}#Register Custom Element
Elements can be registered in two ways: globally and locally.
#Global Registration
Globally registered elements can be shared across multiple LynxView instances.
import { BUILTIN_BEHAVIORS } from '@lynx/lynx/src/main/ets/tasm/behavior/Behavior';

export class CustomElement {
  private static initialized = false;

  static initialize() {
    if (CustomElement.initialized) {
      return;
    }
    BUILTIN_BEHAVIORS.set(
      'explorer-input',
      new Behavior(LynxExplorerInput, undefined),
    );
    CustomElement.initialized = true;
  }
}

export default class EntryAbility extends UIAbility {
  onCreate(want: Want, launchParam: AbilityConstant.LaunchParam) {
    CustomElement.initialize();
  }
}#Local Registration
Locally registered elements are only applicable to the current LynxView instance. Component names and their component instances are associated through BehaviorRegistryMap. Behavior defines the specific implementation of the component, including UI Class and ShadowNode Class.
export class Behavior {
  uiClass?: Function;
  shadowNodeClass?: Function;
  customData?: Object;
  type?: NodeType;
}
Corresponding parameter description:
uiClass: The UI class corresponding to the component, which is used for rendering-related operations;
shadowNodeClass: Optional parameter, the ShadowNode class corresponding to the component, if implemented, it indicates that this node can provide measurement capabilities to the Lynx layout engine (such as text nodes);
customData: Optional parameter, some custom data;
type: Optional parameter, specifies the type of this component, generally not required. Currently, the following three types are defined:
- COMMON indicates having a UI node
- VIRTUAL indicates having only a ShadowNode without a UI
- CUSTOM indicates having both UI and ShadowNode
import {
  Behavior,
  BehaviorRegistryMap,
} from '@lynx/lynx';
import { LynxExplorerInput } from '../component/LynxExplorerInput';

build() {
  LynxView({
    ...
    behaviors: new Map([['explorer-input', new Behavior(LynxExplorerInput, undefined)]]),
    ...
  }).height('100%')
  ...
}
Where "input" corresponds to the tag name in the front-end DSL. When Lynx Engine parses this tag, it will look for the registered native element and create an instance.
#Create Native Component Instance
Each custom element needs to implement the Builder method, which returns a corresponding native Component instance.
Here is the implementation for the <explorer-input> element:
@ObservedV2
class InputParams {
  constructor(ui: LynxExplorerInput) {
    this.ui = ui;
  }

  @Trace inputText: string = '';
  @Trace placeholder: string = '';
  ui: LynxExplorerInput;
}

@ComponentV2
struct InputView {
  @Param @Require inputParams: InputParams;

  build() {
    Stack() {
      TextInput({
        controller: this.inputParams.ui.controller,
        text: this.inputParams.inputText,
        placeholder: this.inputParams.placeholder
      })
      .id(this.inputParams.ui.sign.toString())
      .style(TextContentStyle.DEFAULT)
      .focusable(true)
    }
    .width('100%')
    .height('100%')
  }
}

@Builder
export function buildInput(ui: UIBase) {
  if (ui as LynxExplorerInput) {
    InputView({ inputParams: (ui as LynxExplorerInput).inputParams });
  }
}

export class LynxExplorerInput extends UIBase {
  controller: TextInputController = new TextInputController();
  inputParams: InputParams = new InputParams(this)
  focused: boolean = false;
  readonly builder: WrappedBuilder<[UIBase]> = wrapBuilder<[UIBase]>(buildInput);
}#Handle Front-End Style and Property Updates
You can inherit and override update(props: Object, events?: EventHandlerArray[]) to listen for property changes passed from the front-end and update the native view. For example, handling the value property of the <explorer-input> element:
export class LynxExplorerInput extends UIBase {
  controller: TextInputController = new TextInputController();
  inputParams: InputParams = new InputParams(this);
  focused: boolean = false;
  readonly builder: WrappedBuilder<[UIBase]> =
    wrapBuilder<[UIBase]>(buildInput);

  static PropSetter: Map<string, Function> = new Map([
    [
      'value',
      (ui: LynxExplorerInput, value: Object) => {
        ui.updateInputTextIfNecessary(value, true);
      },
    ],
    [
      'placeholder',
      (ui: LynxExplorerInput, value: Object) => {
        ui.inputParams.placeholder = value as string;
      },
    ],
    [
      'text-color',
      (ui: LynxExplorerInput, value: Object) => {
        ui.inputParams.fontColor = value as string;
      },
    ],
  ]);

  update(prop: Record<string, Object>, events?: EventHandlerArray[]): void {
    for (const entry of Object.entries(prop)) {
      LynxExplorerInput.PropSetter.get(entry[0])?.(this, entry[1]);
    }
  }
}#Handle Layout Information (Optional)
#Handle Lynx Engine Layout Results
Typically, Lynx Engine automatically calculates and updates the Component layout information, so developers do not need to manually handle this. However, in some special cases, such as when additional adjustments to the Component are required, you can obtain the latest layout information in the layout function and apply custom logic.
export class LynxExplorerInput extends UIBase {
  controller: TextInputController = new TextInputController();
  inputParams: InputParams = new InputParams(this)
  focused: boolean = false;
  readonly builder: WrappedBuilder<[UIBase]> = wrapBuilder<[UIBase]>(buildInput);

  update(prop: Record<string, Object>, events?: EventHandlerArray[]): void {
    ...
  }

  layout(x: number, y: number, width: number, height: number, paddingLeft: number,
  paddingTop: number, paddingRight: number, paddingBottom: number, marginLeft: number, marginTop: number,
  marginRight: number, marginBottom: number, sticky?: number[]): void {
   ...
   // Generally, no special handling is required!
 }
}#Custom measure (Optional)
If a component's size needs to be determined by the component itself, you need to implement a ShadowNode to provide Measure capability and return it to the Lynx layout engine. The most typical example is the text component, whose size can be calculated from the text content.
Note: ShadowNode capabilities are only supported for leaf node Components!!
#Declare and Implement ShadowNode
The following is the implementation of <LynxExplorerInputShadowNode>, which needs to inherit from ShadowNode.
import { ShadowNode, MeasureMode, IContext } from '@lynx/lynx';

export class LynxExplorerInputShadowNode extends ShadowNode {
  constructor(context: IContext) {
    super(context);
    this.setMeasureFunc(this.measure, null);
  }

  measure(width: number, widthMode: number, height: number, heightMode: number): [number, number, number] {
    let res = 0;
    ...
    return [width, res, 0];
  }
}#Handle Front-End Style and Property Updates
You can inherit and override updateProps(props: Record<string, Object>) method of ShadowNode to listen for property changes passed from the front-end and update the native view.
import { ShadowNode, MeasureMode, IContext } from '@lynx/lynx';

export class LynxExplorerInputShadowNode extends ShadowNode {
  constructor(context: IContext) {
    super(context);
    this.setMeasureFunc(this.measure, null);
  }

  override updateProps(props: Record<string, Object>) {
    // Props-related processing
    if (prop['text-maxline'] !== undefined) {
      this.maxLength = prop['max-length'] as number;
    }
    ...
    // Call the super method
    super.update(props, events);
  }

  measure(width: number, widthMode: number, height: number, heightMode: number): [number, number, number] {
    let res = 0;
    ...
    return [width, res, 0];
  }
}#Override the measure method to return a custom size
You can inherit and override measure method of ShadowNode to return a custom size.
import { ShadowNode, MeasureMode, IContext } from '@lynx/lynx';

export class LynxExplorerInputShadowNode extends ShadowNode {
  constructor(context: IContext) {
    super(context);
    this.setMeasureFunc(this.measure, null);
  }

  override updateProps(props: Record<string, Object>) {
    // Props-related processing
    if (prop['text-maxline'] !== undefined) {
      this.maxLength = prop['max-length'] as number;
    }
    ...
    // Call the super method
    super.update(props, events);
  }

  override measure(width: number, widthMode: number, height: number, heightMode: number): [number, number, number] {
    let res = height;
    if (heightMode === MeasureMode.DEFINITE) {
      res = height;
    } else if (heightMode === MeasureMode.AT_MOST) {
      res = Math.min(res, height);
    }
    return [width, res, 0];
  }
}
Parameter descriptions:
width: Width constraint;
widthMode: Width constraint mode, type is MeasureMode;
height: Height constraint;
heightMode: Height constraint mode, type is MeasureMode;
Return Value Description:
The return value is an array that needs to return 3 values: width, height, and Baseline (affects vertical alignment, default is 0)
#Communication between UI and ShadowNode
Currently, only the measurement results of ShadowNode can be passed to UI for rendering. ShadowNode implements setExtraDataFunc(func: () => Object): void, where the getExtraBundle method returned to UI is provided
import { ShadowNode, MeasureMode, IContext } from '@lynx/lynx';

export class LynxExplorerInputShadowNode extends ShadowNode {
  constructor(context: IContext) {
    super(context);
    this.setMeasureFunc(this.measure, null);
    this.setExtraDataFunc(this.getExtraBundle);
  }

  getExtraBundle(): Object {
    return "This is from extra bundle"
  }

  override updateProps(props: Record<string, Object>) {
    // Props-related processing
    if (prop['text-maxline'] !== undefined) {
      this.maxLength = prop['max-length'] as number;
    }
    ...
    // Call the super method
    super.update(props, events);
  }

  override measure(width: number, widthMode: number, height: number, heightMode: number): [number, number, number] {
    let res = height;
    if (heightMode === MeasureMode.DEFINITE) {
      res = height;
    } else if (heightMode === MeasureMode.AT_MOST) {
      res = Math.min(res, height);
    }
    return [width, res, 0];
  }
}
The corresponding UI inherits and overrides the updateExtraData method of UIBase, which allows it to receive the ExtraBundle passed by ShadowNode after the Layout process.
import { UIBase, EventHandlerArray, LynxUIMethodConstants } from '@lynx/lynx';
...
@Builder
export function buildInput(ui: UIBase) {
  if (ui as LynxExplorerInput) {
    InputView();
  }
}

export class LynxExplorerInput extends UIBase {
  readonly builder: WrappedBuilder<[UIBase]> = wrapBuilder<[UIBase]>(buildInput);

override updateExtraData(data: Object): void {
...
}
}
#Handle Event Binding (Optional)
In some scenarios, the front-end may need to respond to events from custom elements. For example, when the user types in the input box, the front-end might need to capture and process the input data.
Here is an example of how to send a text input event from the <explorer-input> element to the front-end and how the front-end listens for the event.
#Client-Side Event Sending
The client listens to text input callbacks from the native view, and when the text changes, it uses sendCustomEvent(name: string, params: Object, paramName?: string) method of UIBase to send the event to the front-end for handling.
@ComponentV2
struct InputView {
  @Param @Require inputParams: InputParams;

  build() {
    Stack() {
      TextInput({
        controller: this.inputParams.ui.controller,
        text: this.inputParams.inputText,
        placeholder: this.inputParams.placeholder
      })
      .id(this.inputParams.ui.sign.toString())
      .style(TextContentStyle.DEFAULT)
      .focusable(true)
      .onChange((value: string) => {
        // update input text
        this.inputParams.inputText = value;
        this.inputParams.ui.sendCustomEvent('input', {
          value: value,
          cursor: this.inputParams.ui.controller.getCaretOffset()
            .index,
          compositing: false
        } as InputEvent, 'detail');
      })
    }
    .width('100%')
    .height('100%')
  }
}

export class LynxExplorerInput extends UIBase {
  controller: TextInputController = new TextInputController();
  inputParams: InputParams = new InputParams(this)
  focused: boolean = false;
  readonly builder: WrappedBuilder<[UIBase]> = wrapBuilder<[UIBase]>(buildInput);

  update(prop: Record<string, Object>, events?: EventHandlerArray[]): void {
    ...
  }

  layout(x: number, y: number, width: number, height: number, paddingLeft: number,
    paddingTop: number, paddingRight: number, paddingBottom: number, marginLeft: number, marginTop: number,
    marginRight: number, marginBottom: number, sticky?: number[]): void {
   ...
 }
}
#Front-End DSL Event Binding
On the front-end, bind the corresponding input event to listen for and handle the text input data sent by the client.
const handleInput = (e) => {
  const currentValue = e.detail.value.trim();
  setInputValue(currentValue);
};

<explorer-input
  className="input-box"
  bindinput={handleInput}
  value={inputValue}
/>;Note: The front-end DSL uses
bindxxxfor event binding, such asbindinputto bind theinputevent.
#Support Direct Element Manipulation (Optional)
In some cases, the front-end may need to directly manipulate custom elements via imperative APIs. You can make elements support such operations with LYNX_UI_METHOD.
#Front-End Call Example
The following code shows how to use SelectorQuery to call the focus method and focus the <explorer-input> element:
lynx
  .createSelectorQuery()
  .select('#input-id')
  .invoke({
    method: 'focus',
    params: {},
    success: function (res) {
      console.log('lynx', 'request focus success');
    },
    fail: function (res : {code: number, data: any}) {
      console.log('lynx', 'request focus fail');
    },
  })
.exec();#Client-Side Implementation
On the client side, you need to override the invokeMethod of UIBase to add a focus method to the custom element to handle front-end call.
export class LynxExplorerInput extends UIBase {
  controller: TextInputController = new TextInputController();
  inputParams: InputParams = new InputParams(this);
  focused: boolean = false;
  readonly builder: WrappedBuilder<[UIBase]> =
    wrapBuilder<[UIBase]>(buildInput);

  focus(callback: (code: number, res: Object) => void) {
    focusControl.requestFocus(this.sign.toString());
    this.focused = true;
    this.setFocusedUI();
    callback(LynxUIMethodConstants.SUCCESS, new Object());
  }

  override invokeMethod(
    method: string,
    params: Object,
    callback: (code: number, res: Object) => void,
  ): boolean {
    switch (method) {
      case 'focus':
        this.focus(callback);
        break;
      default:
        return false;
    }
    return true;
  }
}#Method Callback Return Values
When implementing the focus method, component developers need to return a status code to the frontend to indicate whether the operation was successful. For instance, the frontend call might fail, in which case an appropriate error status should be returned so that the frontend can handle it in the fail callback.
Lynx Engine defines several common error codes, and developers can return the appropriate status code in the method callback:
enum LynxUIMethodErrorCode {
  kUIMethodSuccess = 0, // Succeeded
  kUIMethodUnknown, // Unknown error
  kUIMethodNodeNotFound, // Cannot find corresponding element
  kUIMethodMethodNotFound, // No corresponding method on this element
  kUIMethodParamInvalid, // Invalid method parameters
  kUIMethodSelectorNotSupported, // Selector not supported
};
The way to customize elements in the web can directly refer to Web Components
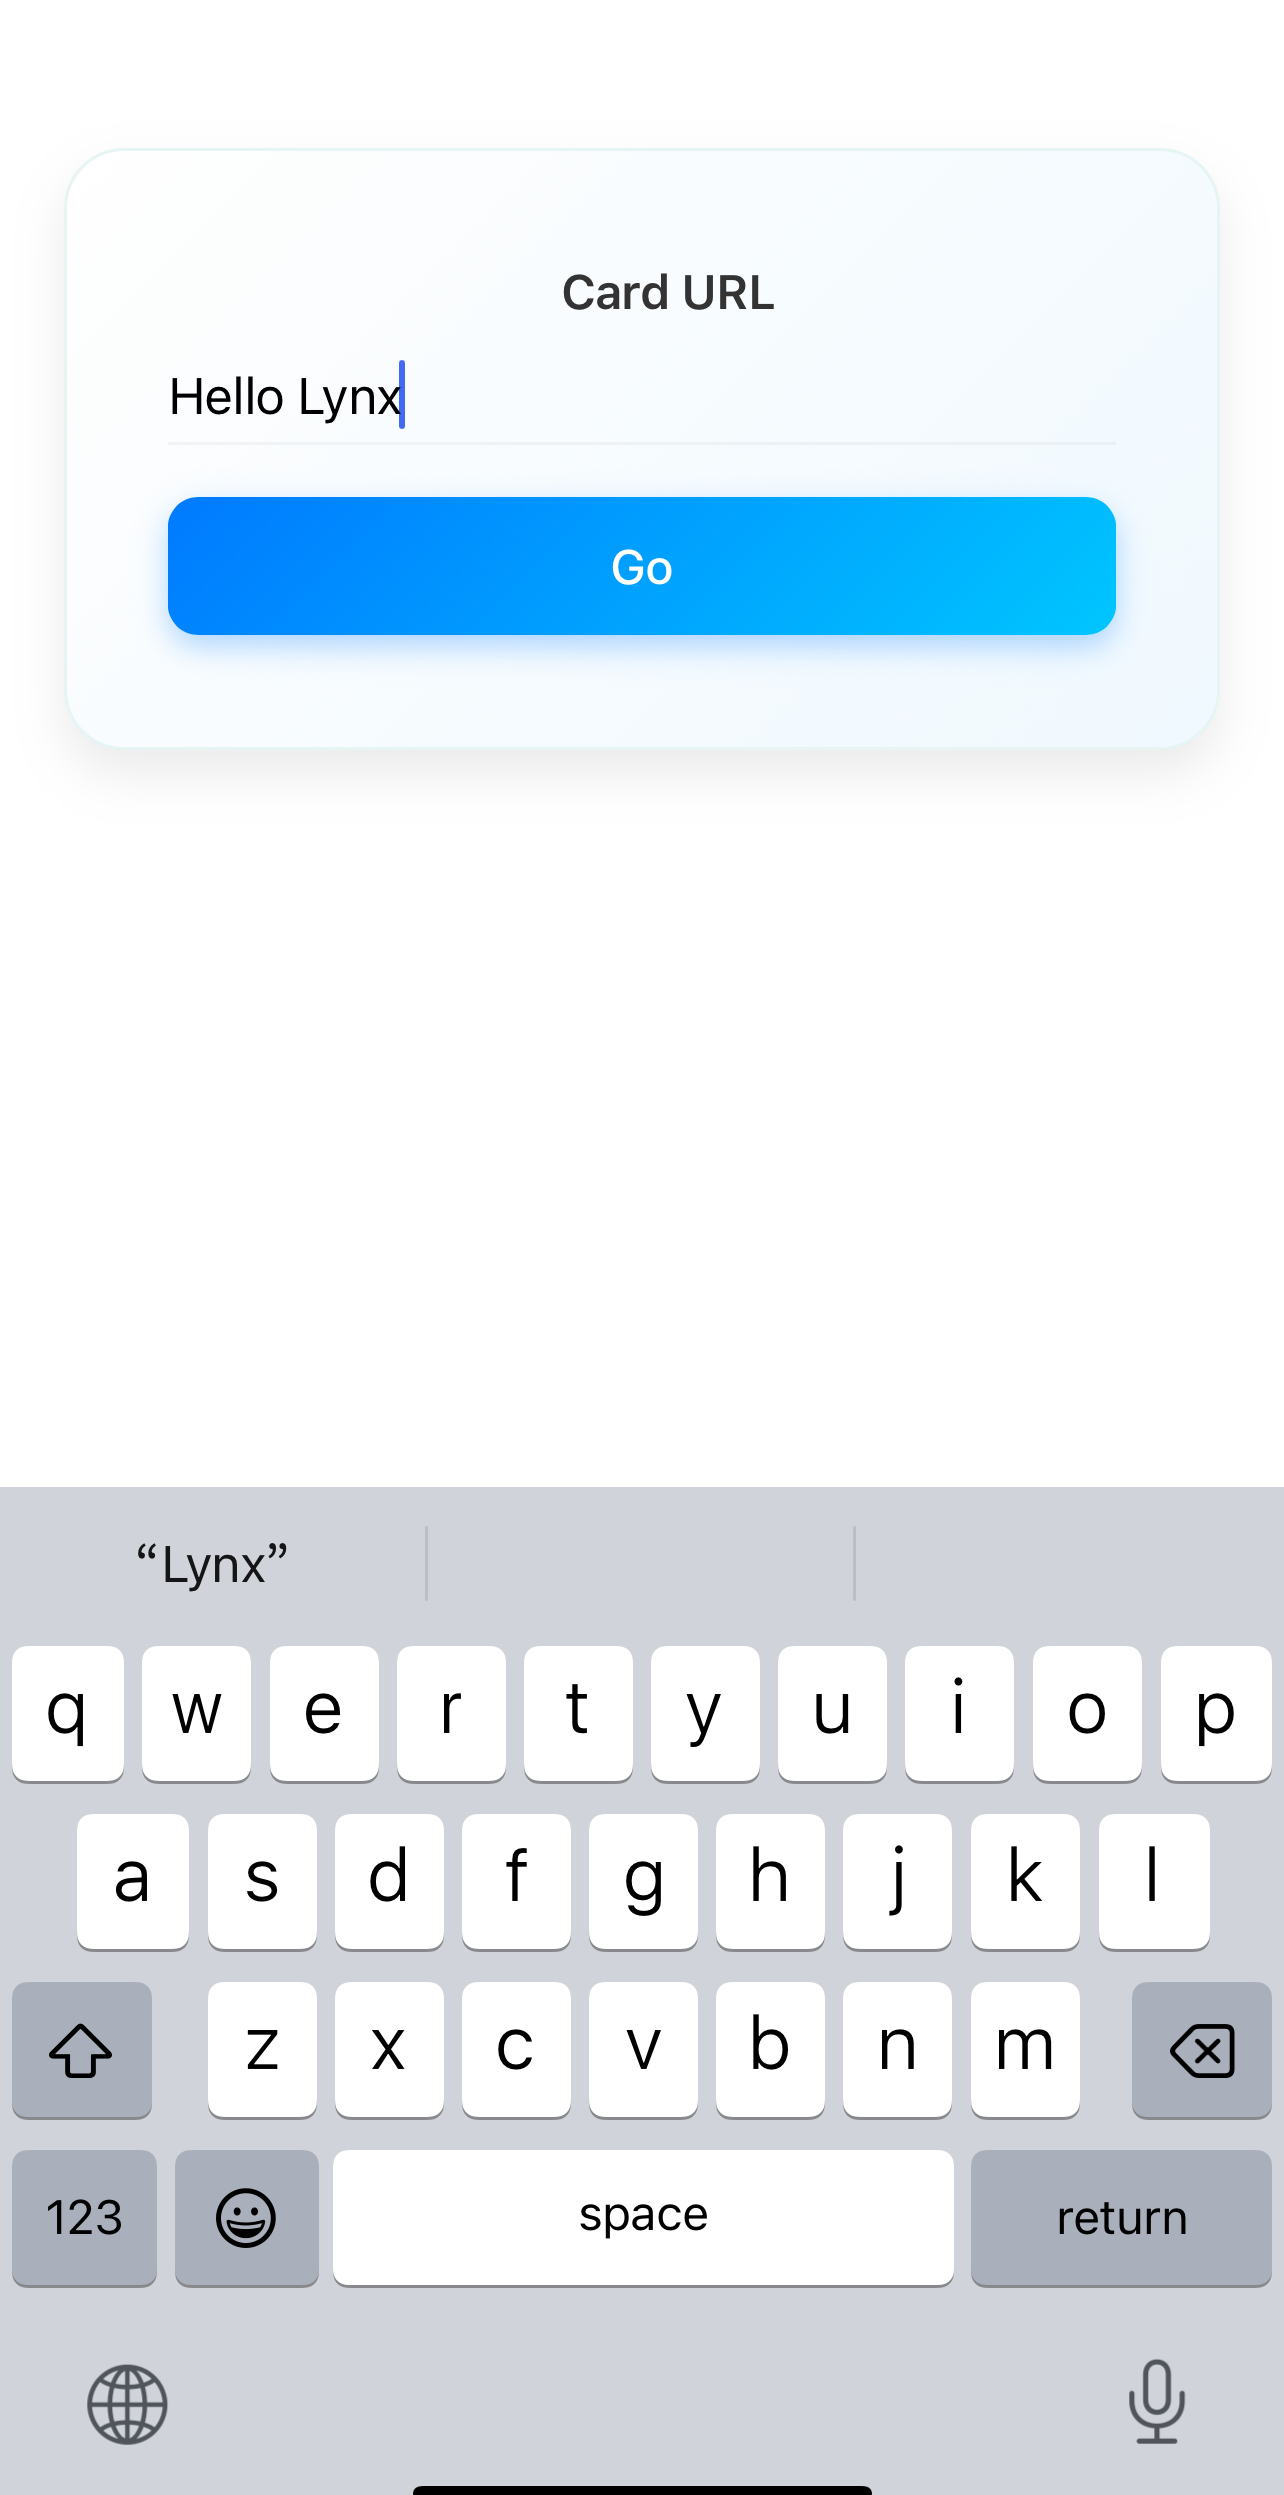
#Use your Native Element
Once you have completed the development of a custom element, you can use it just like a built-in element. Below is a simple example of using an <explorer-input> element: