Typography
Text in Lynx
In Lynx, the text content needs to be written inside the <text> element. This is different from HTML, where text can be directly written inside a <div>. Let's look at a simple example:
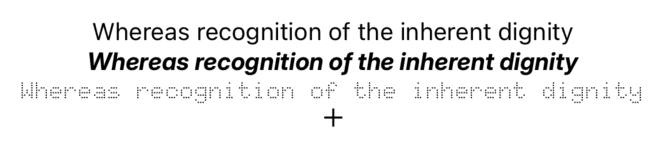
You can add styles to the <text> element to change the text effect. For example, to change the text color:
Similarly, to change the text size and make the text italic:
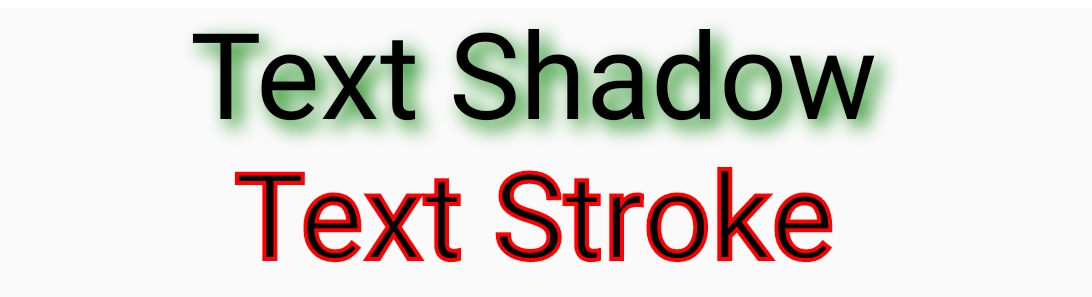
Lynx also supports adding shadows or strokes to the text by setting the text-shadow and text-stroke properties to enrich the display effect:
Mixing Text with Different Styles
In daily text layout, it is often necessary to highlight some parts of the text, such as making keywords bold and changing their color. Suppose we want to make "important word" in the text "This is an important word" bold and red. We can put "important word" into an nested <text> and set the color and font-weight properties.
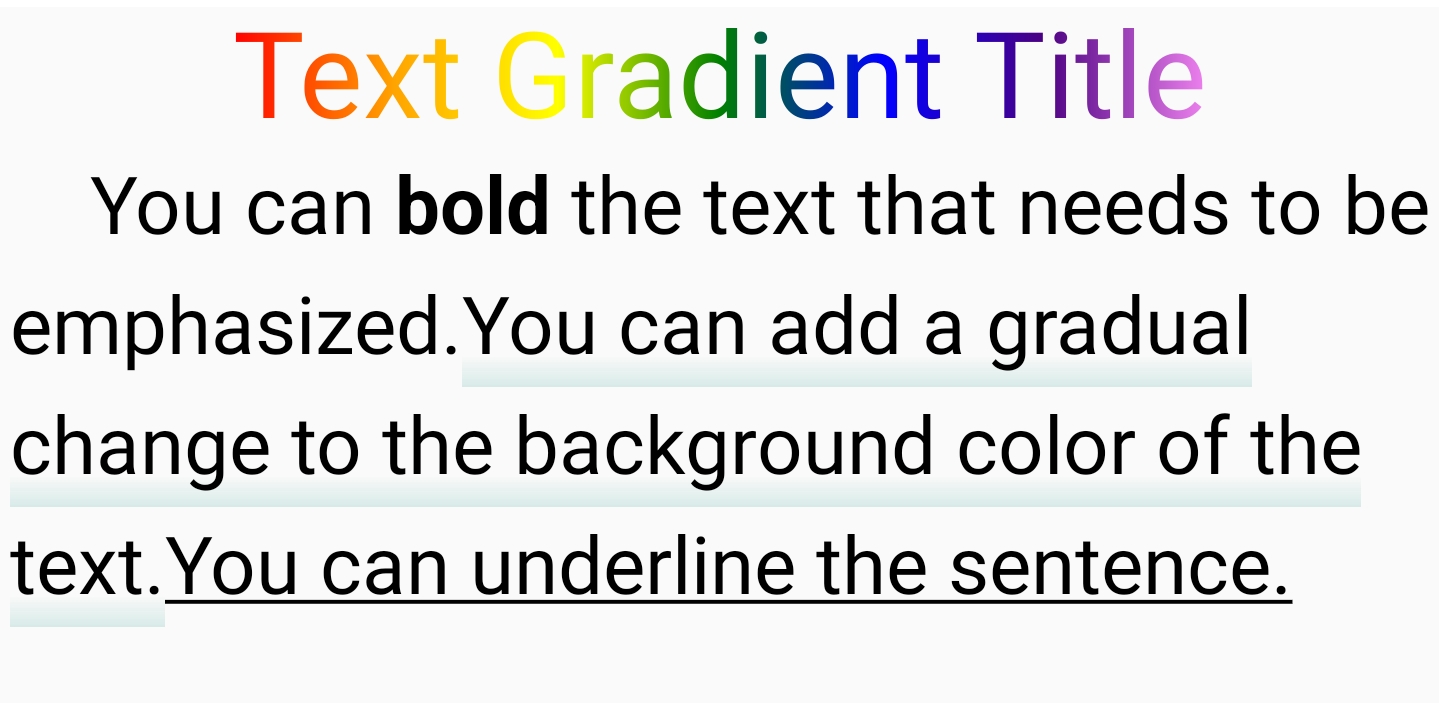
You can use the properties in the CSS text module to control how text is displayed, such as line-breaking, alignment, and whitespace handling, to achieve more diverse text layout effects. For example, use text-indent to control the first-line indentation of text, word-break to control the line-breaking behavior of words, and text-align to control the horizontal alignment of text content.
The following is an example of the comprehensive use of properties. You can also refer to text-related properties.
Implementing Text-Image Mixing Layout
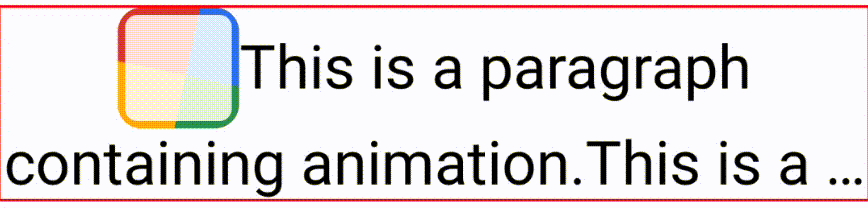
To create more colorful pages, it is often necessary to embed images in text. The following describes how to mix text and images in layout. Take the following figure as an example:
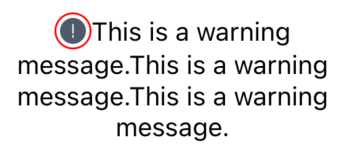
The first step is to use the <text> and <image> elements to build the page structure. They cooperate with each other to construct the basic framework.
The second step is to set the style of the <image> element. The key is to set the width and height to ensure that the image is presented appropriately on the page and is compatible with the text. At the same time, set the text-align property on the <text> element to center the text horizontally.
The third step is to adjust the vertical position of the image within the line. By default, the bottom of the <image> element aligns with the text baseline. You can use the vertical-align property to precisely adjust the vertical position of the <image> element within the line.
In addition to images, you can also nest <view> within the <text> component to create more complex pages.
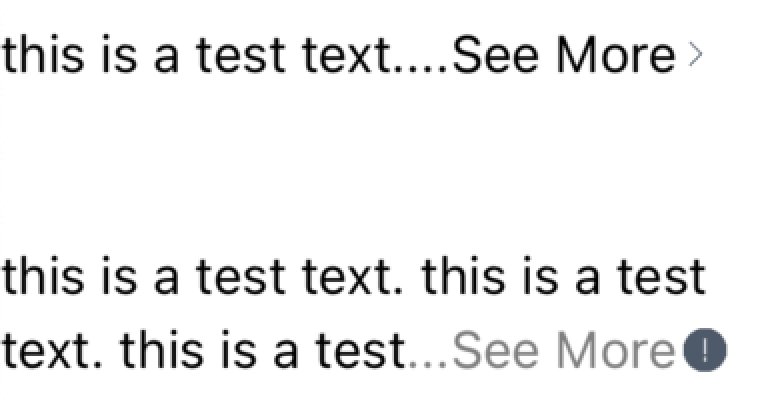
Text Truncation and Ellipsis
When the text content is long and the space is limited, it is necessary to use ellipsis techniques to make the page concise and avoid information clutter. In Lynx, the text-overflow property can be used to add an ellipsis effect at the text truncation point. You can choose ellipsis to automatically add an ellipsis, or use clip to truncate according to the rules.
In specific implementation, first limit the number of lines or height of the <text> element. When the text exceeds the range, the ellipsis effect will be triggered. Then set the text-overflow property to control the presentation method:
Although text-overflow cannot directly specify the content displayed at the truncation point, the <inline-truncation> element provided by Lynx has strong customization capabilities and can display various contents such as images and <view> at the truncation point.
Custom Font Settings
You can directly use @font-face to specify custom font resources (the client needs to support the font resource loader). At the same time, set the corresponding font-family on the <text> element.
In addition, if you need to load a font file in JS, you can refer to the addFont API designed based on Web Font Loading. This module provides the FontFace class and the addFont method on the global object lynx.