#Custom Element
If the built-in elements do not meet your requirements, you can extend Lynx's capabilities by creating custom native elements. This section will guide you through creating and registering custom elements on Android, iOS, HarmonyOS, and Desktops.
#Building your Native Code
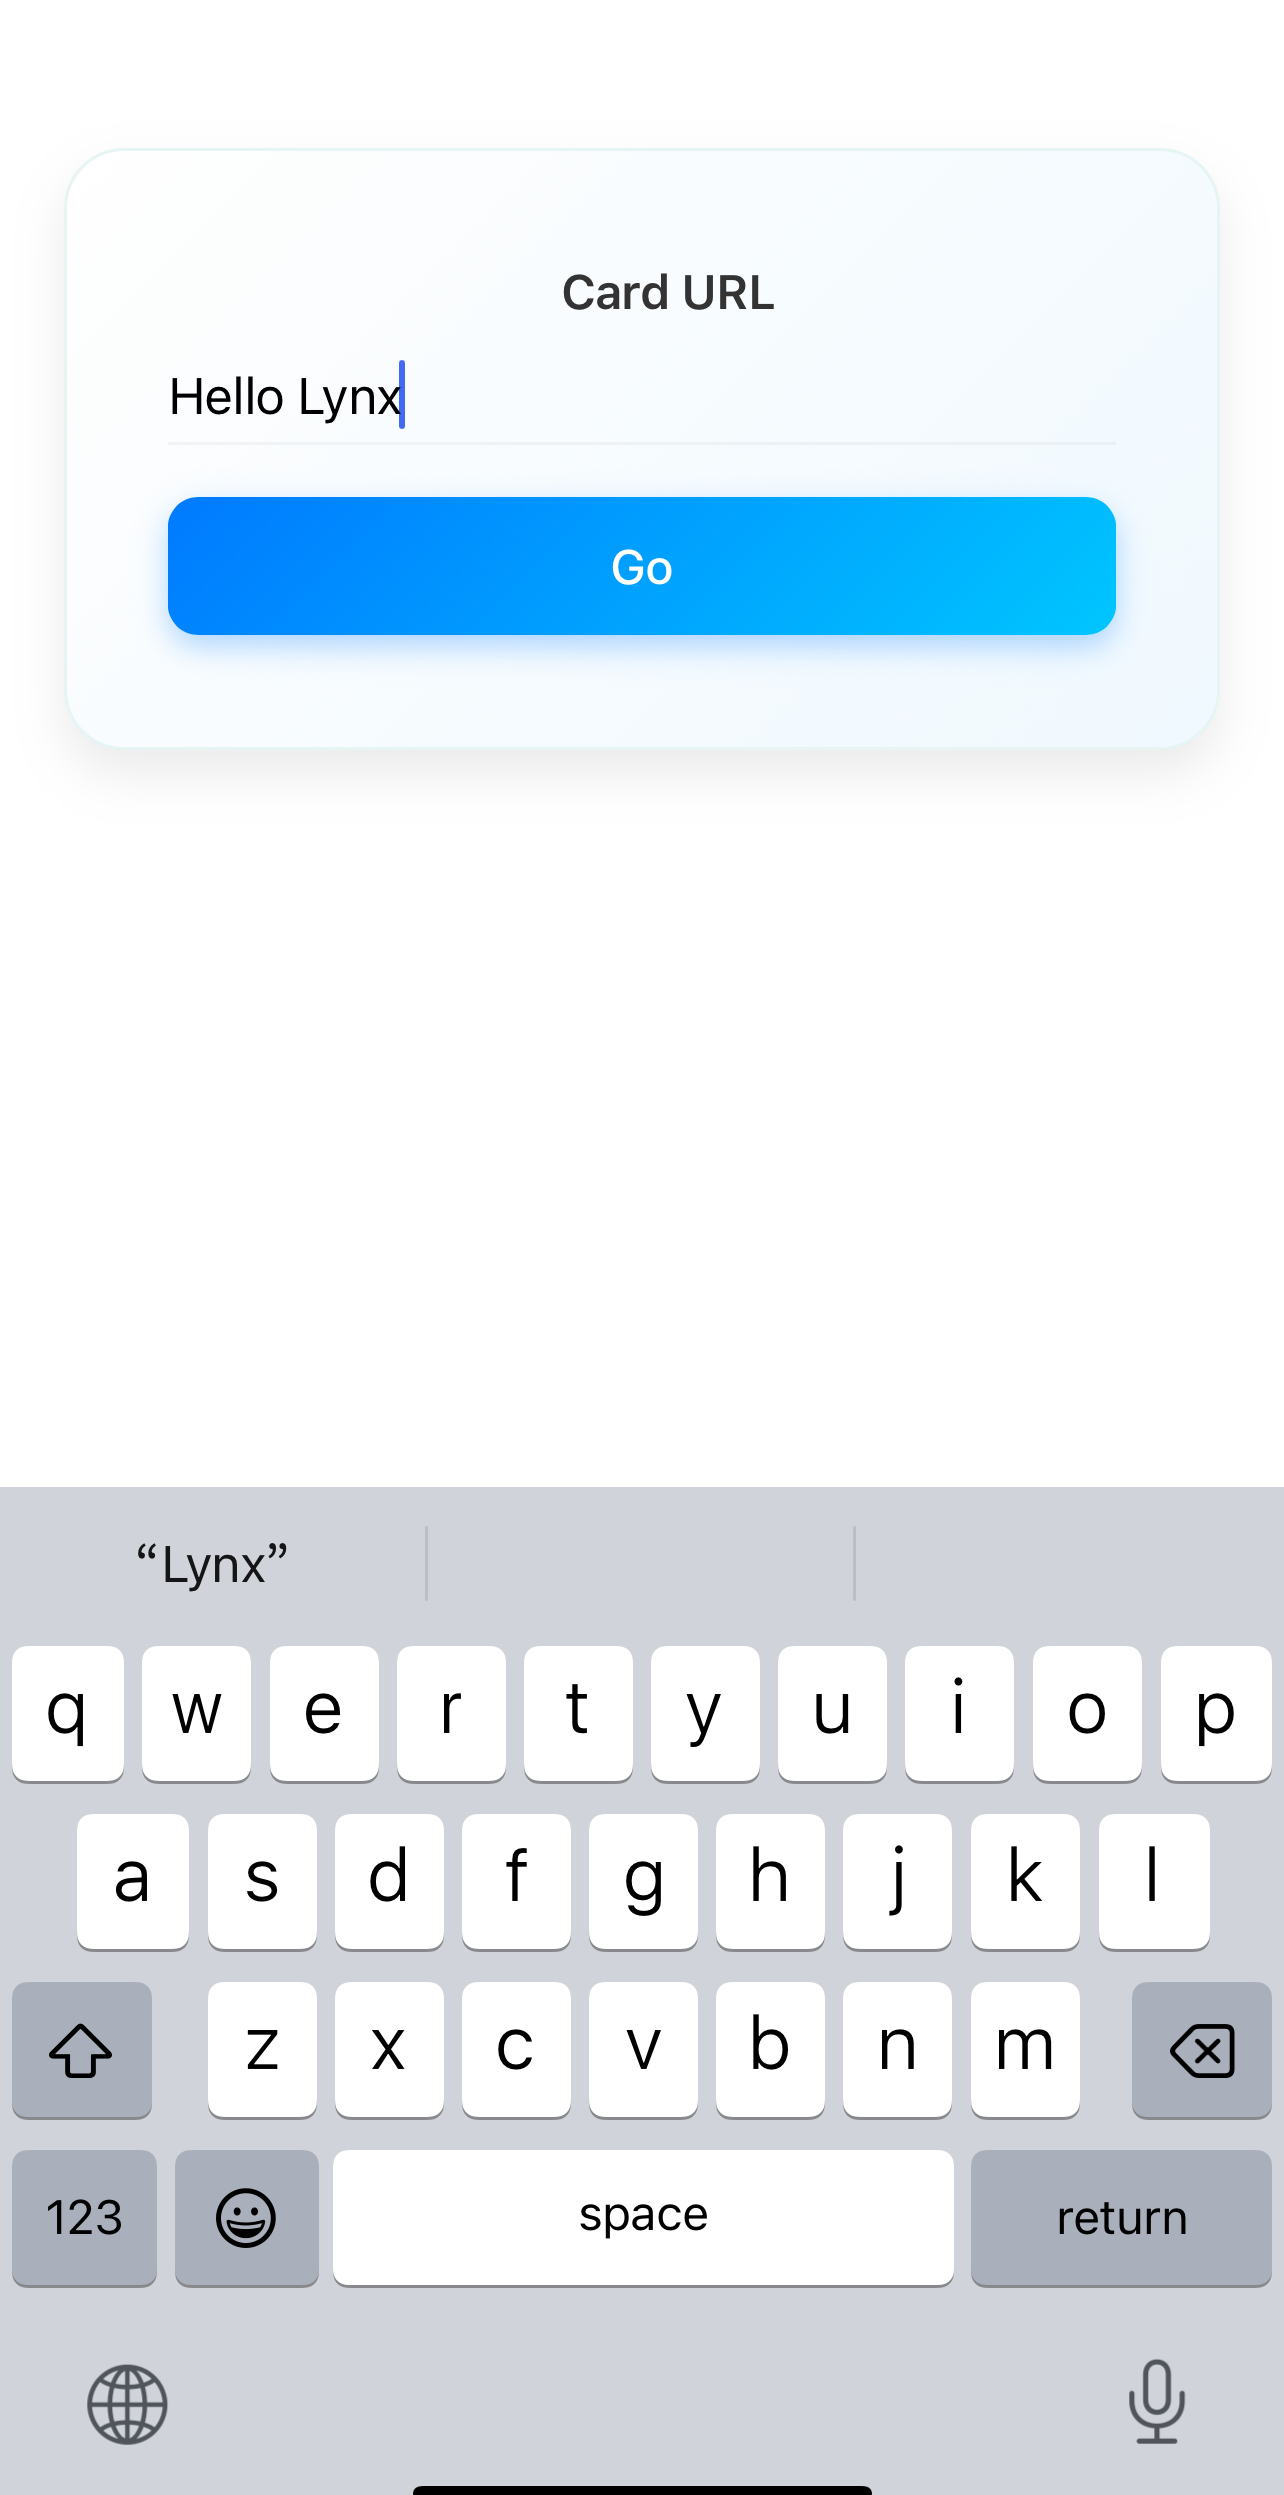
The implementation of custom native elements can be broken down into several steps, including: declaring and registering elements, creating native views, handling styles and properties, event binding, etc. Let's take a simple custom input element <explorer-input> as an example to briefly introduce the implementation process of custom elements.
The complete implementation can be found in the LynxExplorer/input module. You can compile and run the LynxExplorer sample project to preview element behavior in real-time.
#Declare and Register Elements
#Declare Custom Elements
A declared custom element needs to inherit from LynxUI. Below is the implementation of the <explorer-input> element:
#import <Lynx/LynxUI.h>

NS_ASSUME_NONNULL_BEGIN

@interface LynxTextField : UITextField

@property(nonatomic, assign) UIEdgeInsets padding;

@end

@interface LynxExplorerInput : LynxUI <LynxTextField *> <UITextFieldDelegate>

@end

NS_ASSUME_NONNULL_END
#import "LynxExplorerInput.h"

@implementation LynxExplorerInput

//...

@end


@implementation LynxTextField

- (UIEditingInteractionConfiguration)editingInteractionConfiguration API_AVAILABLE(ios(13.0)) {
  return UIEditingInteractionConfigurationNone;
}

- (void)setPadding:(UIEdgeInsets)padding {
  _padding = padding;
  [self setNeedsLayout];
}

- (CGRect)textRectForBounds:(CGRect)bounds {
  CGFloat x = self.padding.left;
  CGFloat y = self.padding.top;
  CGFloat width = bounds.size.width - self.padding.left - self.padding.right;
  CGFloat height = bounds.size.height - self.padding.top - self.padding.bottom;

  return CGRectMake(x, y, width, height);
}

- (CGRect)editingRectForBounds:(CGRect)bounds {
  return [self textRectForBounds:bounds];
}
@end#Register Custom Element
Elements can be registered in two ways: globally and locally.
#Global Registration
Globally registered elements can be shared across multiple LynxView instances.
#import "LynxExplorerInput.h"
#import <Lynx/LynxComponentRegistry.h>

@implementation LynxExplorerInput

LYNX_LAZY_REGISTER_UI("explorer-input")

@end


@implementation LynxTextField

- (UIEditingInteractionConfiguration)editingInteractionConfiguration API_AVAILABLE(ios(13.0)) {
  return UIEditingInteractionConfigurationNone;
}

- (void)setPadding:(UIEdgeInsets)padding {
  _padding = padding;
  [self setNeedsLayout];
}

- (CGRect)textRectForBounds:(CGRect)bounds {
  CGFloat x = self.padding.left;
  CGFloat y = self.padding.top;
  CGFloat width = bounds.size.width - self.padding.left - self.padding.right;
  CGFloat height = bounds.size.height - self.padding.top - self.padding.bottom;

  return CGRectMake(x, y, width, height);
}

- (CGRect)editingRectForBounds:(CGRect)bounds {
  return [self textRectForBounds:bounds];
}
@end#Local Registration
Locally registered elements are only applicable to the current LynxView instance.
#import <Lynx/LynxEnv.h>
#import <Lynx/LynxView.h>

  LynxView *lynxView = [[LynxView alloc] initWithBuilderBlock:^(LynxViewBuilder *builder) {
    builder.config =
        [[LynxConfig alloc] initWithProvider:[LynxEnv sharedInstance].config.templateProvider];
    [builder.config registerUI:[LynxExplorerInput class] withName:@"explorer-input"];
  }];
Where "explorer-input" corresponds to the tag name in the front-end DSL. When Lynx Engine parses this tag, it will look for the registered native element and create an instance.
#Create Native View Instance
Each custom element needs to implement the createView method, which returns a corresponding native View instance.
Here is the implementation for the <explorer-input> element:
#import "LynxExplorerInput.h"
#import <Lynx/LynxComponentRegistry.h>

@implementation LynxExplorerInput

LYNX_LAZY_REGISTER_UI("explorer-input")

- (UITextField *)createView {
  UITextField *textField = [[LynxTextField alloc] init];
  //...
  textField.delegate = self;
  return textField;
}

@end

@implementation LynxTextField

- (UIEditingInteractionConfiguration)editingInteractionConfiguration API_AVAILABLE(ios(13.0)) {
  return UIEditingInteractionConfigurationNone;
}

- (void)setPadding:(UIEdgeInsets)padding {
  _padding = padding;
  [self setNeedsLayout];
}

- (CGRect)textRectForBounds:(CGRect)bounds {
  CGFloat x = self.padding.left;
  CGFloat y = self.padding.top;
  CGFloat width = bounds.size.width - self.padding.left - self.padding.right;
  CGFloat height = bounds.size.height - self.padding.top - self.padding.bottom;

  return CGRectMake(x, y, width, height);
}

- (CGRect)editingRectForBounds:(CGRect)bounds {
  return [self textRectForBounds:bounds];
}
@end#Handle Front-End Style and Property Updates
You can use the LYNX_PROP_SETTER macro to listen for property changes passed from the front end and update the native view. For example, handling the value property of the <explorer-input> element:
#import "LynxExplorerInput.h"
#import <Lynx/LynxComponentRegistry.h>
#import <Lynx/LynxPropsProcessor.h>

@implementation LynxExplorerInput

LYNX_LAZY_REGISTER_UI("explorer-input")

LYNX_PROP_SETTER("value", setValue, NSString *) {
    self.view.text = value;
}

- (UITextField *)createView {
  UITextField *textField = [[LynxTextField alloc] init];
  //...
  textField.delegate = self;
  return textField;
}

@end

@implementation LynxTextField

- (UIEditingInteractionConfiguration)editingInteractionConfiguration API_AVAILABLE(ios(13.0)) {
  return UIEditingInteractionConfigurationNone;
}

- (void)setPadding:(UIEdgeInsets)padding {
  _padding = padding;
  [self setNeedsLayout];
}

- (CGRect)textRectForBounds:(CGRect)bounds {
  CGFloat x = self.padding.left;
  CGFloat y = self.padding.top;
  CGFloat width = bounds.size.width - self.padding.left - self.padding.right;
  CGFloat height = bounds.size.height - self.padding.top - self.padding.bottom;

  return CGRectMake(x, y, width, height);
}

- (CGRect)editingRectForBounds:(CGRect)bounds {
  return [self textRectForBounds:bounds];
}
@end#Handle Layout Information (Optional)
#Handle Lynx Engine Layout Results
Typically, Lynx Engine automatically calculates and updates the View layout information, so developers do not need to manually handle this. However, in some special cases, such as when additional adjustments to the View are required, you can obtain the latest layout information in the layoutDidFinished callback and apply custom logic.
#import "LynxExplorerInput.h"
#import <Lynx/LynxComponentRegistry.h>
#import <Lynx/LynxPropsProcessor.h>

@implementation LynxExplorerInput

LYNX_LAZY_REGISTER_UI("explorer-input")

- (void)layoutDidFinished {
  self.view.padding = self.padding;
  }

LYNX_PROP_SETTER("value", setValue, NSString *) {
self.view.text = value;
}

- (UITextField *)createView {
  UITextField *textField = [[LynxTextField alloc] init];
  //...
  textField.delegate = self;
  return textField;
  }

@end

@implementation LynxTextField

- (UIEditingInteractionConfiguration)editingInteractionConfiguration API_AVAILABLE(ios(13.0)) {
  return UIEditingInteractionConfigurationNone;
  }

- (void)setPadding:(UIEdgeInsets)padding {
  _padding = padding;
  [self setNeedsLayout];
  }

- (CGRect)textRectForBounds:(CGRect)bounds {
  CGFloat x = self.padding.left;
  CGFloat y = self.padding.top;
  CGFloat width = bounds.size.width - self.padding.left - self.padding.right;
  CGFloat height = bounds.size.height - self.padding.top - self.padding.bottom;

  return CGRectMake(x, y, width, height);
  }

- (CGRect)editingRectForBounds:(CGRect)bounds {
  return [self textRectForBounds:bounds];
  }
  @end
#Handle Event Binding (Optional)
In some scenarios, the front-end may need to respond to events from custom elements. For example, when the user types in the input box, the front-end might
need to capture and process the input data.
Here is an example of how to send a text input event from the <explorer-input> element to the front-end and how the front-end listens for the event.
#Client-Side Event Sending
The client listens to text input callbacks from the native view, and when the text changes, it uses [self.context.eventEmitter dispatchCustomEvent:eventInfo] to send the event to the front-end for handling.
#import "LynxExplorerInput.h"
#import <Lynx/LynxComponentRegistry.h>
#import <Lynx/LynxPropsProcessor.h>

@implementation LynxExplorerInput

LYNX_LAZY_REGISTER_UI("explorer-input")

- (UITextField *)createView {
  UITextField *textField = [[LynxTextField alloc] init];
  //...
  textField.delegate = self;
  [[NSNotificationCenter defaultCenter] addObserver:self
                                        selector:@selector(textFieldDidChange:)
                                        name:UITextFieldTextDidChangeNotification
                                        object:textField];
  return textField;
}

- (void)emitEvent:(NSString *)name detail:(NSDictionary *)detail {
  LynxCustomEvent *eventInfo = [[LynxDetailEvent alloc] initWithName:name
                                                          targetSign:[self sign]
                                                              detail:detail];
  [self.context.eventEmitter dispatchCustomEvent:eventInfo];
}

- (void)textFieldDidChange:(NSNotification *)notification {
  [self emitEvent:@"input"
           detail:@{
             @"value": [self.view text] ?: @"",
           }];
}

- (void)layoutDidFinished {
    self.view.padding = self.padding;
}

LYNX_PROP_SETTER("value", setValue, NSString *) {
    self.view.text = value;
}

@end

@implementation LynxTextField

- (UIEditingInteractionConfiguration)editingInteractionConfiguration API_AVAILABLE(ios(13.0)) {
  return UIEditingInteractionConfigurationNone;
}

- (void)setPadding:(UIEdgeInsets)padding {
  _padding = padding;
  [self setNeedsLayout];
}

- (CGRect)textRectForBounds:(CGRect)bounds {
  CGFloat x = self.padding.left;
  CGFloat y = self.padding.top;
  CGFloat width = bounds.size.width - self.padding.left - self.padding.right;
  CGFloat height = bounds.size.height - self.padding.top - self.padding.bottom;

  return CGRectMake(x, y, width, height);
}

- (CGRect)editingRectForBounds:(CGRect)bounds {
  return [self textRectForBounds:bounds];
}
@end#Front-End DSL Event Binding
On the front-end, bind the corresponding input event to listen for and handle the text input data sent by the client.
const handleInput = (e) => {
  const currentValue = e.detail.value.trim();
  setInputValue(currentValue);
};

<explorer-input
  className="input-box"
  style={{ width: '100px', height: '100px' }}
  bindinput={handleInput}
  value={inputValue}
/>;Note: The front-end DSL uses
bindxxxfor event binding, such asbindinputto bind theinputevent.
#Support Direct Element Manipulation (Optional)
In some cases, the front-end may need to directly manipulate custom elements via imperative APIs. You can make elements support such operations with LYNX_UI_METHOD.
#Front-End Call Example
The following code shows how to use SelectorQuery to call the focus method and focus the <explorer-input> element:
lynx
  .createSelectorQuery()
  .select('#input-id')
  .invoke({
    method: 'focus',
    params: {},
    success: function (res) {
      console.log('lynx', 'request focus success');
    },
    fail: function (res) {
      console.log('lynx', 'request focus fail');
    },
  })
.exec();#Client-Side Implementation
On the client side, use LYNX_UI_METHOD to add a focus method to the custom element to handle the front-end call.
#import "LynxExplorerInput.h"
#import <Lynx/LynxComponentRegistry.h>
#import <Lynx/LynxPropsProcessor.h>
#import <Lynx/LynxUIMethodProcessor.h>

@implementation LynxExplorerInput

LYNX_LAZY_REGISTER_UI("explorer-input")

LYNX_UI_METHOD(focus) {
    if ([self.view becomeFirstResponder]) {
        callback(kUIMethodSuccess, nil);
    } else {
        callback(kUIMethodUnknown, @"fail to focus");
    }
}

- (UITextField *)createView {
  UITextField *textField = [[LynxTextField alloc] init];
  //...
  textField.delegate = self;
  [[NSNotificationCenter defaultCenter] addObserver:self
                                        selector:@selector(textFieldDidChange:)
                                        name:UITextFieldTextDidChangeNotification
                                        object:textField];
  return textField;
}

- (void)emitEvent:(NSString *)name detail:(NSDictionary *)detail {
  LynxCustomEvent *eventInfo = [[LynxDetailEvent alloc] initWithName:name
                                                          targetSign:[self sign]
                                                              detail:detail];
  [self.context.eventEmitter dispatchCustomEvent:eventInfo];
}

- (void)textFieldDidChange:(NSNotification *)notification {
  [self emitEvent:@"input"
           detail:@{
             @"value": [self.view text] ?: @"",
           }];
}

- (void)layoutDidFinished {
    self.view.padding = self.padding;
}

LYNX_PROP_SETTER("value", setValue, NSString *) {
    self.view.text = value;
}

@end

@implementation LynxTextField

- (UIEditingInteractionConfiguration)editingInteractionConfiguration API_AVAILABLE(ios(13.0)) {
  return UIEditingInteractionConfigurationNone;
}

- (void)setPadding:(UIEdgeInsets)padding {
  _padding = padding;
  [self setNeedsLayout];
}

- (CGRect)textRectForBounds:(CGRect)bounds {
  CGFloat x = self.padding.left;
  CGFloat y = self.padding.top;
  CGFloat width = bounds.size.width - self.padding.left - self.padding.right;
  CGFloat height = bounds.size.height - self.padding.top - self.padding.bottom;

  return CGRectMake(x, y, width, height);
}

- (CGRect)editingRectForBounds:(CGRect)bounds {
  return [self textRectForBounds:bounds];
}
@end#Method Callback Return Values
When implementing the focus method, component developers need to return a status code to the frontend to indicate whether the operation was successful. For instance, the frontend call might fail, in which case an appropriate error status should be returned so that the frontend can handle it in the fail callback.
Lynx Engine defines several common error codes, and developers can return the appropriate status code in the method callback:
enum LynxUIMethodErrorCode {
  kUIMethodSuccess = 0, // Succeeded
  kUIMethodUnknown, // Unknown error
  kUIMethodNodeNotFound, // Cannot find corresponding element
  kUIMethodMethodNotFound, // No corresponding method on this element
  kUIMethodParamInvalid, // Invalid method parameters
  kUIMethodSelectorNotSupported, // Selector not supported
};#Custom Native element Implementation Process
The implementation of custom native elements involves several steps, including: declaring and registering the element, creating native views, handling styles and properties, event binding, etc. Let's take a simple custom input element <explorer-input> as an example to briefly introduce the implementation process of a custom element. The complete code can be viewed in LynxExplorer.
The complete implementation can be found in the LynxExplorer/input module. You can compile and run the LynxExplorer sample project to preview element behavior in real-time.
#Integrate the LynxProcessor Module
Add the following to your module's build.gradle(.kts) file:
compileOnly project('org.lynxsdk.lynx:lynx-processor:4.1.0')
annotationProcessor project('org.lynxsdk.lynx:lynx-processor:4.1.0')
plugins {
alias(libs.plugins.android.application)
alias(libs.plugins.jetbrains.kotlin.android)
id("kotlin-kapt")
}
//dependency
kapt('org.lynxsdk.lynx:lynx-processor:4.1.0')
implementation("androidx.appcompat:appcompat:1.7.0")#Declaring and Registering the Element
#Declare the Custom Element
The declared custom element needs to inherit from LynxUI.
import com.lynx.tasm.behavior.LynxContext;
import com.lynx.tasm.behavior.ui.LynxUI;
import androidx.appcompat.widget.AppCompatEditText;


public class LynxExplorerInput extends LynxUI<AppCompatEditText> {

  public LynxExplorerInput(LynxContext context) {
    super(context);
  }
  //...

}
import com.lynx.tasm.behavior.LynxContext
import com.lynx.tasm.behavior.ui.LynxUI
import androidx.appcompat.widget.AppCompatEditText


class LynxExplorerInput(context: LynxContext) : LynxUI<AppCompatEditText>(context) {

   //...

}
#Register the Custom Element
There are two ways to register elements: global registration and local registration.
#Global Registration
Globally registered elements can be shared among multiple LynxView instances.
import com.lynx.tasm.LynxEnv;
import com.lynx.tasm.behavior.Behavior;

LynxEnv.inst().addBehavior(new Behavior("explorer-input"){
      @Override
      public LynxExplorerInput createUI(LynxContext context) {
        return new LynxExplorerInput(context);
      }
    });
import com.lynx.tasm.LynxEnv
import com.lynx.tasm.behavior.Behavior

LynxEnv.inst().addBehavior(object : Behavior("explorer-input") {
    override fun createUI(context: LynxContext): LynxExplorerInput {
        return LynxExplorerInput(context)
    }
})
#Local Registration
Locally registered elements are only available for the current LynxView instance.
LynxViewBuilder lynxViewBuilder = new LynxViewBuilder();
lynxViewBuilder.addBehavior(new Behavior("explorer-input") {
      @Override
      public LynxExplorerInput createUI(LynxContext context) {
        return new LynxExplorerInput(context);
      }
    });
    val lynxViewBuilder = LynxViewBuilder()
    lynxViewBuilder.addBehavior(object : Behavior("explorer-input") {
      override fun createUI(context: LynxContext): LynxExplorerInput {
        return LynxExplorerInput(context)
      }
    })
Where explorer-input" corresponds to the tag name in the front-end DSL. When the Lynx Engine encounters this tag, it will look for the registered native element and create an instance.
#Create the Native View Instance
Each custom element needs to implement the createView method, which returns the corresponding native View instance.
Here’s the implementation for the <explorer-input> element:
import android.content.Context;
import androidx.appcompat.widget.AppCompatEditText;
import com.lynx.tasm.behavior.LynxContext;
import com.lynx.tasm.behavior.ui.LynxUI;

public class LynxExplorerInput extends LynxUI<AppCompatEditText> {

  public LynxExplorerInput(LynxContext context) {
    super(context);
  }

  @Override
  protected AppCompatEditText createView(Context context) {
    AppCompatEditText view = new AppCompatEditText(context);
    //...
    return view;
  }

}
import android.content.Context
import androidx.appcompat.widget.AppCompatEditText
import com.lynx.tasm.behavior.LynxContext
import com.lynx.tasm.behavior.ui.LynxUI


class LynxExplorerInput(context: LynxContext) : LynxUI<AppCompatEditText>(context) {

  override fun createView(context: Context): AppCompatEditText {
    return AppCompatEditText(context).apply {
      //...
    }
  }
}
#Handle Front-End Style and Property Updates
You can use the @LynxProp annotation to listen for property changes passed from the front-end and update the native view accordingly. For example, handling the value property of the <explorer-input> element:
import android.content.Context;
import androidx.appcompat.widget.AppCompatEditText;
import com.lynx.tasm.behavior.LynxContext;
import com.lynx.tasm.behavior.LynxProp;
import com.lynx.tasm.behavior.ui.LynxUI;

public class LynxExplorerInput extends LynxUI<AppCompatEditText> {

  public LynxExplorerInput(LynxContext context) {
    super(context);
  }

  @LynxProp(name = "value")
  public void setValue(String value) {
    if (!value.equals(mView.getText().toString())) {
      mView.setText(value);
    }
  }

  @Override
  protected AppCompatEditText createView(Context context) {
    AppCompatEditText view = new AppCompatEditText(context);
    //...
    return view;
  }


}
import android.content.Context
import androidx.appcompat.widget.AppCompatEditText
import com.lynx.tasm.behavior.LynxContext
import com.lynx.tasm.behavior.LynxProp
import com.lynx.tasm.behavior.ui.LynxUI

class LynxExplorerInput(context: LynxContext) : LynxUI<AppCompatEditText>(context) {

  override fun createView(context: Context): AppCompatEditText {
    return AppCompatEditText(context).apply {
      //...
    }
  }

  @LynxProp(name = "value")
  fun setValue(value: String) {
    if (value != mView.text.toString()) {
      mView.setText(value)
    }
  }
}
#Handle Layout Information (Optional)
#Handle the Layout Result from the Lynx Engine
Usually, the Lynx Engine will automatically calculate and update the View layout information, so developers don’t need to handle this manually. However, in some special cases, such as when extra adjustments are needed for the View, you can retrieve the latest layout information in the onLayoutUpdated callback and apply custom logic.
import android.content.Context;
import androidx.appcompat.widget.AppCompatEditText;
import com.lynx.tasm.behavior.LynxContext;
import com.lynx.tasm.behavior.LynxProp;
import com.lynx.tasm.behavior.ui.LynxUI;

public class LynxExplorerInput extends LynxUI<AppCompatEditText> {

  public LynxExplorerInput(LynxContext context) {
    super(context);
  }

  @Override
  public void onLayoutUpdated() {
    super.onLayoutUpdated();
    int paddingTop = mPaddingTop + mBorderTopWidth;
    int paddingBottom = mPaddingBottom + mBorderBottomWidth;
    int paddingLeft = mPaddingLeft + mBorderLeftWidth;
    int paddingRight = mPaddingRight + mBorderRightWidth;
    mView.setPadding(paddingLeft, paddingTop, paddingRight, paddingBottom);
  }

  @Override
  protected AppCompatEditText createView(Context context) {
    AppCompatEditText view = new AppCompatEditText(context);
    //...
    return view;
  }

  @LynxProp(name = "value")
  public void setValue(String value) {
    if (!value.equals(mView.getText().toString())) {
      mView.setText(value);
    }
  }

}
import android.content.Context
import androidx.appcompat.widget.AppCompatEditText
import com.lynx.tasm.behavior.LynxContext
import com.lynx.tasm.behavior.LynxProp
import com.lynx.tasm.behavior.ui.LynxUI


class LynxExplorerInput(context: LynxContext) : LynxUI<AppCompatEditText>(context) {

  override fun onLayoutUpdated() {
    super.onLayoutUpdated()
    val paddingTop = mPaddingTop + mBorderTopWidth
    val paddingBottom = mPaddingBottom + mBorderBottomWidth
    val paddingLeft = mPaddingLeft + mBorderLeftWidth
    val paddingRight = mPaddingRight + mBorderRightWidth
    mView.setPadding(paddingLeft, paddingTop, paddingRight, paddingBottom)
  }

  override fun createView(context: Context): AppCompatEditText {
    return AppCompatEditText(context).apply {
      //...
    }
  }

  @LynxProp(name = "value")
  fun setValue(value: String) {
    if (value != mView.text.toString()) {
      mView.setText(value)
    }
  }
}
#Event Binding
Event handling in native elements is usually done using the @LynxEvent annotation, which binds events between the front-end and native elements. For example, let’s implement a custom onChange event for the <explorer-input> element:
import android.content.Context;
import android.text.Editable;
import android.text.TextWatcher;
import androidx.appcompat.widget.AppCompatEditText;
import com.lynx.tasm.behavior.LynxContext;
import com.lynx.tasm.behavior.LynxProp;
import com.lynx.tasm.behavior.ui.LynxUI;
import com.lynx.tasm.event.LynxCustomEvent;
import java.util.HashMap;
import java.util.Map;

public class LynxExplorerInput extends LynxUI<AppCompatEditText> {

  private void emitEvent(String name, Map<String, Object> value) {
    LynxCustomEvent detail = new LynxCustomEvent(getSign(), name);
    if (value != null) {
      for (Map.Entry<String, Object> entry : value.entrySet()) {
        detail.addDetail(entry.getKey(), entry.getValue());
      }
    }
    getLynxContext().getEventEmitter().sendCustomEvent(detail);
  }

  @Override
  protected AppCompatEditText createView(Context context) {
    AppCompatEditText view = new AppCompatEditText(context);
    view.addTextChangedListener(new TextWatcher() {
      @Override
      public void afterTextChanged(Editable s) {
        emitEvent("input", new HashMap<String, Object>() {
          {
            put("value", s.toString());
          }
        });
      }

      @Override
      public void beforeTextChanged(CharSequence s, int start, int count, int after) {}

      @Override
      public void onTextChanged(CharSequence s, int start, int before, int count) {
      }
    });
    return view;

  }

  public LynxExplorerInput(LynxContext context) {
    super(context);
  }

  @Override
  public void onLayoutUpdated() {
    super.onLayoutUpdated();
    int paddingTop = mPaddingTop + mBorderTopWidth;
    int paddingBottom = mPaddingBottom + mBorderBottomWidth;
    int paddingLeft = mPaddingLeft + mBorderLeftWidth;
    int paddingRight = mPaddingRight + mBorderRightWidth;
    mView.setPadding(paddingLeft, paddingTop, paddingRight, paddingBottom);
  }

  @LynxProp(name = "value")
  public void setValue(String value) {
    if (!value.equals(mView.getText().toString())) {
      mView.setText(value);
    }
  }

}
import android.content.Context
import android.text.Editable
import android.text.TextWatcher
import androidx.appcompat.widget.AppCompatEditText
import com.lynx.tasm.behavior.LynxContext
import com.lynx.tasm.behavior.LynxProp
import com.lynx.tasm.behavior.ui.LynxUI
import com.lynx.tasm.event.LynxCustomEvent


class LynxExplorerInput(context: LynxContext) : LynxUI<AppCompatEditText>(context) {

  override fun createView(context: Context): AppCompatEditText {
    return AppCompatEditText(context).apply {
      addTextChangedListener(object : TextWatcher {
        override fun beforeTextChanged(s: CharSequence?, start: Int, count: Int, after: Int) {}

        override fun onTextChanged(s: CharSequence?, start: Int, before: Int, count: Int) {}

        override fun afterTextChanged(s: Editable?) {
          emitEvent("input", mapOf("value" to (s?.toString() ?: "")))
        }
      })
    }
  }

  private fun emitEvent(name: String, value: Map<String, Any>?) {
    val detail = LynxCustomEvent(sign, name)
    value?.forEach { (key, v) ->
      detail.addDetail(key, v)
    }
    lynxContext.eventEmitter.sendCustomEvent(detail)
  }


  override fun onLayoutUpdated() {
    super.onLayoutUpdated()
    val paddingTop = mPaddingTop + mBorderTopWidth
    val paddingBottom = mPaddingBottom + mBorderBottomWidth
    val paddingLeft = mPaddingLeft + mBorderLeftWidth
    val paddingRight = mPaddingRight + mBorderRightWidth
    mView.setPadding(paddingLeft, paddingTop, paddingRight, paddingBottom)
  }

  @LynxProp(name = "value")
  fun setValue(value: String) {
    if (value != mView.text.toString()) {
      mView.setText(value)
    }
  }
}
#Front-End DSL Event Binding
On the front-end, you need to bind the relevant input events for the text box. With the following code, the front-end will listen for events sent by the client and process the input data as needed.
const handleInput = (e) => {
  const currentValue = e.detail.value.trim();
  setInputValue(currentValue);
};

<explorer-input
  className="input-box"
  style={{ width: '100px', height: '100px' }}
  bindinput={handleInput}
  value={inputValue}
/>;Note: Front-end DSL uses
bindxxxfor event binding, such asbindinputfor binding theinputevent.
#Supporting Direct Element Manipulation (Optional)
In some cases, the front-end may need to directly manipulate custom elements using imperative APIs. You can enable such operations on elements by using @LynxUIMethod.
#Front-End Example Call
The following code demonstrates how to use the SelectorQuery API to call the focus method and make the <explorer-input> element gain focus:
lynx
  .createSelectorQuery()
  .select('#input-id')
  .invoke({
    method: 'focus',
    params: {},
    success: function (res) {
      console.log('lynx', 'request focus success');
    },
    fail: function (res) {
      console.log('lynx', 'request focus fail');
    },
  })
.exec();#Client-Side Implementation
On the client side, you need to add the focus method to your custom element using @LynxUIMethod, ensuring it can correctly handle the front-end call.
import android.content.Context;
import android.text.Editable;
import android.text.TextWatcher;
import android.view.inputmethod.InputMethodManager;
import androidx.appcompat.widget.AppCompatEditText;
import com.lynx.react.bridge.Callback;
import com.lynx.react.bridge.ReadableMap;
import com.lynx.tasm.behavior.LynxContext;
import com.lynx.tasm.behavior.LynxProp;
import com.lynx.tasm.behavior.LynxUIMethod;
import com.lynx.tasm.behavior.LynxUIMethodConstants;
import com.lynx.tasm.behavior.ui.LynxUI;
import com.lynx.tasm.event.LynxCustomEvent;

import java.util.HashMap;
import java.util.Map;

public class LynxExplorerInput extends LynxUI<AppCompatEditText> {

  private boolean showSoftInput() {
    InputMethodManager imm = (InputMethodManager) getLynxContext().getSystemService(Context.INPUT_METHOD_SERVICE);
    return imm.showSoftInput(mView,
      InputMethodManager.SHOW_IMPLICIT, null);
  }

  @LynxUIMethod
  public void focus(ReadableMap params, Callback callback) {
    if (mView.requestFocus()) {
      if (showSoftInput()) {
        callback.invoke(LynxUIMethodConstants.SUCCESS);
      } else {
        callback.invoke(LynxUIMethodConstants.UNKNOWN, "fail to show keyboard");
      }
    } else {
      callback.invoke(LynxUIMethodConstants.UNKNOWN, "fail to focus");
    }
  }

  private void emitEvent(String name, Map<String, Object> value) {
    LynxCustomEvent detail = new LynxCustomEvent(getSign(), name);
    if (value != null) {
      for (Map.Entry<String, Object> entry : value.entrySet()) {
        detail.addDetail(entry.getKey(), entry.getValue());
      }
    }
    getLynxContext().getEventEmitter().sendCustomEvent(detail);
  }

  @Override
  protected AppCompatEditText createView(Context context) {
    AppCompatEditText view = new AppCompatEditText(context);
    view.addTextChangedListener(new TextWatcher() {
      @Override
      public void afterTextChanged(Editable s) {
        emitEvent("input", new HashMap<String, Object>() {
          {
            put("value", s.toString());
          }
        });
      }

      @Override
      public void beforeTextChanged(CharSequence s, int start, int count, int after) {
      }

      @Override
      public void onTextChanged(CharSequence s, int start, int before, int count) {
      }
    });
    return view;
  }

  public LynxExplorerInput(LynxContext context) {
    super(context);
  }

  @Override
  public void onLayoutUpdated() {
    super.onLayoutUpdated();
    int paddingTop = mPaddingTop + mBorderTopWidth;
    int paddingBottom = mPaddingBottom + mBorderBottomWidth;
    int paddingLeft = mPaddingLeft + mBorderLeftWidth;
    int paddingRight = mPaddingRight + mBorderRightWidth;
    mView.setPadding(paddingLeft, paddingTop, paddingRight, paddingBottom);
  }

  @LynxProp(name = "value")
  public void setValue(String value) {
    if (!value.equals(mView.getText().toString())) {
      mView.setText(value);
    }
  }
}
import android.content.Context
import android.text.Editable
import android.text.TextWatcher
import android.view.inputmethod.InputMethodManager
import androidx.appcompat.widget.AppCompatEditText
import com.lynx.react.bridge.Callback
import com.lynx.react.bridge.ReadableMap
import com.lynx.tasm.behavior.LynxContext
import com.lynx.tasm.behavior.LynxProp
import com.lynx.tasm.behavior.LynxUIMethod
import com.lynx.tasm.behavior.LynxUIMethodConstants
import com.lynx.tasm.behavior.ui.LynxUI
import com.lynx.tasm.event.LynxCustomEvent


class LynxExplorerInput(context: LynxContext) : LynxUI<AppCompatEditText>(context) {

  private fun showSoftInput(): Boolean {
    val imm = lynxContext.getSystemService(Context.INPUT_METHOD_SERVICE) as InputMethodManager
    return imm.showSoftInput(mView, InputMethodManager.SHOW_IMPLICIT, null)
  }

  @LynxUIMethod
  fun focus(params: ReadableMap, callback: Callback) {
    if (mView.requestFocus()) {
      if (showSoftInput()) {
        callback.invoke(LynxUIMethodConstants.SUCCESS)
      } else {
        callback.invoke(LynxUIMethodConstants.UNKNOWN, "fail to show keyboard")
      }
    } else {
      callback.invoke(LynxUIMethodConstants.UNKNOWN, "fail to focus")
    }
  }

  override fun createView(context: Context): AppCompatEditText {
    return AppCompatEditText(context).apply {
      addTextChangedListener(object : TextWatcher {
        override fun beforeTextChanged(s: CharSequence?, start: Int, count: Int, after: Int) {}

        override fun onTextChanged(s: CharSequence?, start: Int, before: Int, count: Int) {}

        override fun afterTextChanged(s: Editable?) {
          emitEvent("input", mapOf("value" to (s?.toString() ?: "")))
        }
      })
    }
  }

  private fun emitEvent(name: String, value: Map<String, Any>?) {
    val detail = LynxCustomEvent(sign, name)
    value?.forEach { (key, v) ->
      detail.addDetail(key, v)
    }
    lynxContext.eventEmitter.sendCustomEvent(detail)
  }

  override fun onLayoutUpdated() {
    super.onLayoutUpdated()
    val paddingTop = mPaddingTop + mBorderTopWidth
    val paddingBottom = mPaddingBottom + mBorderBottomWidth
    val paddingLeft = mPaddingLeft + mBorderLeftWidth
    val paddingRight = mPaddingRight + mBorderRightWidth
    mView.setPadding(paddingLeft, paddingTop, paddingRight, paddingBottom)
  }

  @LynxProp(name = "value")
  fun setValue(value: String) {
    if (value != mView.text.toString()) {
      mView.setText(value)
    }
  }
}
#Method Callback Return Values
When implementing the focus method, component developers need to return a status code to the frontend to indicate whether the operation was successful. For instance, the frontend call might fail, in which case an appropriate error status should be returned so that the frontend can handle it in the fail callback.
Lynx Engine predefines some common error codes, and the element developer can return the appropriate status code in the method callback:
enum LynxUIMethodErrorCode {
  kUIMethodSuccess, // Succeeded
  kUIMethodUnknown, // Unknown error
  kUIMethodNodeNotFound, // Cannot find corresponding element
  kUIMethodMethodNotFound, // No corresponding method on this element
  kUIMethodParamInvalid, // Invalid method parameters
  kUIMethodSelectorNotSupported, // Selector not supported
}
The implementation of custom native elements can be broken down into several steps, including: declaring and registering elements, creating native views, handling styles and properties, event binding, etc. Let's take a simple custom input element <explorer-input> as an example to briefly introduce the implementation process of custom elements.
The complete implementation can be found in the LynxExplorer/input module. You can compile and run the LynxExplorer sample project to preview element behavior in real-time.
#Declare and Register Elements
#Declare Custom Elements
A declared custom element needs to inherit from UIBase. Below is the implementation of the <explorer-input> element:
import { UIBase, EventHandlerArray, LynxUIMethodConstants } from '@lynx/lynx';

@ComponentV2
struct InputView {
  build() {
    Stack() {
      TextInput({})
    }
    .width('100%')
    .height('100%')
  }
}

@Builder
export function buildInput(ui: UIBase) {
  if (ui as LynxExplorerInput) {
    InputView();
  }
}

export class LynxExplorerInput extends UIBase {
  readonly builder: WrappedBuilder<[UIBase]> = wrapBuilder<[UIBase]>(buildInput);
}#Register Custom Element
Elements can be registered in two ways: globally and locally.
#Global Registration
Globally registered elements can be shared across multiple LynxView instances.
import { BUILTIN_BEHAVIORS } from '@lynx/lynx/src/main/ets/tasm/behavior/Behavior';

export class CustomElement {
  private static initialized = false;

  static initialize() {
    if (CustomElement.initialized) {
      return;
    }
    BUILTIN_BEHAVIORS.set(
      'explorer-input',
      new Behavior(LynxExplorerInput, undefined),
    );
    CustomElement.initialized = true;
  }
}

export default class EntryAbility extends UIAbility {
  onCreate(want: Want, launchParam: AbilityConstant.LaunchParam) {
    CustomElement.initialize();
  }
}#Local Registration
Locally registered elements are only applicable to the current LynxView instance. Component names and their component instances are associated through BehaviorRegistryMap. Behavior defines the specific implementation of the component, including UI Class and ShadowNode Class.
export class Behavior {
  uiClass?: Function;
  shadowNodeClass?: Function;
  customData?: Object;
  type?: NodeType;
}
Corresponding parameter description:
uiClass: The UI class corresponding to the component, which is used for rendering-related operations;
shadowNodeClass: Optional parameter, the ShadowNode class corresponding to the component, if implemented, it indicates that this node can provide measurement capabilities to the Lynx layout engine (such as text nodes);
customData: Optional parameter, some custom data;
type: Optional parameter, specifies the type of this component, generally not required. Currently, the following three types are defined:
- COMMON indicates having a UI node
- VIRTUAL indicates having only a ShadowNode without a UI
- CUSTOM indicates having both UI and ShadowNode
import {
  Behavior,
  BehaviorRegistryMap,
} from '@lynx/lynx';
import { LynxExplorerInput } from '../component/LynxExplorerInput';

build() {
  LynxView({
    ...
    behaviors: new Map([['explorer-input', new Behavior(LynxExplorerInput, undefined)]]),
    ...
  }).height('100%')
  ...
}
Where "input" corresponds to the tag name in the front-end DSL. When Lynx Engine parses this tag, it will look for the registered native element and create an instance.
#Create Native Component Instance
Each custom element needs to implement the Builder method, which returns a corresponding native Component instance.
Here is the implementation for the <explorer-input> element:
@ObservedV2
class InputParams {
  constructor(ui: LynxExplorerInput) {
    this.ui = ui;
  }

  @Trace inputText: string = '';
  @Trace placeholder: string = '';
  ui: LynxExplorerInput;
}

@ComponentV2
struct InputView {
  @Param @Require inputParams: InputParams;

  build() {
    Stack() {
      TextInput({
        controller: this.inputParams.ui.controller,
        text: this.inputParams.inputText,
        placeholder: this.inputParams.placeholder
      })
      .id(this.inputParams.ui.sign.toString())
      .style(TextContentStyle.DEFAULT)
      .focusable(true)
    }
    .width('100%')
    .height('100%')
  }
}

@Builder
export function buildInput(ui: UIBase) {
  if (ui as LynxExplorerInput) {
    InputView({ inputParams: (ui as LynxExplorerInput).inputParams });
  }
}

export class LynxExplorerInput extends UIBase {
  controller: TextInputController = new TextInputController();
  inputParams: InputParams = new InputParams(this)
  focused: boolean = false;
  readonly builder: WrappedBuilder<[UIBase]> = wrapBuilder<[UIBase]>(buildInput);
}#Handle Front-End Style and Property Updates
You can inherit and override update(props: Object, events?: EventHandlerArray[]) to listen for property changes passed from the front-end and update the native view. For example, handling the value property of the <explorer-input> element:
export class LynxExplorerInput extends UIBase {
  controller: TextInputController = new TextInputController();
  inputParams: InputParams = new InputParams(this);
  focused: boolean = false;
  readonly builder: WrappedBuilder<[UIBase]> =
    wrapBuilder<[UIBase]>(buildInput);

  static PropSetter: Map<string, Function> = new Map([
    [
      'value',
      (ui: LynxExplorerInput, value: Object) => {
        ui.updateInputTextIfNecessary(value, true);
      },
    ],
    [
      'placeholder',
      (ui: LynxExplorerInput, value: Object) => {
        ui.inputParams.placeholder = value as string;
      },
    ],
    [
      'text-color',
      (ui: LynxExplorerInput, value: Object) => {
        ui.inputParams.fontColor = value as string;
      },
    ],
  ]);

  update(prop: Record<string, Object>, events?: EventHandlerArray[]): void {
    for (const entry of Object.entries(prop)) {
      LynxExplorerInput.PropSetter.get(entry[0])?.(this, entry[1]);
    }
  }
}#Handle Layout Information (Optional)
#Handle Lynx Engine Layout Results
Typically, Lynx Engine automatically calculates and updates the Component layout information, so developers do not need to manually handle this. However, in some special cases, such as when additional adjustments to the Component are required, you can obtain the latest layout information in the layout function and apply custom logic.
export class LynxExplorerInput extends UIBase {
  controller: TextInputController = new TextInputController();
  inputParams: InputParams = new InputParams(this)
  focused: boolean = false;
  readonly builder: WrappedBuilder<[UIBase]> = wrapBuilder<[UIBase]>(buildInput);

  update(prop: Record<string, Object>, events?: EventHandlerArray[]): void {
    ...
  }

  layout(x: number, y: number, width: number, height: number, paddingLeft: number,
  paddingTop: number, paddingRight: number, paddingBottom: number, marginLeft: number, marginTop: number,
  marginRight: number, marginBottom: number, sticky?: number[]): void {
   ...
   // Generally, no special handling is required!
 }
}#Custom measure (Optional)
If a component's size needs to be determined by the component itself, you need to implement a ShadowNode to provide Measure capability and return it to the Lynx layout engine. The most typical example is the text component, whose size can be calculated from the text content.
Note: ShadowNode capabilities are only supported for leaf node Components!!
#Declare and Implement ShadowNode
The following is the implementation of <LynxExplorerInputShadowNode>, which needs to inherit from ShadowNode.
import { ShadowNode, MeasureMode, IContext } from '@lynx/lynx';

export class LynxExplorerInputShadowNode extends ShadowNode {
  constructor(context: IContext) {
    super(context);
    this.setMeasureFunc(this.measure, null);
  }

  measure(width: number, widthMode: number, height: number, heightMode: number): [number, number, number] {
    let res = 0;
    ...
    return [width, res, 0];
  }
}#Handle Front-End Style and Property Updates
You can inherit and override updateProps(props: Record<string, Object>) method of ShadowNode to listen for property changes passed from the front-end and update the native view.
import { ShadowNode, MeasureMode, IContext } from '@lynx/lynx';

export class LynxExplorerInputShadowNode extends ShadowNode {
  constructor(context: IContext) {
    super(context);
    this.setMeasureFunc(this.measure, null);
  }

  override updateProps(props: Record<string, Object>) {
    // Props-related processing
    if (prop['text-maxline'] !== undefined) {
      this.maxLength = prop['max-length'] as number;
    }
    ...
    // Call the super method
    super.update(props, events);
  }

  measure(width: number, widthMode: number, height: number, heightMode: number): [number, number, number] {
    let res = 0;
    ...
    return [width, res, 0];
  }
}#Override the measure method to return a custom size
You can inherit and override measure method of ShadowNode to return a custom size.
import { ShadowNode, MeasureMode, IContext } from '@lynx/lynx';

export class LynxExplorerInputShadowNode extends ShadowNode {
  constructor(context: IContext) {
    super(context);
    this.setMeasureFunc(this.measure, null);
  }

  override updateProps(props: Record<string, Object>) {
    // Props-related processing
    if (prop['text-maxline'] !== undefined) {
      this.maxLength = prop['max-length'] as number;
    }
    ...
    // Call the super method
    super.update(props, events);
  }

  override measure(width: number, widthMode: number, height: number, heightMode: number): [number, number, number] {
    let res = height;
    if (heightMode === MeasureMode.DEFINITE) {
      res = height;
    } else if (heightMode === MeasureMode.AT_MOST) {
      res = Math.min(res, height);
    }
    return [width, res, 0];
  }
}
Parameter descriptions:
width: Width constraint;
widthMode: Width constraint mode, type is MeasureMode;
height: Height constraint;
heightMode: Height constraint mode, type is MeasureMode;
Return Value Description:
The return value is an array that needs to return 3 values: width, height, and Baseline (affects vertical alignment, default is 0)
#Communication between UI and ShadowNode
Currently, only the measurement results of ShadowNode can be passed to UI for rendering. ShadowNode implements setExtraDataFunc(func: () => Object): void, where the getExtraBundle method returned to UI is provided
import { ShadowNode, MeasureMode, IContext } from '@lynx/lynx';

export class LynxExplorerInputShadowNode extends ShadowNode {
  constructor(context: IContext) {
    super(context);
    this.setMeasureFunc(this.measure, null);
    this.setExtraDataFunc(this.getExtraBundle);
  }

  getExtraBundle(): Object {
    return "This is from extra bundle"
  }

  override updateProps(props: Record<string, Object>) {
    // Props-related processing
    if (prop['text-maxline'] !== undefined) {
      this.maxLength = prop['max-length'] as number;
    }
    ...
    // Call the super method
    super.update(props, events);
  }

  override measure(width: number, widthMode: number, height: number, heightMode: number): [number, number, number] {
    let res = height;
    if (heightMode === MeasureMode.DEFINITE) {
      res = height;
    } else if (heightMode === MeasureMode.AT_MOST) {
      res = Math.min(res, height);
    }
    return [width, res, 0];
  }
}
The corresponding UI inherits and overrides the updateExtraData method of UIBase, which allows it to receive the ExtraBundle passed by ShadowNode after the Layout process.
import { UIBase, EventHandlerArray, LynxUIMethodConstants } from '@lynx/lynx';
...
@Builder
export function buildInput(ui: UIBase) {
  if (ui as LynxExplorerInput) {
    InputView();
  }
}

export class LynxExplorerInput extends UIBase {
  readonly builder: WrappedBuilder<[UIBase]> = wrapBuilder<[UIBase]>(buildInput);

override updateExtraData(data: Object): void {
...
}
}
#Handle Event Binding (Optional)
In some scenarios, the front-end may need to respond to events from custom elements. For example, when the user types in the input box, the front-end might need to capture and process the input data.
Here is an example of how to send a text input event from the <explorer-input> element to the front-end and how the front-end listens for the event.
#Client-Side Event Sending
The client listens to text input callbacks from the native view, and when the text changes, it uses sendCustomEvent(name: string, params: Object, paramName?: string) method of UIBase to send the event to the front-end for handling.
@ComponentV2
struct InputView {
  @Param @Require inputParams: InputParams;

  build() {
    Stack() {
      TextInput({
        controller: this.inputParams.ui.controller,
        text: this.inputParams.inputText,
        placeholder: this.inputParams.placeholder
      })
      .id(this.inputParams.ui.sign.toString())
      .style(TextContentStyle.DEFAULT)
      .focusable(true)
      .onChange((value: string) => {
        // update input text
        this.inputParams.inputText = value;
        this.inputParams.ui.sendCustomEvent('input', {
          value: value,
          cursor: this.inputParams.ui.controller.getCaretOffset()
            .index,
          compositing: false
        } as InputEvent, 'detail');
      })
    }
    .width('100%')
    .height('100%')
  }
}

export class LynxExplorerInput extends UIBase {
  controller: TextInputController = new TextInputController();
  inputParams: InputParams = new InputParams(this)
  focused: boolean = false;
  readonly builder: WrappedBuilder<[UIBase]> = wrapBuilder<[UIBase]>(buildInput);

  update(prop: Record<string, Object>, events?: EventHandlerArray[]): void {
    ...
  }

  layout(x: number, y: number, width: number, height: number, paddingLeft: number,
    paddingTop: number, paddingRight: number, paddingBottom: number, marginLeft: number, marginTop: number,
    marginRight: number, marginBottom: number, sticky?: number[]): void {
   ...
 }
}
#Front-End DSL Event Binding
On the front-end, bind the corresponding input event to listen for and handle the text input data sent by the client.
const handleInput = (e) => {
  const currentValue = e.detail.value.trim();
  setInputValue(currentValue);
};

<explorer-input
  className="input-box"
  style={{ width: '100px', height: '100px' }}
  bindinput={handleInput}
  value={inputValue}
/>;Note: The front-end DSL uses
bindxxxfor event binding, such asbindinputto bind theinputevent.
#Support Direct Element Manipulation (Optional)
In some cases, the front-end may need to directly manipulate custom elements via imperative APIs. You can make elements support such operations with LYNX_UI_METHOD.
#Front-End Call Example
The following code shows how to use SelectorQuery to call the focus method and focus the <explorer-input> element:
lynx
  .createSelectorQuery()
  .select('#input-id')
  .invoke({
    method: 'focus',
    params: {},
    success: function (res) {
      console.log('lynx', 'request focus success');
    },
    fail: function (res: { code: number; data: any }) {
      console.log('lynx', 'request focus fail');
    },
  })
.exec();#Client-Side Implementation
On the client side, you need to override the invokeMethod of UIBase to add a focus method to the custom element to handle front-end call.
export class LynxExplorerInput extends UIBase {
  controller: TextInputController = new TextInputController();
  inputParams: InputParams = new InputParams(this);
  focused: boolean = false;
  readonly builder: WrappedBuilder<[UIBase]> =
    wrapBuilder<[UIBase]>(buildInput);

  focus(callback: (code: number, res: Object) => void) {
    focusControl.requestFocus(this.sign.toString());
    this.focused = true;
    this.setFocusedUI();
    callback(LynxUIMethodConstants.SUCCESS, new Object());
  }

  override invokeMethod(
    method: string,
    params: Object,
    callback: (code: number, res: Object) => void,
  ): boolean {
    switch (method) {
      case 'focus':
        this.focus(callback);
        break;
      default:
        return false;
    }
    return true;
  }
}#Method Callback Return Values
When implementing the focus method, component developers need to return a status code to the frontend to indicate whether the operation was successful. For instance, the frontend call might fail, in which case an appropriate error status should be returned so that the frontend can handle it in the fail callback.
Lynx Engine defines several common error codes, and developers can return the appropriate status code in the method callback:
enum LynxUIMethodErrorCode {
  kUIMethodSuccess = 0, // Succeeded
  kUIMethodUnknown, // Unknown error
  kUIMethodNodeNotFound, // Cannot find corresponding element
  kUIMethodMethodNotFound, // No corresponding method on this element
  kUIMethodParamInvalid, // Invalid method parameters
  kUIMethodSelectorNotSupported, // Selector not supported
};
The way to customize elements in the web can directly refer to Web Components
The implementation of custom native elements can be broken down into several steps, including declaring and registering elements, creating native views, handling layout, and using the element in Lynx app code. On Desktops, native elements are implemented with the Lynx C/C++ APIs. Let's take a simple custom input element <explorer-input> as an example.
The extension headers used below, including capi/lynx_view_capi.h, lynx_native_view.h, and lynx/registration.h, ship as the @lynx-js/lynx-library-headers npm package. Add it to your native library project so its include/ directory is on your include path; the CMake generated by create-lynx-library wires this up automatically.
#Declare and Register Elements
#Declare Custom Elements
Put the behavior shared by all Desktops rendering backends in the element header. Platform rendering backends inherit from this class and only implement presentation details.
#pragma once

#include <functional>
#include <string>

#if __has_include(<lynx_extension.h>)
#include <lynx_extension.h>
#elif __has_include(<lynx/extension.h>)
#include <lynx/extension.h>
#endif

#include <lynx_native_view.h>

class ExplorerInputElementView : public lynx::pub::LynxNativeView {
 public:
  explicit ExplorerInputElementView(void* opaque)
      : lynx_view_(static_cast<lynx_view_t*>(opaque)) {}

  void OnPropertiesChanged(const lynx::pub::LynxValue& attrs,
                           const lynx::pub::LynxValue& events) override {
    (void)events;
    if (!attrs.HasProperty("value")) {
      return;
    }
    SetValue(attrs.GetProperty("value").StdString());
  }

  void OnMethodInvoked(
      const char* method,
      const lynx::pub::LynxValue& params,
      std::function<void(int, lynx::pub::LynxValue&&)> callback) override {
    if (method != nullptr && std::string(method) == "setValue") {
      if (!params.HasProperty("value")) {
        callback(kInvalidParameter,
                 lynx::pub::LynxValue(
                     lynx::pub::LynxValue::kCreateAsNullTag));
        return;
      }
      SetValue(params.GetProperty("value").StdString());
      callback(kSuccess,
               lynx::pub::LynxValue(
                   lynx::pub::LynxValue::kCreateAsNullTag));
      return;
    }

    callback(kMethodNotFound,
             lynx::pub::LynxValue(lynx::pub::LynxValue::kCreateAsNullTag));
  }

 protected:
  lynx_view_t* lynx_view() const { return lynx_view_; }
  const std::string& value() const { return value_; }

  virtual void OnValueChanged(const std::string& value) { (void)value; }

 private:
  void SetValue(const std::string& value) {
    value_ = value;
    OnValueChanged(value_);
  }

  lynx_view_t* lynx_view_ = nullptr;
  std::string value_ = "explorer-input";
};#Register Custom Element
Desktops native elements are registered with LYNX_REGISTER_ELEMENT. This performs process-wide static registration: once the native library is linked into the host app or loaded by the host process, the static registration makes the tag available as a Lynx element in the Lynx runtime.
When the last argument is nullptr, the creator receives the current lynx_view_t* as opaque, which can be used to resolve the platform host window:
#include <lynx/registration.h>

#include "shared/elements/ExplorerInputElement.h"

lynx_native_view_t* CreateExplorerInputElementNativeView(void* opaque);

LYNX_REGISTER_ELEMENT(
    "ExplorerInputElementModule",
    "explorer-input",
    CreateExplorerInputElementNativeView,
    false,
    nullptr)
Where "explorer-input" corresponds to the tag name in the front-end DSL. When Lynx Engine parses this tag, it will look for the registered native element and create an instance.
#Create Native View Instance
Each custom element is created as a LynxNativeView. The declaration, property handling, method handling, and static registration above are shared by all Desktops implementations. The rendering backend decides what the view owns after creation: a platform control for Native UI, or a Lynx-managed Surface for Texture.
The examples below use the same registered creator name for two alternative rendering backend implementations. Choose one rendering backend in your library build so CreateExplorerInputElementNativeView resolves to one implementation.
#Choose a Composition Backend
Native UI and Texture elements have different composition behavior:
| Backend | Presentation | Composition behavior |
|---|---|---|
| Native UI | A platform control, such as an NSView or child HWND | Preserves native input, IME, and accessibility behavior, but regular Lynx CSS z-index cannot reliably interleave Lynx-rendered content with the control. |
| Texture | An IOSurface or D3D shared texture acquired and presented through Lynx | Participates in the Lynx render tree, including clipping, transforms, and ordinary Lynx stacking, but the element must forward input and IME behavior. |
For Native UI elements, resolve the renderer host from the current lynx_view_t with lynx_view_get_native_window(...), then attach the platform control as its child. This gives the control the correct window ownership in multi-window applications and keeps it inside the native subtree that Lynx overlay slices can cover. Top-level platform surfaces require separate host integration and are outside this composition model.
The Native UI rendering backend attaches a platform control and updates its layout frame in OnLayoutChanged. For <explorer-input>, the implementation attaches a minimal input control.
Platform views or child windows attached by the Native UI backend are placed above Clay's main rendering surface, so regular Lynx z-index cannot reliably cover them. Keep the platform control inside the renderer host returned for its lynx_view_t, and place overlapping Lynx content inside a <cover-view>. If the UI requires arbitrary clipping, transforms, or interleaving with regular Lynx content, use the Texture backend instead.
On macOS, attach an NSTextField:
#import <Cocoa/Cocoa.h>

#include "shared/elements/ExplorerInputElement.h"

namespace {

using MainThreadBlock = void (^)(void);

void RunOnMainThreadSync(MainThreadBlock block) {
  if ([NSThread isMainThread]) {
    block();
    return;
  }
  dispatch_sync(dispatch_get_main_queue(), block);
}

NSString* NSStringFromStdString(const std::string& value) {
  NSString* result = [NSString stringWithUTF8String:value.c_str()];
  return result != nil ? result : @"";
}

}  // namespace

class ExplorerInputElementNativeUIView : public ExplorerInputElementView {
 public:
  explicit ExplorerInputElementNativeUIView(void* opaque)
      : ExplorerInputElementView(opaque) {
    RunOnMainThreadSync(^{
      input_ = [[NSTextField alloc] initWithFrame:NSZeroRect];
      input_.placeholderString = @"explorer-input";
      input_.stringValue = NSStringFromStdString(value());
      input_.editable = YES;
      input_.selectable = YES;
      input_.bezeled = YES;
      input_.bezelStyle = NSTextFieldRoundedBezel;
      input_.textColor = [NSColor blackColor];
    });
  }

  ~ExplorerInputElementNativeUIView() override {
    RunOnMainThreadSync(^{
      [input_ removeFromSuperview];
      input_ = nil;
    });
  }

  bool IsSurfaceEnabled() override { return false; }

  void OnDetach() override {
    RunOnMainThreadSync(^{
      [input_ removeFromSuperview];
    });
  }

  void OnLayoutChanged(
      float left,
      float top,
      float width,
      float height,
      float pixel_ratio) override {
    (void)pixel_ratio;
    RunOnMainThreadSync(^{
      auto* lynx_parent =
          (__bridge NSView*)lynx_view_get_native_window(lynx_view());
      if (lynx_parent == nil || input_ == nil) {
        return;
      }

      // Keep the control inside this LynxView's renderer subtree. Clay owns a
      // sibling overlay host above that subtree for slices such as
      // <cover-view>, so the extension must not discover or reorder the
      // private overlay view itself.
      NSView* parent = lynx_parent;
      if (input_.superview != parent) {
        [input_ removeFromSuperview];
        [parent addSubview:input_];
      }

      const NSRect frame_in_lynx = NSMakeRect(left, top, width, height);
      input_.frame = [lynx_parent convertRect:frame_in_lynx toView:parent];
    });
  }

 private:
  void OnValueChanged(const std::string& value) override {
    std::string text = value;
    RunOnMainThreadSync(^{
      if (input_ != nil) {
        input_.stringValue = NSStringFromStdString(text);
      }
    });
  }

  NSTextField* input_ = nil;
};

lynx_native_view_t* CreateExplorerInputElementNativeView(void* opaque) {
  auto* view = new ExplorerInputElementNativeUIView(opaque);
  return view->native_view();
}
On Windows, attach an EDIT control:
#include <algorithm>
#include <string>

#ifndef WIN32_LEAN_AND_MEAN
#define WIN32_LEAN_AND_MEAN
#endif
#ifndef NOMINMAX
#define NOMINMAX
#endif

#include <windows.h>

#include "shared/elements/ExplorerInputElement.h"

namespace {

constexpr wchar_t kHostClassName[] = L"ExplorerInputElementNativeUIHost";

int Scale(float value, float pixel_ratio) {
  const float ratio = pixel_ratio > 0 ? pixel_ratio : 1;
  return static_cast<int>(value * ratio);
}

std::wstring Utf8ToWide(const char* value) {
  if (value == nullptr || value[0] == '\0') {
    return L"";
  }
  const int size = MultiByteToWideChar(CP_UTF8, 0, value, -1, nullptr, 0);
  if (size <= 0) {
    return L"";
  }
  std::wstring result(static_cast<size_t>(size), L'\0');
  const int converted =
      MultiByteToWideChar(CP_UTF8, 0, value, -1, result.data(), size);
  if (converted <= 0) {
    return L"";
  }
  result.resize(static_cast<size_t>(converted - 1));
  return result;
}

bool EnsureHostClassRegistered() {
  static bool registered = false;
  if (registered) {
    return true;
  }

  WNDCLASSEXW window_class{};
  window_class.cbSize = sizeof(window_class);
  window_class.lpfnWndProc = DefWindowProcW;
  window_class.hInstance = GetModuleHandleW(nullptr);
  window_class.hCursor = LoadCursor(nullptr, IDC_ARROW);
  window_class.hbrBackground = reinterpret_cast<HBRUSH>(COLOR_WINDOW + 1);
  window_class.lpszClassName = kHostClassName;
  registered = RegisterClassExW(&window_class) != 0 ||
      GetLastError() == ERROR_CLASS_ALREADY_EXISTS;
  return registered;
}

}  // namespace

class ExplorerInputElementNativeUIView : public ExplorerInputElementView {
 public:
  explicit ExplorerInputElementNativeUIView(void* opaque)
      : ExplorerInputElementView(opaque) {}

  ~ExplorerInputElementNativeUIView() override {
    if (input_ != nullptr) {
      DestroyWindow(input_);
      input_ = nullptr;
    }
    if (host_ != nullptr) {
      DestroyWindow(host_);
      host_ = nullptr;
    }
  }

  bool IsSurfaceEnabled() override { return false; }

  void OnDetach() override {
    if (host_ != nullptr) {
      ShowWindow(host_, SW_HIDE);
    }
  }

  void OnLayoutChanged(
      float left,
      float top,
      float width,
      float height,
      float pixel_ratio) override {
    HWND parent = static_cast<HWND>(
        lynx_view_get_native_window(lynx_view()));
    if (parent == nullptr || !EnsureHostClassRegistered()) {
      return;
    }

    const int x = Scale(left, pixel_ratio);
    const int y = Scale(top, pixel_ratio);
    const int w = std::max(1, Scale(width, pixel_ratio));
    const int h = std::max(1, Scale(height, pixel_ratio));
    if (host_ == nullptr) {
      host_ = CreateWindowExW(
          0,
          kHostClassName,
          L"",
          WS_CHILD | WS_CLIPCHILDREN | WS_CLIPSIBLINGS,
          x,
          y,
          w,
          h,
          parent,
          nullptr,
          GetModuleHandleW(nullptr),
          nullptr);
    }

    if (host_ == nullptr) {
      return;
    }

    if (input_ == nullptr) {
      const std::wstring text = Utf8ToWide(value().c_str());
      input_ = CreateWindowExW(
          0,
          L"EDIT",
          text.c_str(),
          WS_CHILD | WS_VISIBLE | WS_TABSTOP | ES_AUTOHSCROLL,
          0,
          0,
          w,
          h,
          host_,
          nullptr,
          GetModuleHandleW(nullptr),
          nullptr);
    }

    if (input_ == nullptr) {
      return;
    }

    SetWindowPos(
        host_,
        // Keep native UI below child overlay windows created for <cover-view>.
        HWND_BOTTOM,
        x,
        y,
        w,
        h,
        SWP_SHOWWINDOW | SWP_NOACTIVATE);
    SetWindowPos(input_, HWND_TOP, 0, 0, w, h, SWP_SHOWWINDOW);
  }

 private:
  void OnValueChanged(const std::string& value) override {
    if (input_ == nullptr) {
      return;
    }
    const std::wstring text = Utf8ToWide(value.c_str());
    SetWindowTextW(input_, text.c_str());
  }

  HWND host_ = nullptr;
  HWND input_ = nullptr;
};

lynx_native_view_t* CreateExplorerInputElementNativeView(void* opaque) {
  auto* view = new ExplorerInputElementNativeUIView(opaque);
  return view->native_view();
}
Implementing a text input as a texture element is possible, but it requires text editing, cursor, selection, and IME handling. The example below keeps the texture path focused: it draws a native texture and reuses the shared value property and setValue UI method from ExplorerInputElementView.
The shared Texture rendering backend is cross-platform. It enables the Surface rendering path, tracks layout size, and calls DrawExplorerInputElementTextureSurface, which each platform rendering backend implements.
#include <algorithm>

#include "shared/elements/ExplorerInputElement.h"

bool DrawExplorerInputElementTextureSurface(
    lynx_surface_handle_t* handle,
    int width_px,
    int height_px,
    const char* message);

namespace {

constexpr float kYFlipTransform[3 * 3] = {1, 0, 0, 0, -1, 1, 0, 0, 1};

class ExplorerInputElementTextureView : public ExplorerInputElementView {
 public:
  explicit ExplorerInputElementTextureView(void* opaque)
      : ExplorerInputElementView(opaque) {}

  bool IsSurfaceEnabled() override { return true; }

  lynx_surface_buffer_mode_t SurfaceBufferMode() override {
    return kTripleBuffer;
  }

  void OnAttach() override {
    attached_ = true;
    Render();
  }

  void OnDetach() override { attached_ = false; }

  void OnLayoutChanged(
      float left,
      float top,
      float width,
      float height,
      float pixel_ratio) override {
    (void)left;
    (void)top;
    const float ratio = pixel_ratio > 0 ? pixel_ratio : 1;
    width_px_ = std::max(1, static_cast<int>(width * ratio + 0.5f));
    height_px_ = std::max(1, static_cast<int>(height * ratio + 0.5f));
    Render();
  }

 private:
  void OnValueChanged(const std::string& value) override {
    (void)value;
    Render();
  }

  void Render() {
    if (!attached_ || width_px_ <= 0 || height_px_ <= 0) {
      return;
    }

    lynx_surface_handle_t* surface = AcquireSurface(width_px_, height_px_);
    if (surface == nullptr) {
      return;
    }

    if (DrawExplorerInputElementTextureSurface(
            surface,
            width_px_,
            height_px_,
            value().c_str())) {
      PresentSurface(width_px_, height_px_, kYFlipTransform, surface);
    }
  }

  bool attached_ = false;
  int width_px_ = 0;
  int height_px_ = 0;
};

}  // namespace

lynx_native_view_t* CreateExplorerInputElementNativeView(void* opaque) {
  auto* view = new ExplorerInputElementTextureView(opaque);
  return view->native_view();
}On macOS, draw into the IOSurface-backed surface. This demo maps the received value to colored bars so the texture visibly changes after setValue:
#include <lynx_extension.h>

#import <CoreGraphics/CoreGraphics.h>
#import <IOSurface/IOSurface.h>

#include <algorithm>
#include <cstring>

bool DrawExplorerInputElementTextureSurface(
    lynx_surface_handle_t* handle,
    int width_px,
    int height_px,
    const char* message) {
  if (handle == nullptr || width_px <= 0 || height_px <= 0) {
    return false;
  }

  IOSurfaceRef surface = reinterpret_cast<IOSurfaceRef>(handle);
  uint32_t seed = 0;
  if (IOSurfaceLock(surface, 0, &seed) != kIOReturnSuccess) {
    return false;
  }

  void* base = IOSurfaceGetBaseAddress(surface);
  const size_t bytes_per_row = IOSurfaceGetBytesPerRow(surface);
  CGColorSpaceRef color_space = CGColorSpaceCreateDeviceRGB();
  CGContextRef context = CGBitmapContextCreate(
      base,
      width_px,
      height_px,
      8,
      bytes_per_row,
      color_space,
      kCGBitmapByteOrder32Little | kCGImageAlphaPremultipliedFirst);
  CGColorSpaceRelease(color_space);

  if (context == nullptr) {
    IOSurfaceUnlock(surface, 0, &seed);
    return false;
  }

  CGContextSetRGBFillColor(context, 1, 1, 1, 1);
  CGContextFillRect(context, CGRectMake(0, 0, width_px, height_px));

  const char* label = message != nullptr && message[0] != '\0'
                          ? message
                          : "explorer-input";
  const size_t count = std::min<size_t>(std::strlen(label), 12);
  for (size_t i = 0; i < count; ++i) {
    const unsigned char value = static_cast<unsigned char>(label[i]);
    CGContextSetRGBFillColor(
        context,
        ((value * 37) % 255) / 255.0,
        ((value * 67) % 255) / 255.0,
        ((value * 97) % 255) / 255.0,
        1.0);
    CGContextFillRect(
        context,
        CGRectMake(8 + i * 14, 8, 10, std::max(1, height_px - 16)));
  }

  CGContextRelease(context);
  IOSurfaceUnlock(surface, 0, &seed);
  return true;
}
On Windows, the surface handle is a D3D shared handle. Import it as an ID3D11Texture2D, update its pixels, and let ExplorerInputElementTextureView present it back to Lynx:
#include <lynx_extension.h>

#ifndef WIN32_LEAN_AND_MEAN
#define WIN32_LEAN_AND_MEAN
#endif
#ifndef NOMINMAX
#define NOMINMAX
#endif

#include <d3d11.h>
#include <windows.h>
#include <wrl/client.h>

#include <algorithm>
#include <cstdint>
#include <cstring>
#include <vector>

using Microsoft::WRL::ComPtr;

namespace {

std::vector<std::uint32_t> DrawMessagePixels(
    int width_px,
    int height_px,
    const char* message) {
  std::vector<std::uint32_t> pixels(
      static_cast<size_t>(width_px) * height_px,
      0xffffffff);

  const char* label = message != nullptr && message[0] != '\0'
                          ? message
                          : "explorer-input";
  const size_t count = std::min<size_t>(std::strlen(label), 12);
  for (size_t i = 0; i < count; ++i) {
    const unsigned char value = static_cast<unsigned char>(label[i]);
    const std::uint32_t color =
        0xff000000 |
        (((value * 37) % 255) << 16) |
        (((value * 67) % 255) << 8) |
        ((value * 97) % 255);
    const int x0 = 8 + static_cast<int>(i) * 14;
    const int x1 = std::min(width_px, x0 + 10);
    for (int y = 8; y < std::max(8, height_px - 8); ++y) {
      for (int x = x0; x < x1; ++x) {
        pixels[static_cast<size_t>(y) * width_px + x] = color;
      }
    }
  }
  return pixels;
}

}  // namespace

bool DrawExplorerInputElementTextureSurface(
    lynx_surface_handle_t* handle,
    int width_px,
    int height_px,
    const char* message) {
  if (handle == nullptr || width_px <= 0 || height_px <= 0) {
    return false;
  }

  ComPtr<ID3D11Device> device;
  ComPtr<ID3D11DeviceContext> context;
  D3D_FEATURE_LEVEL feature_level = D3D_FEATURE_LEVEL_11_0;
  auto hr = D3D11CreateDevice(
      nullptr,
      D3D_DRIVER_TYPE_HARDWARE,
      nullptr,
      0,
      nullptr,
      0,
      D3D11_SDK_VERSION,
      device.GetAddressOf(),
      &feature_level,
      context.GetAddressOf());
  if (FAILED(hr)) {
    return false;
  }

  ComPtr<ID3D11Texture2D> texture;
  hr = device->OpenSharedResource(
      reinterpret_cast<HANDLE>(handle),
      IID_PPV_ARGS(texture.GetAddressOf()));
  if (FAILED(hr) || !texture) {
    return false;
  }

  const auto pixels = DrawMessagePixels(width_px, height_px, message);
  context->UpdateSubresource(
      texture.Get(),
      0,
      nullptr,
      pixels.data(),
      static_cast<UINT>(width_px * sizeof(std::uint32_t)),
      0);
  context->Flush();
  return true;
}
Production code should also match the active Windows graphics backend and handle synchronization primitives exposed by the imported texture.
#Build and Use the Element
After the native code is ready, compile it into the host app or into a Desktops native library that the host can load. If your package contains both Native UI and Texture rendering backend implementations, choose one in your build system so the registered creator resolves to one implementation.
Use the registered Lynx element after the library has been linked or loaded:
<explorer-input style={{ width: '100px', height: '100px' }} value="hello" />#Handle Front-End Style and Property Updates
Override OnPropertiesChanged to receive property and event information from the front end. The attrs value contains the latest properties, and events contains the event bindings declared on the element.
void OnPropertiesChanged(const lynx::pub::LynxValue& attrs,
                         const lynx::pub::LynxValue& events) override {
  (void)events;
  if (!attrs.HasProperty("value")) {
    return;
  }
  SetValue(attrs.GetProperty("value").StdString());
}#Handle Layout Information (Optional)
#Handle Lynx Engine Layout Results
Lynx Engine sends the element's layout result through OnLayoutChanged. Use this callback to move or resize the platform view, or to resize the texture surface before rendering.
void OnLayoutChanged(
    float left,
    float top,
    float width,
    float height,
    float pixel_ratio) override {
  // Convert the Lynx layout result to platform coordinates and update the
  // native view frame or texture size.
}#Handle Event Binding (Optional)
In some scenarios, the front end may need to respond to events from custom elements. For example, when the user types in the input box, the native element can trigger an input event.
#Client-Side Event Sending
Use TriggerEvent to send a custom event from the native element to the Lynx page.
void EmitInputEvent(const std::string& value) {
  lynx::pub::LynxValue detail(lynx::pub::LynxValue::kCreateAsMapTag);
  detail.SetProperty("value", lynx::pub::LynxValue(value));
  TriggerEvent("input", std::move(detail));
}#Front-End DSL Event Binding
On the front end, bind the corresponding event to listen for and handle the data sent by the native element.
const handleInput = (e) => {
  const currentValue = e.detail.value.trim();
  setInputValue(currentValue);
};

<explorer-input
  style={{ width: '100px', height: '100px' }}
  bindinput={handleInput}
  value={inputValue}
/>;Note: The front-end DSL uses
bindxxxfor event binding, such asbindinputto bind theinputevent.
#Support Direct Element Manipulation (Optional)
In some cases, the front end may need to directly manipulate custom elements via imperative APIs. Implement OnMethodInvoked to handle these calls on Desktop.
#Front-End Call Example
The following code shows how to use SelectorQuery to call the setValue method on the <explorer-input> element:
lynx
  .createSelectorQuery()
  .select('#input-id')
  .invoke({
    method: 'setValue',
    params: { value: 'updated value' },
    success: function (res) {
      console.log('lynx', 'set value success');
    },
    fail: function (res) {
      console.log('lynx', 'set value fail');
    },
  })
.exec();#Client-Side Implementation
On the client side, override OnMethodInvoked to handle the method call and invoke the callback with a status code.
void OnMethodInvoked(
    const char* method,
    const lynx::pub::LynxValue& params,
    std::function<void(int, lynx::pub::LynxValue&&)> callback) override {
  if (method != nullptr && std::string(method) == "setValue") {
    SetValue(params.GetProperty("value").StdString());
    callback(kSuccess,
             lynx::pub::LynxValue(lynx::pub::LynxValue::kCreateAsNullTag));
    return;
  }

  callback(kMethodNotFound,
           lynx::pub::LynxValue(lynx::pub::LynxValue::kCreateAsNullTag));
}#Method Callback Return Values
When implementing a method, return a status code to the front end so it can handle success or failure in the corresponding callback.
LynxNativeView defines several common status codes:
static constexpr int kSuccess = 0;
static constexpr int kUnknown = 1;
static constexpr int kMethodNotFound = 3;
static constexpr int kInvalidParameter = 4;
static constexpr int kInvalidStateError = 7;#Use your Native Element
Once you have completed the development of a custom element, you can use it just like a built-in element. Below is a simple example of using an <explorer-input> element: