

#Integrate with Existing Apps
Use Lynx as a high-performance, cross-platform UI rendering engine you can embed anywhere inside your existing application. This Brownfield approach offers the maximum flexibility, supports all platforms, lets you adopt Lynx incrementally without rewriting your app, and is commonly used for large-scale applications in production.
#Integrate Lynx with Existing Apps (iOS)
- This article assumes that you are familiar with the basic concepts of native iOS application development.
- You can refer to the project: integrating-lynx-demo-projects for all the code mentioned below.
#1. Dependency configuration
Using Cocoapods can easily integrate Lynx into your application
- Cocoapods: >= 1.11.3
- Ruby: >= 2.6.10
#Configuring Deps
- Lynx
The core capabilities of Lynx Engine include basic capabilities such as parsing Bundle, style parsing, layout, and rendering views
Get the latest version of Lynx from Cocoapods. Then add Lynx to your Podfile:
Lynx publishes its pods to the lynx-family Specs repository, so the Podfile declares that source as well. PrimJS and third-party pods still come from the CocoaPods CDN.
source 'https://cdn.cocoapods.org/'
source 'https://github.com/lynx-family/Specs.git'

platform :ios, '10.0'

target 'YourTarget' do
  pod 'Lynx', '4.1.0', :subspecs => [
    'Framework',
  ]

  pod 'PrimJS', '4.1.1', :subspecs => ['quickjs', 'napi']
end- Lynx Service
Lynx Service includes LynxImageService, LynxLogService, etc. It aims to provide the ability to strongly correlate some host App features, allowing the App to inject custom Services at runtime, or use the default implementation provided by the official. For example, LynxImageService is implemented using the SDWebImage image library by default. Apps that do not integrate SDWebImage components can rely on other image libraries to implement Image Service.
Lynx provides standard native Image, Log, and Http service capabilities, which can be quickly accessed and used by the access party;
Get the latest version of Lynx Service from Cocoapods. Then add Lynx Service to your Podfile:
source 'https://cdn.cocoapods.org/'
source 'https://github.com/lynx-family/Specs.git'

platform :ios, '10.0'

target 'YourTarget' do
  pod 'Lynx', '4.1.0', :subspecs => [
    'Framework',
  ]

  pod 'PrimJS', '4.1.1', :subspecs => ['quickjs', 'napi']

  # integrate image-service, log-service, and http-service
  pod 'LynxService', '4.1.0', :subspecs => [
      'Image',
      'Log',
      'Http',
  ]

  # ImageService dependencies:
  pod 'SDWebImage','5.15.5'
  pod 'SDWebImageWebPCoder', '0.11.0'
end- More Elements
XElement is an extend native elements library maintained by the Lynx team. It provides richer component capabilities, enabling faster adoption of Lynx in production environments and enhancing the vibrancy of the Lynx ecosystem.
source 'https://cdn.cocoapods.org/'
source 'https://github.com/lynx-family/Specs.git'

platform :ios, '10.0'

target 'YourTarget' do
  pod 'Lynx', '4.1.0', :subspecs => [
    'Framework',
  ]

  pod 'PrimJS', '4.1.1', :subspecs => ['quickjs', 'napi']

  # integrate image-service, log-service, and http-service
  pod 'LynxService', '4.1.0', :subspecs => [
      'Image',
      'Log',
      'Http',
  ]

  # ImageService
  pod 'SDWebImage','5.15.5'
  pod 'SDWebImageWebPCoder', '0.11.0'

  pod 'XElement', '4.1.0'
end#Install Dependencies
Run pod install to install dependencies, then open your Xcode project. Additionally, make sure to disable the Sandbox Scripting capability.
In order to disable the Sandbox scripting, in Xcode click on your app, then on build settings. Filter for script and set the User Script Sandboxing to NO.
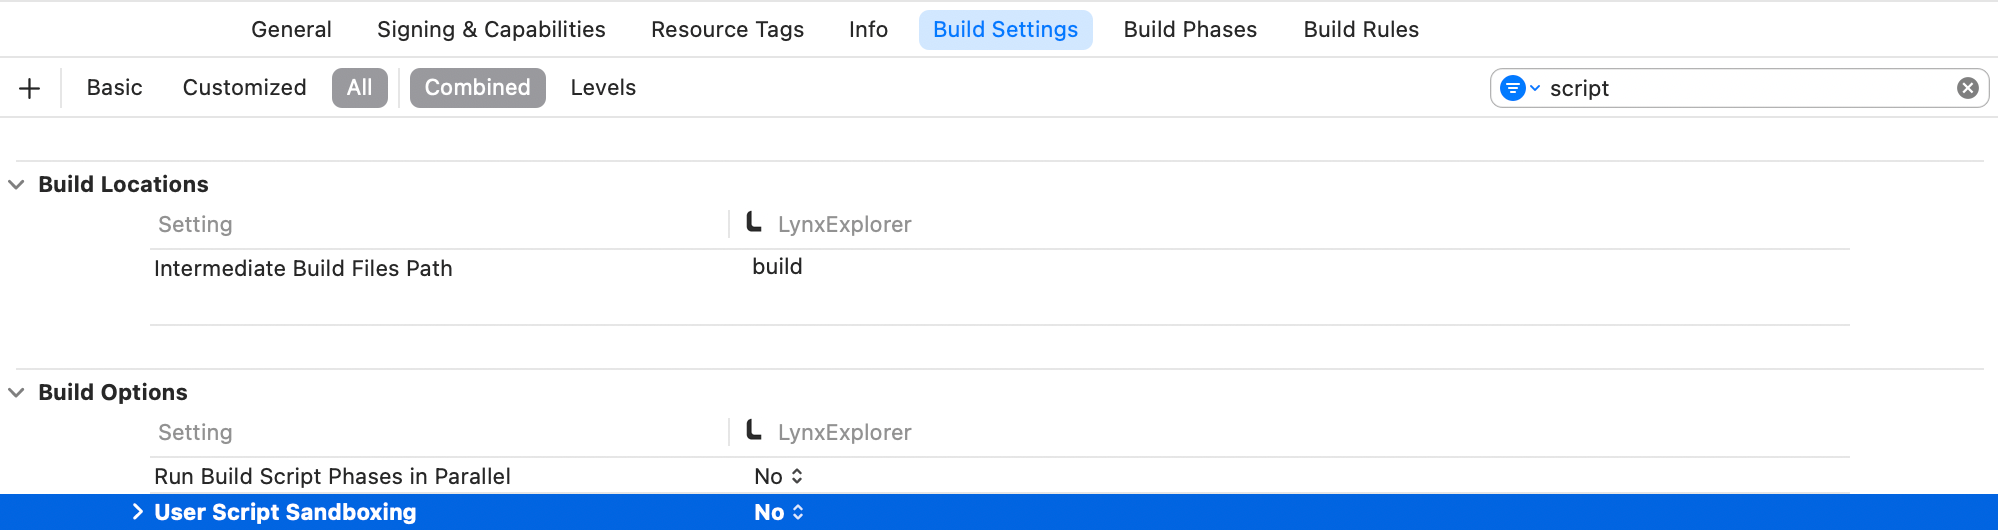
If you build with Xcode 26.x and the Lynx pod fails because warnings are treated as errors, add a post_install hook to your Podfile to demote the affected warnings:
post_install do |installer|
  installer.pods_project.targets.each do |target|
    target.build_configurations.each do |config|
      config.build_settings['GCC_TREAT_WARNINGS_AS_ERRORS'] = 'NO'

      disable = ['-Wno-error', '-Wno-c99-designator',
                 '-Wno-deprecated-declarations', '-Wno-deprecated-implementations']
      ['OTHER_CPLUSPLUSFLAGS', 'OTHER_CFLAGS'].each do |key|
        flags = config.build_settings[key] || ['$(inherited)']
        flags = [flags] unless flags.is_a?(Array)
        config.build_settings[key] = flags + disable
      end
    end
  end
end#2. Lynx Environment Initialization
#LynxEnv Initialization
LynxEnv provides a global initialization interface for the Lynx Engine. Please ensure that the initialization of LynxEnv occurs before any interface call of the Lynx Engine.
For example, it can be initialized in AppDelegate
#import <Lynx/LynxEnv.h>
#import <Lynx/LynxView.h>

@implementation AppDelegate
- (BOOL)application:(UIApplication *)application didFinishLaunchingWithOptions:(NSDictionary *)launchOptions {
  [LynxEnv sharedInstance];
  return YES;
}import UIKit
@UIApplicationMain
class AppDelegate: UIResponder, UIApplicationDelegate {
var window: UIWindow?
func application(_ application: UIApplication, didFinishLaunchingWithOptions launchOptions: [UIApplication.LaunchOptionsKey: Any]?) -> Bool {
LynxEnv.sharedInstance()
return true
}
}
#3. Render LynxView
LynxView is the basic rendering unit provided by Lynx Engine. LynxView is an implementation inherited from iOS native UIView. You can quickly construct a LynxView and add it to the ViewController.
#Create Bundle Loader
Lynx Engine itself does not have the ability to load resources, so it is necessary to initialize LynxEnv, or when constructing LynxView to pass in the specific implementation of the LynxTemplateProvider protocol. Lynx will use the injected resource loader to obtain the Bundle content
You can use various methods to obtain the contents of the Bundle. Here, we choose to embed the contents of the Bundle within the application.
- First, please either generate the Bundle file from the Quick Start phase or download the file below to your local machine, and then follow these steps to embed the file:
Steps to embed files:
- In the target settings of the project, select the target;
- Select the Build Phases tab;
- In the Copy Bundle Resources section, click the add button (+) to add the file;
- Impl Bundle Loader
#import <Foundation/Foundation.h>
#import <Lynx/LynxTemplateProvider.h>

NS_ASSUME_NONNULL_BEGIN

@interface DemoLynxProvider : NSObject <LynxTemplateProvider>

@end

NS_ASSUME_NONNULL_ENDUse Bridging Header to import the required Lynx header files if you are using a Swift project, since Lynx is a project built with Objective-C.
#import <Lynx/LynxConfig.h>
#import <Lynx/LynxEnv.h>
#import <Lynx/LynxTemplateProvider.h>
#import <Lynx/LynxView.h>#import <Foundation/Foundation.h>
#import "DemoLynxProvider.h"
@implementation DemoLynxProvider
- (void)loadTemplateWithUrl:(NSString*)url onComplete:(LynxTemplateLoadBlock)callback {
NSString *filePath = [[NSBundle mainBundle] pathForResource:url ofType:@"bundle"];
if (filePath) {
NSError *error;
NSData *data = [NSData dataWithContentsOfFile:filePath options:0 error:&error];
if (error) {
NSLog(@"Error reading file: %@", error.localizedDescription);
callback(nil, error);
} else {
callback(data, nil);
}
} else {
NSError *urlError = [NSError errorWithDomain:@"com.lynx"
code:400
userInfo:@{NSLocalizedDescriptionKey : @"Invalid URL."}];
callback(nil, urlError);
}
}
@endimport Foundation
class DemoLynxProvider: NSObject, LynxTemplateProvider {
func loadTemplate(withUrl url: String!, onComplete callback: LynxTemplateLoadBlock!) {
if let filePath = Bundle.main.path(forResource: url, ofType: "bundle") {
do {
let data = try Data(contentsOf: URL(fileURLWithPath: filePath))
callback(data, nil)
} catch {
print("Error reading file: \(error.localizedDescription)")
callback(nil, error)
}
} else {
let urlError = NSError(domain: "com.lynx", code: 400, userInfo: [NSLocalizedDescriptionKey: "Invalid URL."])
callback(nil, urlError)
}
}
}#Construct Basic LynxView
you may construct a basic LynxView as follows:
#import <Lynx/LynxView.h>

#import "ViewController.h"
#import "DemoLynxProvider.h"

@implementation ViewController

- (void)viewDidLoad {
    [super viewDidLoad];
    LynxView *lynxView = [[LynxView alloc] initWithBuilderBlock:^(LynxViewBuilder *builder) {
      builder.config = [[LynxConfig alloc] initWithProvider:[[DemoLynxProvider alloc] init]];
      builder.screenSize = self.view.frame.size;
      builder.fontScale = 1.0;
    }];
    lynxView.preferredLayoutWidth = self.view.frame.size.width;
    lynxView.preferredLayoutHeight = self.view.frame.size.height;
    lynxView.layoutWidthMode = LynxViewSizeModeExact;
    lynxView.layoutHeightMode = LynxViewSizeModeExact;
}
@endimport UIKit
class ViewController: UIViewController {
override func viewDidLoad() {
super.viewDidLoad()
let lynxView = LynxView { builder in
builder.config = LynxConfig(provider: DemoLynxProvider())
builder.screenSize = self.view.frame.size
builder.fontScale = 1.0
}
lynxView.preferredLayoutWidth = self.view.frame.size.width
lynxView.preferredLayoutHeight = self.view.frame.size.height
lynxView.layoutWidthMode = .exact
lynxView.layoutHeightMode = .exact
}
}#Add LynxView To The Window:
and then, adding the LynxView to the window.
#import <Lynx/LynxView.h>

#import "ViewController.h"
#import "DemoLynxProvider.h"

@implementation ViewController

- (void)viewDidLoad {
  [super viewDidLoad];

  // ...

  [self.view addSubview:lynxView];
}

@endimport UIKit
class ViewController: UIViewController {
override func viewDidLoad() {
super.viewDidLoad()
// ...
self.view.addSubview(lynxView)
}
}
#Render View
After completing the above steps, all the work of initializing LynxView have been completed. Call the lynxView.loadTemplateFromURL method to render the corresponding Bundle onto the LynxView.
#import <Lynx/LynxView.h>

#import "ViewController.h"
#import "DemoLynxProvider.h"

@implementation ViewController

- (void)viewDidLoad {
  [super viewDidLoad];

  // ...

  [lynxView loadTemplateFromURL:@"main.lynx" initData:nil];
}

@endimport UIKit
class ViewController: UIViewController {
override func viewDidLoad() {
super.viewDidLoad()
// ...
lynxView.loadTemplate(fromURL: "main.lynx", initData: nil)
}
}
Then you will see the following interface on the screen:
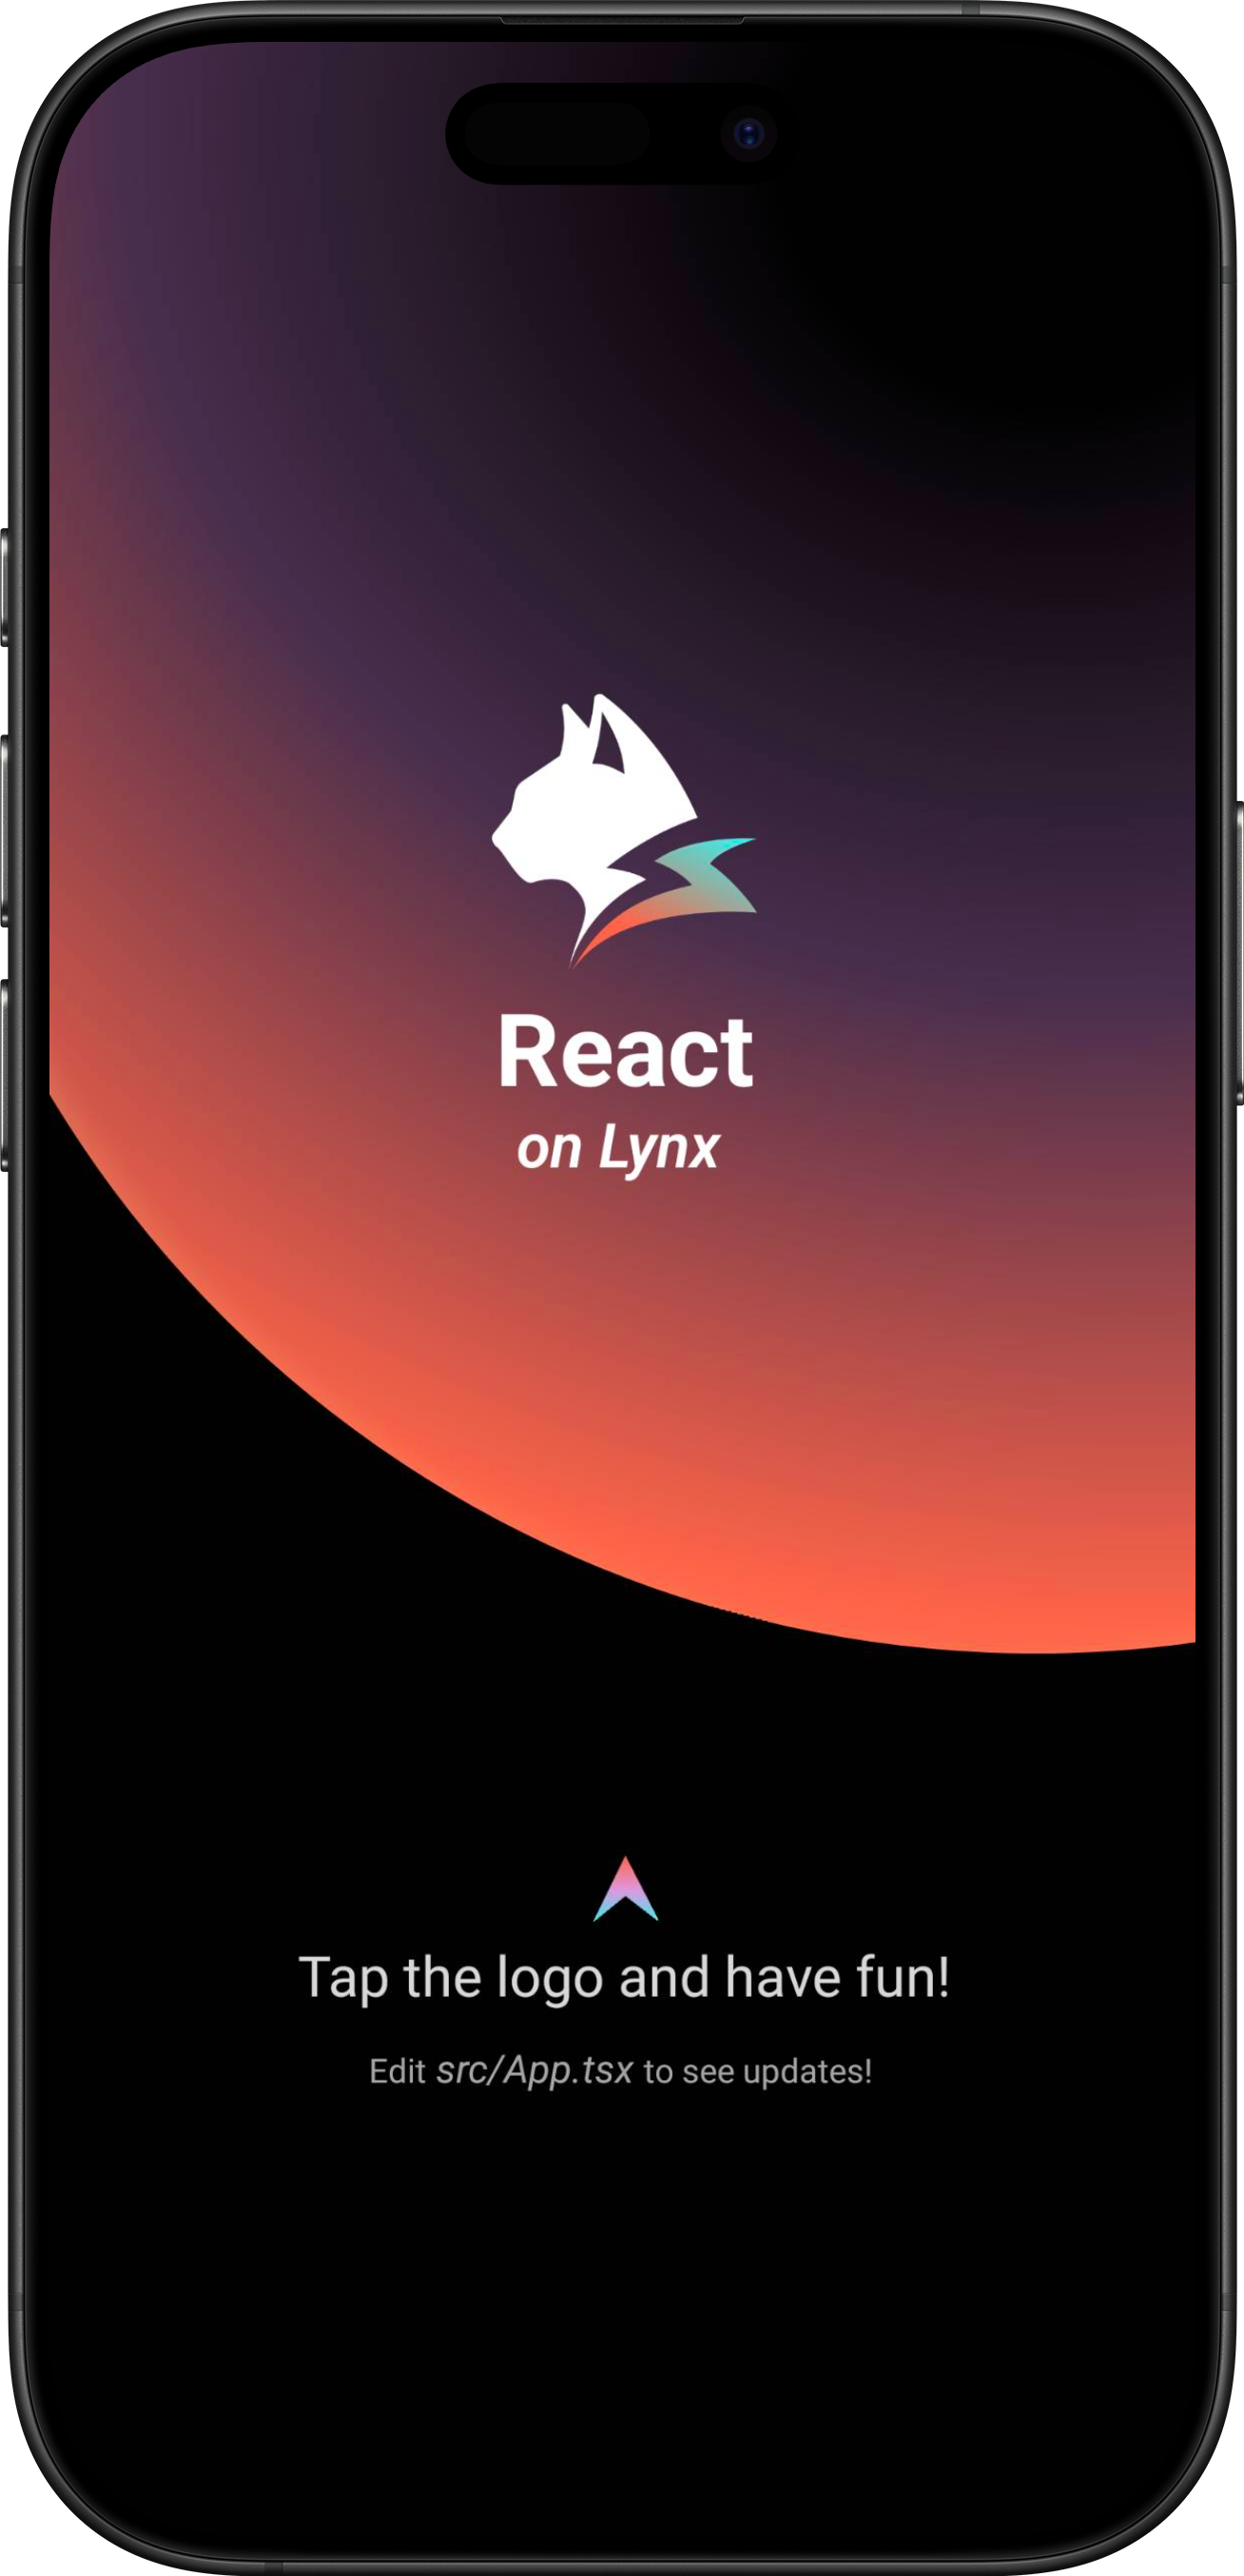
Congratulations, you have now completed all the work of integrating Lynx Engine!
#4. Now what?
At this stage, you have successfully integrated Lynx into your App. Refer to our developing and debugging docs for in-depth insights on working with Lynx.
#Integrate Lynx with Existing Apps (Android)
- This article assumes that you are familiar with the basic concepts of native Android application development.
- You can refer to the project: integrating-lynx-demo-projects for all the code mentioned below.
#1. Dependency configuration
#Configuring Gradle
- Lynx
The core capabilities of Lynx Engine include basic capabilities such as parsing Bundle, style parsing, layout, rendering views and the basic code of the javascript runtime that Lynx pages rely on
dependencies {
    // lynx dependencies
    implementation "org.lynxsdk.lynx:lynx:4.1.0"
    implementation "org.lynxsdk.lynx:lynx-jssdk:4.1.0"
    implementation "org.lynxsdk.lynx:lynx-trace:4.1.0"
    implementation "org.lynxsdk.lynx:primjs:4.1.1"
}dependencies {
// lynx dependencies
implementation("org.lynxsdk.lynx:lynx:4.1.0")
implementation("org.lynxsdk.lynx:lynx-jssdk:4.1.0")
implementation("org.lynxsdk.lynx:lynx-trace:4.1.0")
implementation("org.lynxsdk.lynx:primjs:4.1.1")
}- Lynx Service
Lynx Service includes LynxImageService, LynxLogService, etc. It aims to provide the ability to strongly correlate some host App features, allowing the App to inject custom Services at runtime, or use the default implementation provided by the official.For example, LynxImageService is implemented using the Fresco image library by default. Apps that do not integrate Fresco components can rely on other image libraries, such as Glide to implement Image Service.
Lynx provides standard native Image, Log, and Http service capabilities, which can be quickly accessed and used by the access party;
dependencies {
    // lynx dependencies
    implementation "org.lynxsdk.lynx:lynx:4.1.0"
    implementation "org.lynxsdk.lynx:lynx-jssdk:4.1.0"
    implementation "org.lynxsdk.lynx:lynx-trace:4.1.0"
    implementation "org.lynxsdk.lynx:primjs:4.1.1"

    // integrating image-service
    implementation "org.lynxsdk.lynx:lynx-service-image:4.1.0"

    // image-service dependencies, if not added, images cannot be loaded; if the host APP needs to use other image libraries, you can customize the image-service and remove this dependency
    implementation "com.facebook.fresco:fresco:2.3.0"
    implementation "com.facebook.fresco:animated-gif:2.3.0"
    implementation "com.facebook.fresco:animated-webp:2.3.0"
    implementation "com.facebook.fresco:webpsupport:2.3.0"
    implementation "com.facebook.fresco:animated-base:2.3.0"

    implementation "com.squareup.okhttp3:okhttp:4.9.0"

    // integrating log-service
    implementation "org.lynxsdk.lynx:lynx-service-log:4.1.0"

    // integrating http-service
    implementation "org.lynxsdk.lynx:lynx-service-http:4.1.0"
}dependencies {
// lynx dependencies
implementation("org.lynxsdk.lynx:lynx:4.1.0")
implementation("org.lynxsdk.lynx:lynx-jssdk:4.1.0")
implementation("org.lynxsdk.lynx:lynx-trace:4.1.0")
implementation("org.lynxsdk.lynx:primjs:4.1.1")
// integrating image-service
implementation("org.lynxsdk.lynx:lynx-service-image:4.1.0")
// image-service dependencies, if not added, images cannot be loaded; if the host APP needs to use other image libraries, you can customize the image-service and remove this dependency
implementation("com.facebook.fresco:fresco:2.3.0")
implementation("com.facebook.fresco:animated-gif:2.3.0")
implementation("com.facebook.fresco:animated-webp:2.3.0")
implementation("com.facebook.fresco:webpsupport:2.3.0")
implementation("com.facebook.fresco:animated-base:2.3.0")
// integrating log-service
implementation("org.lynxsdk.lynx:lynx-service-log:4.1.0")
// integrating http-service
implementation("org.lynxsdk.lynx:lynx-service-http:4.1.0")
implementation("com.squareup.okhttp3:okhttp:4.9.0")
}#Configure obfuscation rules (Proguard)
The obfuscation rules for Lynx Engine are as follows. It is recommended to refer to the latest source code configuration.
# LYNX START
# use @Keep to annotate retained classes.
-dontwarn android.support.annotation.Keep
-keep @android.support.annotation.Keep class **
-keep @android.support.annotation.Keep class ** {
    @android.support.annotation.Keep <fields>;
    @android.support.annotation.Keep <methods>;
}
-dontwarn androidx.annotation.Keep
-keep @androidx.annotation.Keep class **
-keep @androidx.annotation.Keep class ** {
    @androidx.annotation.Keep <fields>;
    @androidx.annotation.Keep <methods>;
}
# native method call
-keepclasseswithmembers,includedescriptorclasses class * {
    native <methods>;
}
-keepclasseswithmembers class * {
    @com.lynx.tasm.base.CalledByNative <methods>;
}

# to customize a module, you need to keep the class name and the method annotated as LynxMethod.
-keepclasseswithmembers class * {
    @com.lynx.jsbridge.LynxMethod <methods>;
}

-keepclassmembers class *  {
    @com.lynx.tasm.behavior.LynxProp <methods>;
    @com.lynx.tasm.behavior.LynxPropGroup <methods>;
    @com.lynx.tasm.behavior.LynxUIMethod <methods>;
}

-keepclassmembers class com.lynx.tasm.behavior.ui.UIGroup {
    public boolean needCustomLayout();
}

# in case R8 compiler may remove mLoader in bytecode.
# as mLoader is not used in java and passed as a WeakRef in JNI.
-keepclassmembers class com.lynx.tasm.LynxTemplateRender {
    private com.lynx.tasm.core.resource.LynxResourceLoader mLoader;
    private com.lynx.tasm.core.resource.LynxResourceLoader mResourceLoader;
}

# the automatically generated setter classes use the class names of LynxBaseUI and ShadowNode and their subclasses.
-keep class com.lynx.tasm.behavior.ui.LynxBaseUI
-keep class com.lynx.tasm.behavior.shadow.ShadowNode
-keep class com.lynx.jsbridge.LynxModule { *; }
-keep class * extends com.lynx.tasm.behavior.ui.LynxBaseUI
-keep class * extends com.lynx.tasm.behavior.shadow.ShadowNode
-keep class * extends com.lynx.jsbridge.LynxModule { *; }
-keep class * extends com.lynx.jsbridge.LynxContextModule
-keep class * implements com.lynx.tasm.behavior.utils.Settable
-keep class * implements com.lynx.tasm.behavior.utils.LynxUISetter
-keep class * implements com.lynx.tasm.behavior.utils.LynxUIMethodInvoker
-keep class com.lynx.tasm.rendernode.compat.**{
    *;
}
-keep class com.lynx.tasm.rendernode.compat.RenderNodeFactory{
    *;
}
# LYNX END#2. Environment Initialization
#Lynx Service Initialization
- Lynx Service provides host feature-related capabilities and it is recommended to complete the initialization of Lynx Service during the
Application#onCreatelifecycle of the application. - Lynx Service needs to be actively injected
Please specify your custom Application class in the AndroidManifest.xml file, since Lynx needs to perform some global initialization operations when the application starts.
<application
  android:name=".YourApplication">
</application>import android.app.Application;
import com.facebook.drawee.backends.pipeline.Fresco;
import com.facebook.imagepipeline.core.ImagePipelineConfig;
import com.facebook.imagepipeline.memory.PoolConfig;
import com.facebook.imagepipeline.memory.PoolFactory;
import com.lynx.service.http.LynxHttpService;
import com.lynx.service.image.LynxImageService;
import com.lynx.service.log.LynxLogService;
import com.lynx.tasm.service.LynxServiceCenter;
public class YourApplication extends Application {
@Override
public void onCreate() {
super.onCreate();
initLynxService();
}
private void initLynxService() {
// init Fresco which is needed by LynxImageService
final PoolFactory factory = new PoolFactory(PoolConfig.newBuilder().build());
ImagePipelineConfig.Builder builder =
ImagePipelineConfig.newBuilder(getApplicationContext()).setPoolFactory(factory);
Fresco.initialize(getApplicationContext(), builder.build());
LynxServiceCenter.inst().registerService(LynxImageService.getInstance());
LynxServiceCenter.inst().registerService(LynxLogService.INSTANCE);
LynxServiceCenter.inst().registerService(LynxHttpService.INSTANCE);
}
}import android.app.Application
import com.facebook.drawee.backends.pipeline.Fresco
import com.facebook.imagepipeline.core.ImagePipelineConfig
import com.facebook.imagepipeline.memory.PoolConfig
import com.facebook.imagepipeline.memory.PoolFactory
import com.lynx.service.http.LynxHttpService
import com.lynx.service.image.LynxImageService
import com.lynx.service.log.LynxLogService
import com.lynx.tasm.service.LynxServiceCenter
class YourApplication : Application() {
override fun onCreate() {
super.onCreate()
initLynxService()
}
private fun initLynxService() {
// init Fresco which is needed by LynxImageService
val factory = PoolFactory(PoolConfig.newBuilder().build())
val builder = ImagePipelineConfig.newBuilder(applicationContext).setPoolFactory(factory)
Fresco.initialize(applicationContext, builder.build())
LynxServiceCenter.inst().registerService(LynxImageService.getInstance())
LynxServiceCenter.inst().registerService(LynxLogService)
LynxServiceCenter.inst().registerService(LynxHttpService)
}
}#LynxEnv Initialization
LynxEnv provides the global initialization interface for the Lynx Engine. Please ensure that the initialization of LynxEnv occurs before any interface calls to the Lynx Engine. It is recommended to complete the initialization of LynxEnv during the Application#onCreate lifecycle of the application.
import com.lynx.tasm.LynxEnv;

public class YourApplication extends Application {

    @Override
    public void onCreate() {
        super.onCreate();
        initLynxService();
        initLynxEnv();
    }

    private void initLynxEnv() {
        LynxEnv.inst().init(
            this,
            null,
            null,
            null
        );
    }
}import com.lynx.tasm.LynxEnv
class YourApplication : Application() {
override fun onCreate() {
super.onCreate()
initLynxService()
initLynxEnv()
}
private fun initLynxEnv() {
LynxEnv.inst().init(
this,
null,
null,
null
)
}
}The parameters for the LynxEnv initialization method are described as follows:
- appContext: The context object for the application lifecycle, i.e., ApplicationContext.
- libraryLoader: The loader for native so files, the default value can be null, which will use the system default loader.
- templateProvider: The global AppBundle loader, the default value can be null;
- behaviorBundle: The list of custom components, the default value can be null. If there are customization requirements, please refer to custom-native-component
#3. Render LynxView
#Create Bundle Loader
Lynx Engine itself does not have the ability to integrate downloading resources, so the existing app needs to provide the specific implementation of AbsTemplateProvider, and inject it when initializing LynxEnv or constructing LynxView. Lynx will use the injected resource loader to obtain the Bundle content
You can use various methods to obtain the contents of the Bundle. Here, we choose to embed the contents of the Bundle within the application.
- First, please place the Bundle file generated in the Quick Start stage in the src/main/assets directory, or you can download the file below to your local machine and place it in the same directory:
app
└── src
    └── main
        ├── java
        ├── res
        └── assets
└── main.lynx.bundle- Impl Bundle Loader
import android.content.Context;
import com.lynx.tasm.provider.AbsTemplateProvider;
import java.io.ByteArrayOutputStream;
import java.io.IOException;
import java.io.InputStream;

public class DemoTemplateProvider extends AbsTemplateProvider {
    private Context mContext;

    DemoTemplateProvider(Context context) {
        this.mContext = context.getApplicationContext();
    }

    @Override
    public void loadTemplate(String uri, Callback callback) {
        new Thread(new Runnable() {
            @Override
            public void run() {
                try (InputStream inputStream = mContext.getAssets().open(uri);
                     ByteArrayOutputStream byteArrayOutputStream = new ByteArrayOutputStream()) {
                    byte[] buffer = new byte[1024];
                    int length;
                    while ((length = inputStream.read(buffer)) != -1) {
                        byteArrayOutputStream.write(buffer, 0, length);
                    }
                    callback.onSuccess(byteArrayOutputStream.toByteArray());
                } catch (IOException e) {
                    callback.onFailed(e.getMessage());
                }
            }
        }).start();
    }
}import android.content.Context
import com.lynx.tasm.provider.AbsTemplateProvider
import java.io.ByteArrayOutputStream
import java.io.IOException
class DemoTemplateProvider(context: Context) : AbsTemplateProvider() {
private var mContext: Context = context.applicationContext
override fun loadTemplate(uri: String, callback: Callback) {
Thread {
try {
mContext.assets.open(uri).use { inputStream ->
ByteArrayOutputStream().use { byteArrayOutputStream ->
val buffer = ByteArray(1024)
var length: Int
while ((inputStream.read(buffer).also { length = it }) != -1) {
byteArrayOutputStream.write(buffer, 0, length)
}
callback.onSuccess(byteArrayOutputStream.toByteArray())
}
}
} catch (e: IOException) {
callback.onFailed(e.message)
}
}.start()
}
}#Construct LynxView
LynxView is the basic rendering view provided by Lynx Engine. LynxView inherits from the native Android View. You can quickly construct a LynxView and add it arbitrarily to the native Android view tree.
import android.app.Activity;
import android.os.Bundle;

import com.lynx.tasm.LynxView;
import com.lynx.tasm.LynxViewBuilder;

public class MainActivity extends Activity {

    @Override
    protected void onCreate(Bundle savedInstanceState) {
        super.onCreate(savedInstanceState);
        LynxView lynxView = buildLynxView();
        setContentView(lynxView);
    }

    private LynxView buildLynxView() {
        LynxViewBuilder viewBuilder = new LynxViewBuilder();
        viewBuilder.setTemplateProvider(new DemoTemplateProvider(this));
        return viewBuilder.build(this);
    }
}import android.app.Activity
import android.os.Bundle
import com.lynx.tasm.LynxView
import com.lynx.tasm.LynxViewBuilder
class MainActivity : Activity() {
override fun onCreate(savedInstanceState: Bundle?) {
super.onCreate(savedInstanceState)
val lynxView = buildLynxView()
setContentView(lynxView)
}
private fun buildLynxView(): LynxView {
val viewBuilder = LynxViewBuilder()
viewBuilder.setTemplateProvider(DemoTemplateProvider(this))
return viewBuilder.build(this)
}
}- More Elements
XElement is an extend native elements library maintained by the Lynx team. It provides richer component capabilities, enabling faster adoption of Lynx in production environments and enhancing the vibrancy of the Lynx ecosystem.
dependencies {
    // lynx dependencies
    implementation "org.lynxsdk.lynx:lynx:4.1.0"
    implementation "org.lynxsdk.lynx:lynx-jssdk:4.1.0"
    implementation "org.lynxsdk.lynx:lynx-trace:4.1.0"
    implementation "org.lynxsdk.lynx:primjs:4.1.1"
    // integrating image-service
    implementation "org.lynxsdk.lynx:lynx-service-image:4.1.0"
    // image-service dependencies, if not added, images cannot be loaded; if the host APP needs to use other image libraries, you can customize the image-service and remove this dependency
    implementation "com.facebook.fresco:fresco:2.3.0"
    implementation "com.facebook.fresco:animated-gif:2.3.0"
    implementation "com.facebook.fresco:animated-webp:2.3.0"
    implementation "com.facebook.fresco:webpsupport:2.3.0"
    implementation "com.facebook.fresco:animated-base:2.3.0"
    implementation "com.squareup.okhttp3:okhttp:4.9.0"
    // integrating log-service
    implementation "org.lynxsdk.lynx:lynx-service-log:4.1.0"
    // integrating http-service
    implementation "org.lynxsdk.lynx:lynx-service-http:4.1.0"
    // Required when using any XElement.
    implementation "org.lynxsdk.lynx:xelement:4.1.0"
    // Required when templates use <input> or <textarea>.
    implementation "org.lynxsdk.lynx:xelement-input:4.1.0"
    // Required when templates use <overlay>.
    implementation "org.lynxsdk.lynx:xelement-overlay:4.1.0"
    // Required when templates use <svg>; servalsvg provides the SVG renderer.
    implementation "org.lynxsdk.lynx:xelement-svg:4.1.0"
    implementation "org.lynxsdk.lynx:servalsvg:0.0.1-alpha.3"
    // Required when templates use <markdown>; lynxtextra provides native text layout and serval_markdown provides the Markdown renderer.
    implementation "org.lynxsdk.lynx:xelement-markdown:4.1.0"
    implementation "org.lynxsdk.lynx:lynxtextra:0.1.1"
    implementation "org.lynxsdk.lynx:serval_markdown:0.1.1"
    // Required when templates use <viewpager>.
    implementation "org.lynxsdk.lynx:xelement-viewpager:4.1.0"
    // Required when templates use scroll-coordinator.
    implementation "org.lynxsdk.lynx:xelement-scroll-coordinator:4.1.0"
    // Required when templates use pull-to-refresh.
    implementation "org.lynxsdk.lynx:xelement-refresh:4.1.0"
    // xelement-refresh reaches ViewPager2 through refresh-layout-kernel, which does not declare it.
    implementation "androidx.viewpager2:viewpager2:1.1.0"
    // Required when templates use <blur-view>.
    implementation "org.lynxsdk.lynx:xelement-blur-view:4.1.0"
    // Required when templates use <video>.
    implementation "org.lynxsdk.lynx:xelement-video:4.1.0"
    // Required when templates use <webview>.
    implementation "org.lynxsdk.lynx:xelement-webview:4.1.0"
    // Required when templates use AnimaX animations.
    implementation "org.lynxsdk.lynx:xelement-animax:4.1.0"
}dependencies {
// lynx dependencies
implementation("org.lynxsdk.lynx:lynx:4.1.0")
implementation("org.lynxsdk.lynx:lynx-jssdk:4.1.0")
implementation("org.lynxsdk.lynx:lynx-trace:4.1.0")
implementation("org.lynxsdk.lynx:primjs:4.1.1")
// integrating image-service
implementation("org.lynxsdk.lynx:lynx-service-image:4.1.0")
// image-service dependencies, if not added, images cannot be loaded; if the host APP needs to use other image libraries, you can customize the image-service and remove this dependency
implementation("com.facebook.fresco:fresco:2.3.0")
implementation("com.facebook.fresco:animated-gif:2.3.0")
implementation("com.facebook.fresco:animated-webp:2.3.0")
implementation("com.facebook.fresco:webpsupport:2.3.0")
implementation("com.facebook.fresco:animated-base:2.3.0")
// integrating log-service
implementation("org.lynxsdk.lynx:lynx-service-log:4.1.0")
// integrating http-service
implementation("org.lynxsdk.lynx:lynx-service-http:4.1.0")
implementation("com.squareup.okhttp3:okhttp:4.9.0")
// Required when using any XElement.
implementation("org.lynxsdk.lynx:xelement:4.1.0")
// Required when templates use <input> or <textarea>.
implementation("org.lynxsdk.lynx:xelement-input:4.1.0")
// Required when templates use <overlay>.
implementation("org.lynxsdk.lynx:xelement-overlay:4.1.0")
// Required when templates use <svg>; servalsvg provides the SVG renderer.
implementation("org.lynxsdk.lynx:xelement-svg:4.1.0")
implementation("org.lynxsdk.lynx:servalsvg:0.0.1-alpha.3")
// Required when templates use <markdown>; lynxtextra provides native text layout and serval_markdown provides the Markdown renderer.
implementation("org.lynxsdk.lynx:xelement-markdown:4.1.0")
implementation("org.lynxsdk.lynx:lynxtextra:0.1.1")
implementation("org.lynxsdk.lynx:serval_markdown:0.1.1")
// Required when templates use <viewpager>.
implementation("org.lynxsdk.lynx:xelement-viewpager:4.1.0")
// Required when templates use scroll-coordinator.
implementation("org.lynxsdk.lynx:xelement-scroll-coordinator:4.1.0")
// Required when templates use pull-to-refresh.
implementation("org.lynxsdk.lynx:xelement-refresh:4.1.0")
// xelement-refresh reaches ViewPager2 through refresh-layout-kernel, which does not declare it.
implementation("androidx.viewpager2:viewpager2:1.1.0")
// Required when templates use <blur-view>.
implementation("org.lynxsdk.lynx:xelement-blur-view:4.1.0")
// Required when templates use <video>.
implementation("org.lynxsdk.lynx:xelement-video:4.1.0")
// Required when templates use <webview>.
implementation("org.lynxsdk.lynx:xelement-webview:4.1.0")
// Required when templates use AnimaX animations.
implementation("org.lynxsdk.lynx:xelement-animax:4.1.0")
}#Introduce XElement
XElement requires additional importation in the LynxViewBuilder:
import android.app.Activity;
import android.os.Bundle;

import com.lynx.tasm.LynxView;
import com.lynx.tasm.LynxViewBuilder;
import com.lynx.xelement.XElementBehaviors;

public class MainActivity extends Activity {

    @Override
    protected void onCreate(Bundle savedInstanceState) {
        super.onCreate(savedInstanceState);
        LynxView lynxView = buildLynxView();
        setContentView(lynxView);
    }

    private LynxView buildLynxView() {
        LynxViewBuilder viewBuilder = new LynxViewBuilder();
        viewBuilder.addBehaviors(new XElementBehaviors().create());
        viewBuilder.setTemplateProvider(new DemoTemplateProvider(this));
        return viewBuilder.build(this);
    }
}import android.app.Activity
import android.os.Bundle
import com.lynx.tasm.LynxView
import com.lynx.tasm.LynxViewBuilder
import com.lynx.xelement.XElementBehaviors
class MainActivity : Activity() {
override fun onCreate(savedInstanceState: Bundle?) {
super.onCreate(savedInstanceState)
val lynxView = buildLynxView()
setContentView(lynxView)
}
private fun buildLynxView(): LynxView {
val viewBuilder: LynxViewBuilder = LynxViewBuilder()
viewBuilder.addBehaviors(XElementBehaviors().create())
viewBuilder.setTemplateProvider(DemoTemplateProvider(this))
return viewBuilder.build(this)
}
}#4 Render view
After completing the above steps, all the work of initializing LynxView have been completed. Call the lynxView.renderTemplateUrl method to render the corresponding Bundle onto the LynxView view.
public class MainActivity extends Activity {

    @Override
    protected void onCreate(Bundle savedInstanceState) {
        super.onCreate(savedInstanceState);
        LynxView lynxView = buildLynxView();
        setContentView(lynxView);

        String url = "main.lynx.bundle";
        lynxView.renderTemplateUrl(url, "");
    }
}class MainActivity : Activity() {
override fun onCreate(savedInstanceState: Bundle?) {
super.onCreate(savedInstanceState)
val lynxView = buildLynxView()
setContentView(lynxView)
val uri = "main.lynx.bundle";
lynxView.renderTemplateUrl(uri, "")
}
}Then you will see the following interface on the screen:
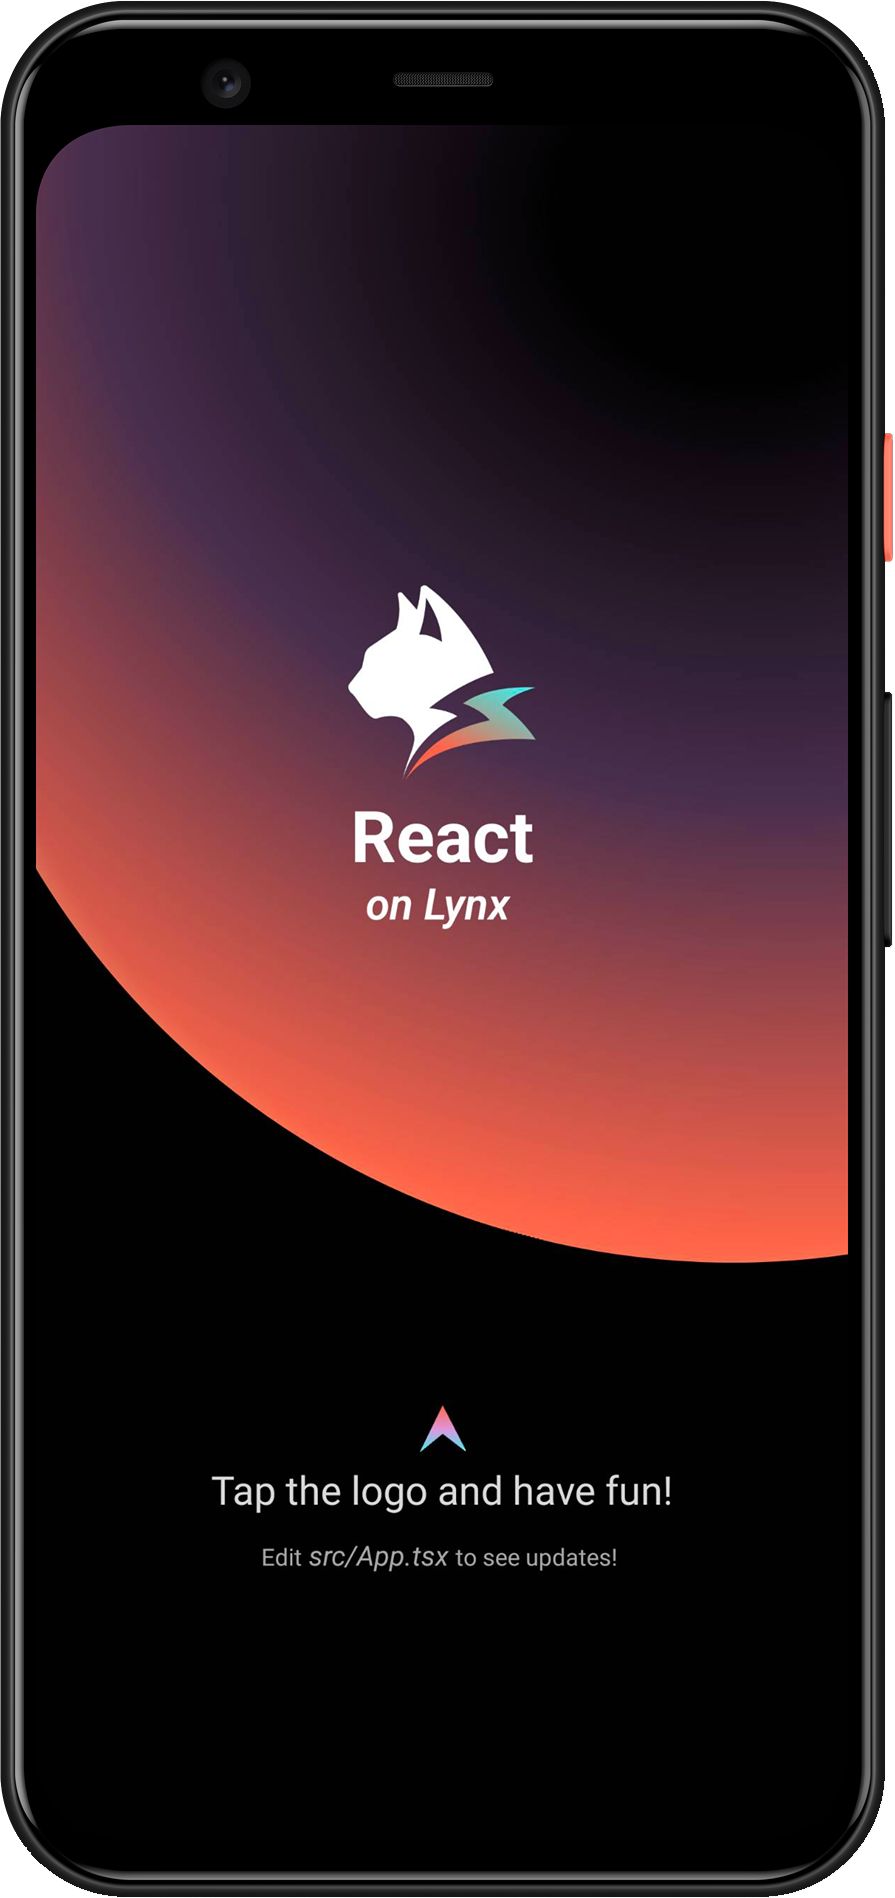
Congratulations, you have now completed all the work of rendering the LynxView!
#4. Now what?
At this stage, you have successfully integrated Lynx into your App. Refer to our developing and debugging docs for in-depth insights on working with Lynx.
#Integrate Lynx with Existing Apps (Harmony)
- This article assumes that you are familiar with the basic concepts of native Harmony application development.
- You can refer to the project: integrating-lynx-demo-projects for all the code mentioned below.
#1. Dependency Configuration
#Configuring Deps
- Lynx
The core capabilities of Lynx Engine include basic capabilities such as parsing Bundle, style parsing, layout, rendering views and the basic code of the javascript runtime that Lynx pages rely on
"dependencies": {
  "@ohos/imageknife": "3.2.6",
  "@lynx/lynx": "4.0.0",
  "@lynx/primjs": "4.0.0",
},- Lynx Service
Lynx Service includes LynxDevtoolService, LynxLogService, etc. It aims to provide the ability to strongly correlate some host App features, allowing the App to inject custom Services at runtime, or use the default implementation provided by the official. For example, LynxHttpService is implemented using the built-in HTTP module of HarmonyOS by default. Lynx provides standard native Log and HTTP service capabilities, which can be quickly accessed and used by the access party;
"dependencies": {
  "@ohos/imageknife": "3.2.6",
  "@lynx/lynx": "4.0.0",
  "@lynx/lynx_devtool": "4.0.0",
  "@lynx/lynx_devtool_service": "4.0.0",
  "@lynx/lynx_http_service": "4.0.0",
  "@lynx/lynx_log_service": "4.0.0",
  "@lynx/primjs": "4.0.0",
},#Capability Dependencies
- Native C++ Configuration
To import libc++_shared.so, you need to configure Native C++. This requires defining a CMakeLists.txt file.
# the minimum version of CMake.
cmake_minimum_required(VERSION 3.5.0)
project(MyApplication)
And modify the buildOptions in entry/build-profile.json5:
{
  buildOption: {
    externalNativeOptions: {
      path: './src/main/cpp/CMakeLists.txt',
      arguments: '',
      cppFlags: '',
    },
  },
}- Network Request Configuration
If you need to request network resources, configure requestPermissions in module.json5 to enable network requests.
{
  module: {
    requestPermissions: [
      {
        name: 'ohos.permission.INTERNET',
        reason: '$string:network',
        usedScene: {
          abilities: ['FormAbility'],
          when: 'inuse',
        },
      },
    ],
  },
}
And configure the network key field in entry/src/main/resources/base/element/string.json:
{
  "string": [
    {
      "name": "network",
      "value": "Request network"
    }
  ]
}- XElement OHPM Configuration
"dependencies": {
  "@lynx/xelement_svg": "3.6.0",
},#2. Environment Initialization
#Lynx Service Initialization
- Lynx Service provides host feature-related capabilities and it is recommended to complete the initialization of Lynx Service during the
UIAbility#onCreatelifecycle of the application. - Lynx Service needs to be actively injected.
import { LLog, LynxServiceCenter, LynxEnv, LynxServiceType } from '@lynx/lynx';
import { LynxDevToolService } from '@lynx/lynx_devtool_service';
import { LynxLogService } from '@lynx/lynx_log_service';
import { LynxHttpService } from '@lynx/lynx_http_service';

export default class EntryAbility extends UIAbility {
  onCreate(want: Want, launchParam: AbilityConstant.LaunchParam): void {
    // Init LynxDevtoolService
    LynxServiceCenter.registerService(
      LynxServiceType.DevTool,
      LynxDevToolService.instance,
    );
    // Init LynxHttpService
    LynxServiceCenter.registerService(
      LynxServiceType.Http,
      LynxHttpService.instance,
    );
    // Init LynxLogService

    hilog.info(DOMAIN, 'testTag', '%{public}s', 'Ability onCreate');

    LynxServiceCenter.registerService(
      LynxServiceType.Log,
      LynxLogService.instance,
    );
  }
}#LynxEnv Initialization
LynxEnv provides the global initialization interface for the Lynx Engine. Please ensure that the initialization of LynxEnv occurs before any interface calls to the Lynx Engine. It is recommended to complete the initialization of LynxEnv during the UIAbility#onCreate lifecycle of the application.
import { LLog, LynxEnv } from '@lynx/lynx';

export default class EntryAbility extends UIAbility {
  onCreate(want: Want, launchParam: AbilityConstant.LaunchParam): void {
    // Init LynxService
    // ...
    // Init LynxEnv
    LLog.useSysLog(true);
    LynxEnv.initialize(this.context);
    let options = new Map<string, string>();
    options.set('App', 'LynxExplorer');
    options.set('AppVersion', '0.0.1');
    LynxEnv.setAppInfo(options);
    LynxEnv.enableDevtool(true);
  }
}#3. Rendering LynxView
#Create Bundle Loader
Lynx Engine itself does not have the ability to integrate downloading resources, so the existing app needs to provide the specific implementation of LynxResourceProvider, and inject it when constructing LynxView. Lynx will use the injected resource loader to obtain the Bundle content
You can use various methods to obtain the contents of the Bundle. Here, we choose to embed the contents of the Bundle within the application.
First, please place the Bundle file generated in the Quick Start stage in the src/main/resources/rawfile directory, or you can download the file below to your local machine and place it in the same directory:
entry
└── src
    └── main
        └── resources
            └── rawfile
└── main.lynx.bundle- LynxTemplateResourceFetcher
LynxTemplateResourceFetcher provides the capability to load Bundle template resources. You need to implement the fetchTemplate method to handle the loading.
import {
  LLog,
  LynxResourceRequest,
  LynxTemplateResourceFetcher,
  TemplateProviderResult,
} from '@lynx/lynx';
import { AsyncCallback, BusinessError } from '@ohos.base';
import http from '@ohos.net.http';
import resourceManager from '@ohos.resourceManager';

export class ExampleTemplateResourceFetcher extends LynxTemplateResourceFetcher {
  fetchTemplate(
    request: LynxResourceRequest,
    callback: AsyncCallback<TemplateProviderResult, void>,
  ) {
    if (request.url.startsWith('http')) {
      let httpRequest = http.createHttp();
      httpRequest.request(
        request.url,
        {
          expectDataType: http.HttpDataType.ARRAY_BUFFER,
        },
        (err: BusinessError, data: http.HttpResponse) => {
          callback(err, {
            binary: data?.result as ArrayBuffer,
          });
          httpRequest.destroy();
        },
      );
    } else {
      // local file
      const context: Context = getContext(this);
      const resourceMgr: resourceManager.ResourceManager =
        context.resourceManager;
      resourceMgr.getRawFileContent(
        request.url,
        (err: BusinessError, data: Uint8Array) => {
          callback(err, {
            binary: data?.buffer as ArrayBuffer,
          });
        },
      );
    }
  }

  fetchSSRData(
    request: LynxResourceRequest,
    callback: AsyncCallback<ArrayBuffer, void>,
  ) {
    let httpRequest = http.createHttp();
    httpRequest.request(
      request.url,
      {
        expectDataType: http.HttpDataType.ARRAY_BUFFER,
      },
      (err: BusinessError, data: http.HttpResponse) => {
        callback(err, data?.result as ArrayBuffer);
        httpRequest.destroy();
      },
    );
  }
}- LynxMediaResourceFetcher
LynxMediaResourceFetcher provides the capability to load media resources.
import {
  LynxMediaResourceFetcher,
  LynxResourceRequest,
  LynxOptionalBool,
} from '@lynx/lynx';

export class ExampleMediaResourceFetcher extends LynxMediaResourceFetcher {
  shouldRedirectUrl(request: LynxResourceRequest): string {
    // just return the input url;
    return request.url;
  }

  isLocalResource(url: string): LynxOptionalBool {
    return LynxOptionalBool.UNDEFINED;
  }
}- LynxGenericResourceFetcher
LynxGenericResourceFetcher provides the capability to load generic resources. You need to implement the fetchResource method to handle the loading.
import {
  LynxError,
  LynxSubErrorCode,
  LynxGenericResourceFetcher,
  LynxResourceRequest,
  LynxResourceType,
  LynxStreamDelegate,
} from '@lynx/lynx';
import { AsyncCallback, BusinessError } from '@ohos.base';
import http from '@ohos.net.http';
import { ImageKnife, ImageKnifeOption, CacheStrategy } from '@ohos/imageknife';

export class ExampleGenericResourceFetcher extends LynxGenericResourceFetcher {
  fetchResource(
    request: LynxResourceRequest,
    callback: AsyncCallback<ArrayBuffer, void>,
  ): void {
    let httpRequest = http.createHttp();
    httpRequest.request(
      request.url,
      {
        expectDataType: http.HttpDataType.ARRAY_BUFFER,
      },
      (err: BusinessError, data: http.HttpResponse) => {
        callback(err, data?.result as ArrayBuffer);
        httpRequest.destroy();
      },
    );
  }

  fetchResourcePath(
    request: LynxResourceRequest,
    callback: AsyncCallback<string, void>,
  ): void {
    if (request.type === LynxResourceType.LYNX_RESOURCE_TYPE_IMAGE) {
      let option = new ImageKnifeOption();
      option.loadSrc = request.url;
      option.writeCacheStrategy = CacheStrategy.File;
      let error: BusinessError | undefined = undefined;
      ImageKnife.getInstance()
        .preLoadCache(option)
        .then((data: string) => {
          if (data.length > 0) {
            callback(error, data);
          } else {
            error = {
              code: LynxSubErrorCode.E_RESOURCE_IMAGE_PIC_SOURCE,
              message: 'Image path is invalid',
              name: 'Image Error',
            };
            callback(error, '');
          }
        })
        .catch((e: string) => {
          error = {
            code: LynxSubErrorCode.E_RESOURCE_IMAGE_FROM_NETWORK_OR_OTHERS,
            message: e,
            name: 'Image Error',
          };
          callback(error, '');
        });
    } else {
      callback(
        {
          code: LynxError.LYNX_ERROR_CODE_RESOURCE,
          message: 'unsupported type: ' + request.type,
          name: 'Resource Error',
        },
        '',
      );
    }
  }

  fetchStream(
    request: LynxResourceRequest,
    delegate: LynxStreamDelegate,
  ): void {
    // TODO(Lynx): support fetching stream.
    delegate.onStart(100);
    let a = new ArrayBuffer(10);
    delegate.onData(a, 0, 10);
    delegate.onEnd();
  }

  cancel(request: LynxResourceRequest): void {
    // TODO(Lynx)
  }
}#Construct LynxView and Render the View
Once you have completed the steps above, you have finished all the necessary work for creating the LynxView and reading its resources. You can now render the corresponding Bundle content onto the LynxView.
import {
  LynxTemplateResourceFetcher,
  LynxMediaResourceFetcher,
  LynxGenericResourceFetcher,
  LynxView,
} from '@lynx/lynx';

import { ExampleTemplateResourceFetcher } from '../provider/ExampleTemplateResourceFetcher';
import { ExampleMediaResourceFetcher } from '../provider/ExampleMediaResourceFetcher';
import { ExampleGenericResourceFetcher } from  '../provider/ExampleGenericResourceFetcher';

@Entry
@Component
struct Index {
  templateResourceFetcher: LynxTemplateResourceFetcher = new ExampleTemplateResourceFetcher();
  mediaResourceFetcher: LynxMediaResourceFetcher = new ExampleMediaResourceFetcher();
  genericResourceFetcher: LynxGenericResourceFetcher = new ExampleGenericResourceFetcher();
  private url: string = 'your bundle file';

  build() {
    Column() {
      LynxView({
        templateResourceFetcher: this.templateResourceFetcher,
        mediaResourceFetcher: this.mediaResourceFetcher,
        genericResourceFetcher: this.genericResourceFetcher,
        url: this.url,
      }).width('100%').height('100%');
    }
    .size({ width: '100%', height: '100%' })
  }
}
You will then see the following content on your screen:
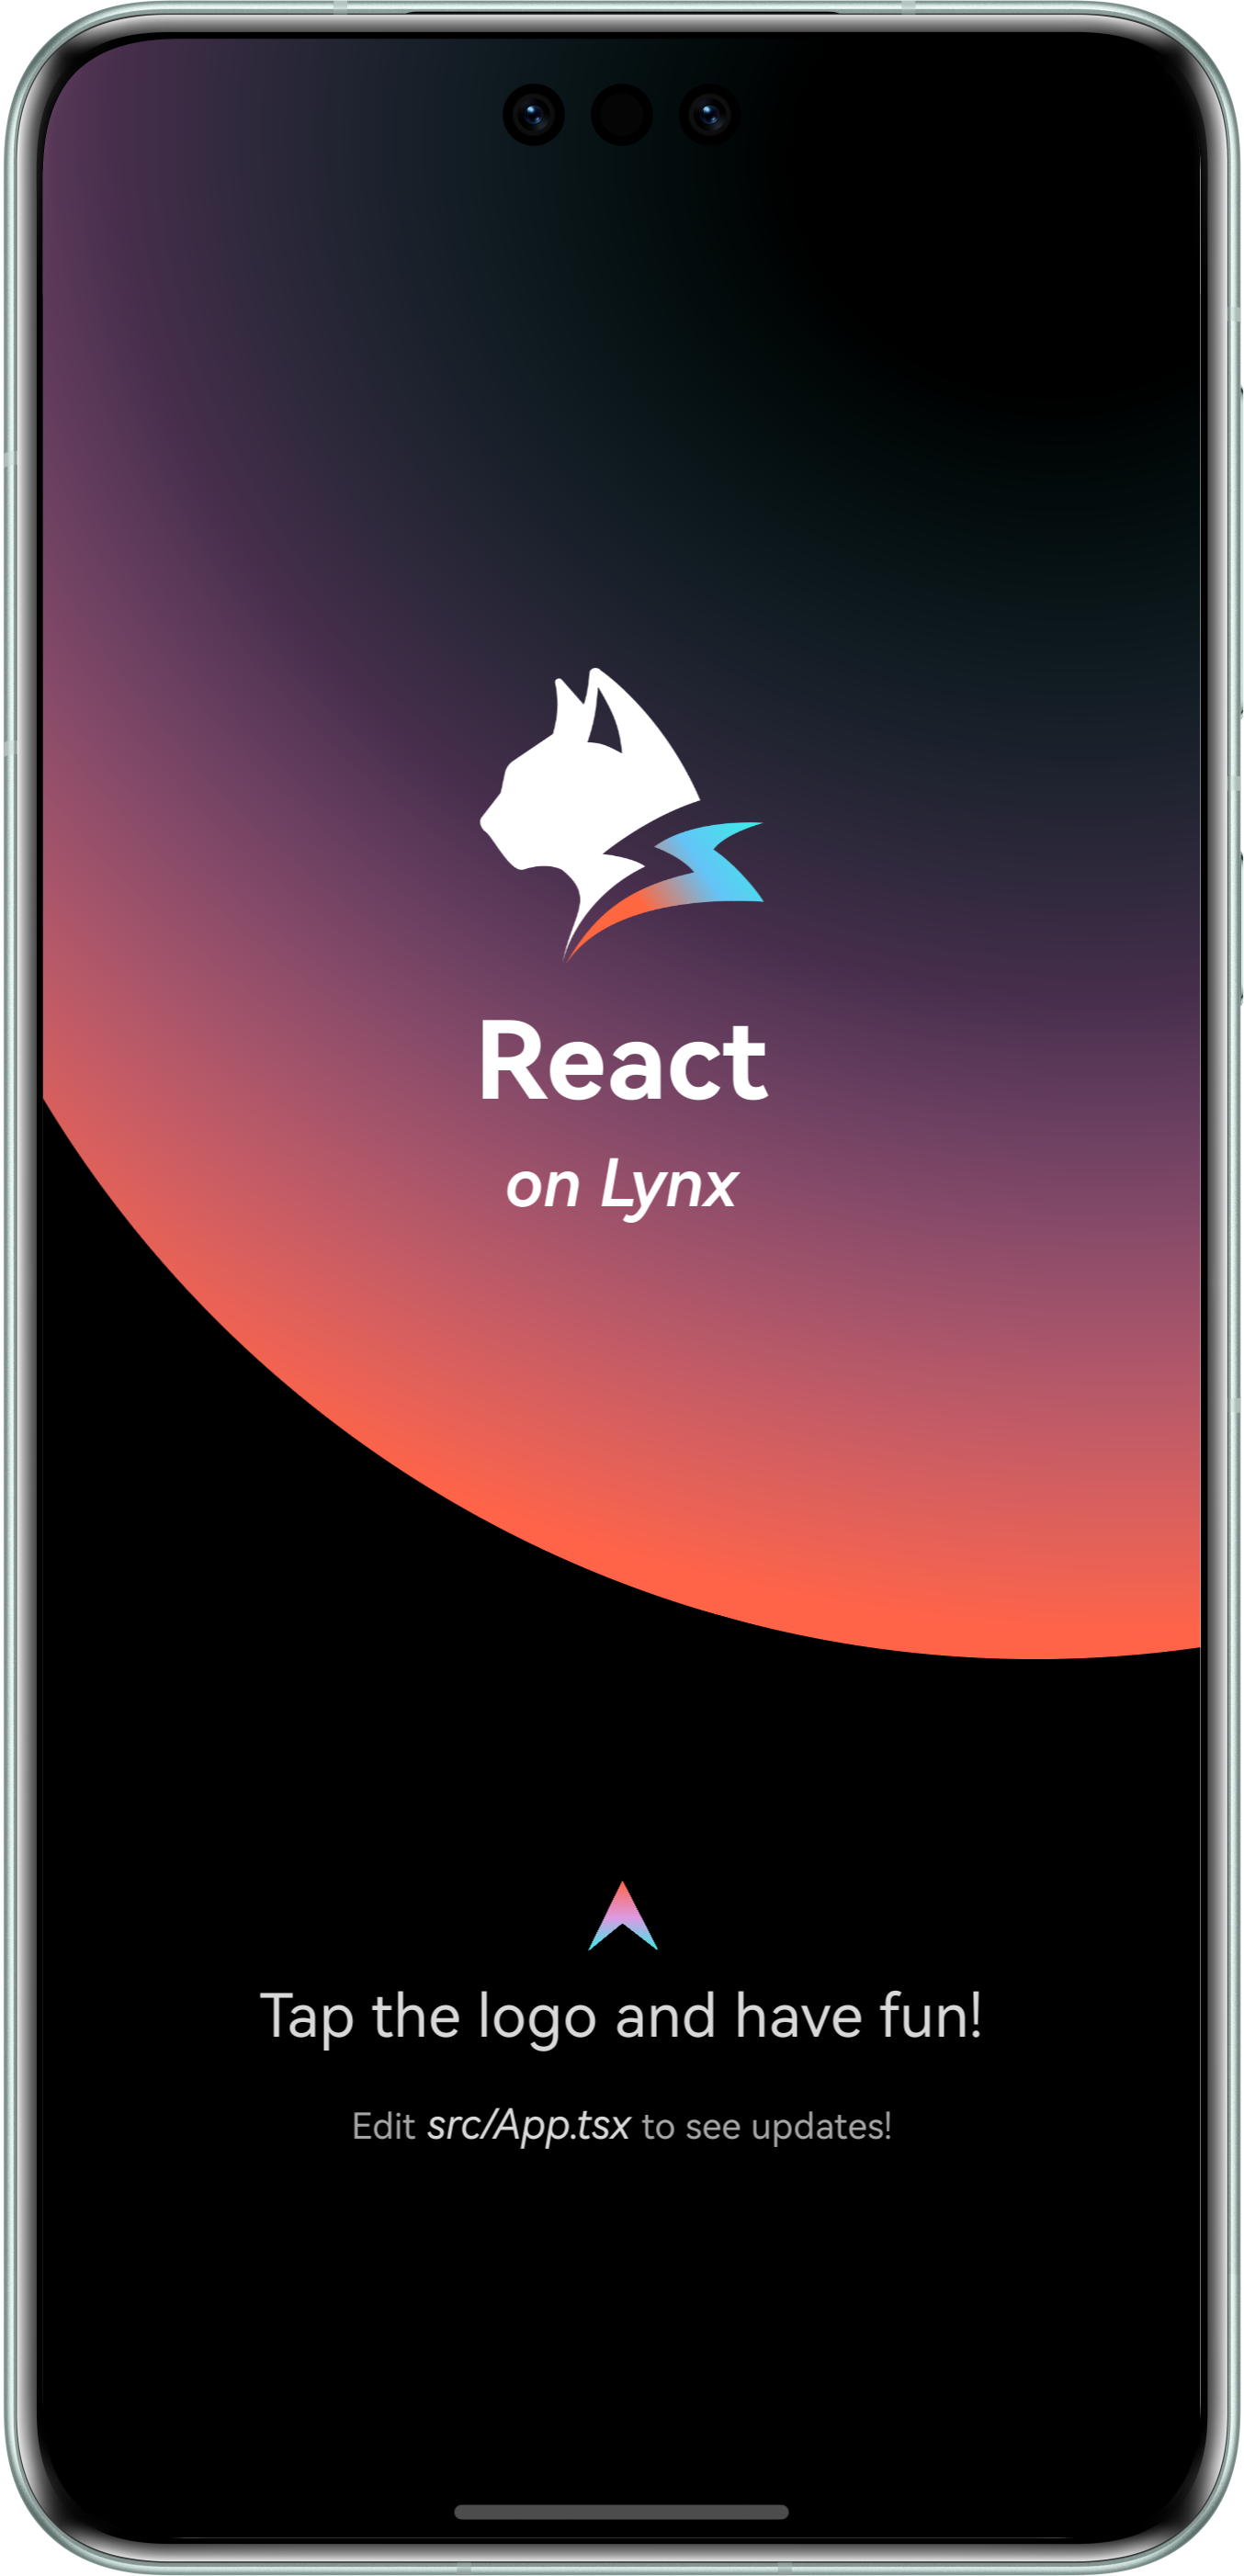
Congratulations! You have now completed the full integration of the Lynx Engine.
#4. Now what?
Now that you have integrated Lynx into your application, please refer to the Development and Debugging documentation to further explore the world of Lynx!
#Integrate Lynx with Existing Apps (Web)
Lynx for Web implements the Lynx engine in web browsers. With Lynx for Web, you can easily integrate Lynx apps into any existing web project, regardless of whether the project uses React, Vue, Svelte, or plain HTML.
#1. Development & Debugging
We need you to have read and created a Lynx project according to Quick Start.
#Add web configuration
- Enter the previously created Lynx project:
cd <lynx-project-name>- Add web configuration (
environments.web) tolynx.config.ts:
import { defineConfig } from '@lynx-js/rspeedy';
import { pluginReactLynx } from '@lynx-js/react-rsbuild-plugin';

export default defineConfig({
  plugins: [pluginReactLynx()],
  environments: {
    web: {},
    lynx: {},
  },
});#Start development server
Run:
npm run devyarn run devpnpm run devbun run devdeno run npm:devYou can now visit the development page locally.
#Build & Preview
You can also use Web Explorer to quickly preview the web bundle of a page in production mode.
First, run:
npm run buildyarn run buildpnpm run buildbun run builddeno run npm:buildYou will see an additional dist/main.web.bundle file in this project, which is the final web build artifact.
Open Lynx Explorer Web Edition, fill in the accessible URL of your artifact, and you can see the effect in production mode.
#2. Integrate with a new web project
Now that you have a Lynx for Web build artifact, we need to create a web project to use it. Here we use Rsbuild.
#Create a web project
Create a new project at the same level as the Lynx project above and run:
npm create rsbuild@latestyarn create rsbuildpnpm create rsbuild@latestbun create rsbuild@latestdeno init --npm rsbuild@latestFollow the prompts to create a React project.
#Configure the project
- Navigate to the created project:
cd <web-project-name>- Install dependencies
npm install @lynx-js/web-coreyarn add @lynx-js/web-corepnpm add @lynx-js/web-corebun add @lynx-js/web-coredeno add npm:@lynx-js/web-core- Import these dependencies in
src/App.tsx
import './App.css';
import '@lynx-js/web-core/client';
import type { LynxViewElement as LynxView } from '@lynx-js/web-core/client';

const App = () => {
  return (
    <lynx-view
      style={{ height: '100vh', width: '100vw' }}
      url="/main.web.bundle"
    ></lynx-view>
  );
};

export default App;- Update
rsbuild.config.ts
server.publicDir needs to be replaced with your actual Lynx project path.
import { defineConfig } from '@rsbuild/core';
import { pluginReact } from '@rsbuild/plugin-react';
import path from 'node:path';
import { fileURLToPath } from 'node:url';
const __filename = fileURLToPath(import.meta.url);
const __dirname = path.dirname(__filename);

export default defineConfig({
  plugins: [pluginReact()],
  server: {
    publicDir: [
      {
        name: path.join(
          __dirname,
          '../',
          // Please replace this with your actual Lynx project name
          'lynx-project',
          'dist',
        ),
      },
    ],
  },
});#Start the project
Run:
npm run devyarn run devpnpm run devbun run devdeno run npm:devVisit http://localhost:3000 to see your Lynx application.
#3. API Reference
See LynxView for more API details.
#Integrate Lynx with Existing Apps (Windows)
- This article assumes that you are familiar with the basic concepts of native Windows application development.
- You can also refer to the official LynxExplorer project.
#1. Dependency configuration
#Download or Build LynxSDK
- Download the LynxSDK from GitHub Release 4.1.0.
- Extract the downloaded file to a subdirectory of your project, such as the
thirdpartydirectory.
Or, you may build from source by following the Build Lynx Explorer for Windows guide.
#Configuring CMake
This manual assumes you have a CMake-based project already and wish to integrate LynxSDK. If you are using a different build system, you can refer to this guide and proceed with integration on your own.
- Based on your project configuration, set up the basic settings of the CMake project.
# Set the C++ standard to at least 17 if you are using the C++ wrapper apis of LynxSDK.
set(CMAKE_CXX_STANDARD 17)
set(CMAKE_CXX_STANDARD_REQUIRED ON)- Setup LynxSDK.
set(LYNX_LIB_PATH ${CMAKE_CURRENT_SOURCE_DIR}/thirdparty/lynx) # Or your location of LynxSDK
# Set include directory of LynxSDK.
include_directories(${LYNX_LIB_PATH}/include)
# Set library of LynxSDK that needs to be linked.
target_link_libraries(${PROJECT_NAME} ${LYNX_LIB_PATH}/lib/lynx.dll.lib)- Add custom command to copy data and resources after build.
# Copy lynx.dll to output directory.
add_custom_command(TARGET ${PROJECT_NAME} POST_BUILD
    COMMAND ${CMAKE_COMMAND} -E copy_if_different
        ${CMAKE_CURRENT_SOURCE_DIR}/thirdparty/lynx/lib/lynx.dll
        $<TARGET_FILE_DIR:${PROJECT_NAME}>)
# Copy data to output directory.
add_custom_command(TARGET ${PROJECT_NAME} POST_BUILD
    COMMAND ${CMAKE_COMMAND} -E copy_directory
        ${CMAKE_CURRENT_SOURCE_DIR}/thirdparty/lynx/data
        $<TARGET_FILE_DIR:${PROJECT_NAME}>/data)
# Copy lynx_core.js to output directory.
add_custom_command(TARGET ${PROJECT_NAME} POST_BUILD
    COMMAND ${CMAKE_COMMAND} -E copy_if_different
        ${CMAKE_CURRENT_SOURCE_DIR}/thirdparty/lynx/lynx_core.js
        $<TARGET_FILE_DIR:${PROJECT_NAME}>)
# Copy lynx_core_dev.js to output directory.
add_custom_command(TARGET ${PROJECT_NAME} POST_BUILD
    COMMAND ${CMAKE_COMMAND} -E copy_if_different
        ${CMAKE_CURRENT_SOURCE_DIR}/thirdparty/lynx/lynx_core_dev.js
$<TARGET_FILE_DIR:${PROJECT_NAME}>)#2. Environment Initialization - Optional
#Lynx Service Initialization
- Lynx Service provides host feature-related capabilities and it is recommended to complete the initialization of Lynx Service before LynxView creation.
- Lynx Service needs to be actively injected
#include "lynx_env.h"
#include "lynx_http_service.h"
#include "lynx_view.h"
#include "lynx_generic_resource_fetcher.h"

// Implements the http service if needed.
class LynxHttpServiceImpl : public lynx::pub::LynxHttpService {
public:
LynxHttpServiceImpl() = default;
~LynxHttpServiceImpl() = default;

void Request(std::shared_ptr<lynx::pub::LynxHttpRequest> request,
std::shared_ptr<lynx::pub::LynxHttpResponse> response) override {
// TODO
}

};

int WINAPI WinMain(HINSTANCE hInstance, HINSTANCE hPrevInstance, LPSTR lpCmdLine, int nCmdShow) {
// Register http service for lynx.fetch.
lynx::pub::LynxServiceCenter::GetInstance().
RegisterService(std::make_shared<LynxHttpServiceImpl>());

// TODO: create window and construct LynxView.

return 0;
}
#LynxEnv Initialization
LynxEnv provides the global initialization interface for the Lynx Engine. Please ensure that the initialization of LynxEnv occurs before any interface calls to the Lynx Engine. It is recommended to complete the initialization of LynxEnv before LynxView creation.
#include <windows.h>

#include "lynx_env.h"
#include "lynx_http_service.h"
#include "lynx_view.h"
#include "lynx_generic_resource_fetcher.h"

int WINAPI WinMain(HINSTANCE hInstance, HINSTANCE hPrevInstance, LPSTR lpCmdLine, int nCmdShow) {
    // Register http service for lynx.fetch.
  lynx::pub::LynxServiceCenter::GetInstance().
    RegisterService(std::make_shared<LynxHttpServiceImpl>());

  // Initialize LynxEnv
  auto& lynx_env = lynx::pub::LynxEnv::GetInstance();
  // Enable devtool.
  lynx_env.SetDevtoolEnabled(true);
  lynx_env.SetDevtoolAppInfo("App", "LynxExplorer");
  lynx_env.SetDevtoolAppInfo("AppVersion", "1.0.0");
  // Register global native module if needed.
  // lynx_env.RegisterNativeModule("ExplorerModule", ExplorerModuleCreator, nullptr);

  // TODO: create window and construct LynxView.

  return 0;
}
#3. Render LynxView
#Create Resource Fetcher
Lynx Engine itself does not have the ability to integrate downloading resources, so the existing app needs to provide the specific implementation of LynxGenericResourceFetcher, and inject it when constructing LynxView. Lynx will use the injected resource fetcher to obtain the Bundle content
You can use various methods to obtain the contents of the Bundle. Here, we choose to load the contents of the Bundle from local file system. Download the Bundle file below.
Impl Resource Fetcher (Optional)
#include "lynx_env.h"
#include "lynx_http_service.h"
#include "lynx_view.h"
#include "lynx_generic_resource_fetcher.h"

class ExampleGenericResourceFetcher : public lynx::pub::LynxGenericResourceFetcher {
public:
void FetchResource(
std::shared_ptr<lynx::pub::LynxResourceRequest> request,
std::shared_ptr<lynx::pub::LynxResourceResponse> response) override {
// Implements fetching logic if you want to load Bundle from net.
}
};
#Construct LynxView
LynxView is the basic rendering view provided by Lynx Engine. You can quickly construct a LynxView and provide a NSView as it's parent.
#include <windows.h>

#include "lynx_env.h"
#include "lynx_http_service.h"
#include "lynx_view.h"
#include "lynx_generic_resource_fetcher.h"

int WINAPI WinMain(HINSTANCE hInstance, HINSTANCE hPrevInstance, LPSTR lpCmdLine, int nCmdShow) {
  // TODO: create window.

  // Construct LynxView.
  lynx::pub::LynxView::Builder builder;
  builder.SetScreenSize(800, 600, 1.0)
      .SetFrame(0, 0, 800, 600)
      .SetParent(hwnd);
  // Set Resource fetcher if needed.
  // builder.SetGenericResourceFetcher(std::make_shared<ExampleGenericResourceFetcher>());
  auto lynx_view = builder.Build();

  // Run message.
  MSG msg = {0};
  while (GetMessage(&msg, NULL, 0, 0)) {
    TranslateMessage(&msg);
    DispatchMessage(&msg);
  }
  return 0;
}
#Render view
After completing the above steps, all the work of initializing LynxView have been completed. Call the lynxView->LoadTemplate method to render the corresponding Bundle onto the LynxView.
#include <windows.h>

#include "lynx_env.h"
#include "lynx_http_service.h"
#include "lynx_view.h"
#include "lynx_generic_resource_fetcher.h"

int WINAPI WinMain(HINSTANCE hInstance, HINSTANCE hPrevInstance, LPSTR lpCmdLine, int nCmdShow) {
// TODO: create window.

// Construct LynxView.
lynx::pub::LynxView::Builder builder;
builder.SetScreenSize(800, 600, 1.0)
.SetFrame(0, 0, 800, 600)
.SetParent(hwnd);
// Set Resource fetcher if needed.
// builder.SetGenericResourceFetcher(std::make_shared<ExampleGenericResourceFetcher>());
auto lynx_view = builder.Build();

auto load_meta = std::make_shared<lynx::pub::LynxLoadMeta>();
// Set to your location.
load_meta->SetUrl("file://C:\\Users\\Admin\\Documents\\main.lynx.bundle");
lynx_view->LoadTemplate(load_meta);

// Run message.
MSG msg = {0};
while (GetMessage(&msg, NULL, 0, 0)) {
TranslateMessage(&msg);
DispatchMessage(&msg);
}
return 0;
}
Then you will see the following interface on the screen:
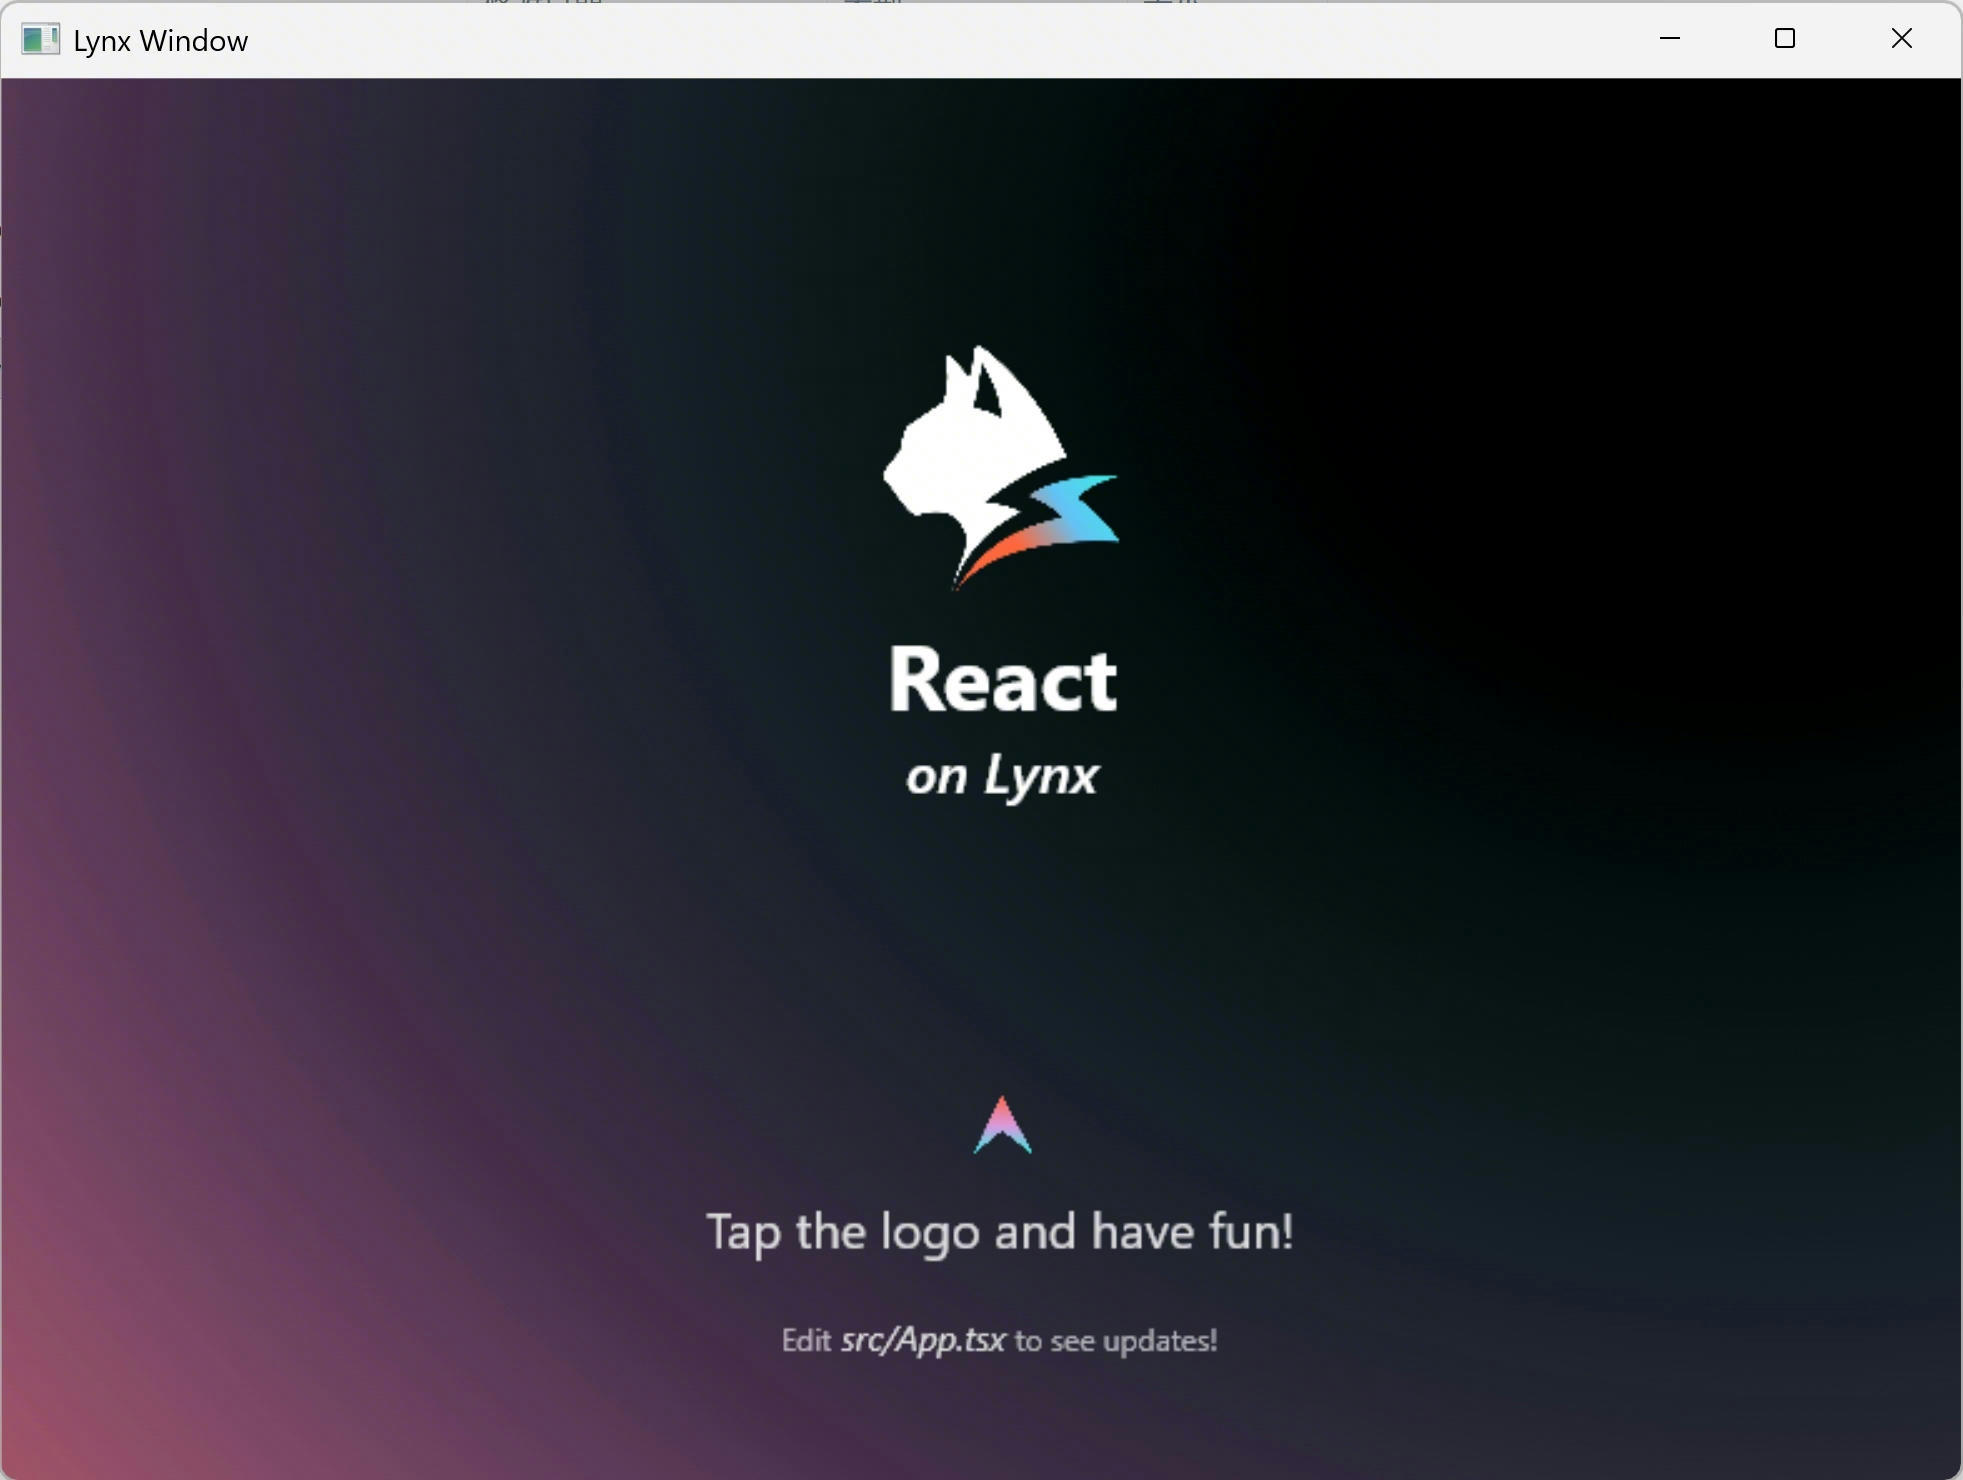
Congratulations, you have now completed all the work of rendering the LynxView!
#4. Now what?
At this stage, you have successfully integrated Lynx into your App. Refer to our developing and debugging docs for in-depth insights on working with Lynx.
#Integrate Lynx with Existing Apps (macOS)
- This article assumes that you are familiar with the basic concepts of native macOS application development.
- You can also refer to the official LynxExplorer project.
#1. Dependency configuration
#Download or Build LynxSDK
- Download the LynxSDK from GitHub Release 4.1.0.
- Extract the downloaded file to a subdirectory of your project, such as the
thirdpartydirectory.
Or, you may build from source by following the Build Lynx Explorer for macOS guide.
#Configuring CMake
This manual assumes you have a CMake-based project already and wish to integrate LynxSDK. If you are using a different build system, you can refer to this guide and proceed with integration on your own.
- Based on your project configuration, set up the basic settings of the CMake project.
# Set the C++ standard to at least 17 if you are using the C++ wrapper apis of LynxSDK.
set(CMAKE_CXX_STANDARD 17)
set(CMAKE_CXX_STANDARD_REQUIRED ON)
set(CMAKE_OBJCXX_STANDARD 17)
set(CMAKE_OBJCXX_STANDARD_REQUIRED ON)- Setup LynxSDK.
set(LYNX_LIB_PATH ${CMAKE_CURRENT_SOURCE_DIR}/thirdparty/lynx) # Or your location of LynxSDK
# Set include directory of LynxSDK.
include_directories(${LYNX_LIB_PATH}/include)
# Set library of LynxSDK that needs to be linked.
target_link_libraries(${PROJECT_NAME} PRIVATE ${LYNX_LIB_PATH}/lib/libLynx.dylib)- Add custom command to copy data and resources after build.
add_custom_command(TARGET ${PROJECT_NAME} POST_BUILD
    # Create Frameworks directory if needed.
    COMMAND mkdir -p "$<TARGET_BUNDLE_CONTENT_DIR:${PROJECT_NAME}>/Frameworks"

    # Copy libLynx.dylib to Frameworks directory of application bundle.
    COMMAND cp "${LYNX_LIB_PATH}/lib/libLynx.dylib" "$<TARGET_BUNDLE_CONTENT_DIR:${PROJECT_NAME}>/Frameworks/"

    # Create Resources directory if needed.
    COMMAND mkdir -p "$<TARGET_BUNDLE_CONTENT_DIR:${PROJECT_NAME}>/Resources"

    # Copy resource bundles to Resources directory of application bundle.
    COMMAND cp -R "${LYNX_LIB_PATH}/bundles/" "$<TARGET_BUNDLE_CONTENT_DIR:${PROJECT_NAME}>/Resources/"

    # Copy data to Resources directory of application bundle.
    COMMAND cp -R "${LYNX_LIB_PATH}/data/" "$<TARGET_BUNDLE_CONTENT_DIR:${PROJECT_NAME}>/Resources/"

    COMMENT "Copying Lynx library and resources to application bundle"
)

# Set the rpath to ensure the application can find dynamic libraries in the internal Frameworks directory.
target_link_options(${PROJECT_NAME} PRIVATE
    "-Wl,-rpath,@executable_path/../Frameworks"
)#2. Environment Initialization - Optional
#Lynx Service Initialization
- Lynx Service provides host feature-related capabilities and it is recommended to complete the initialization of Lynx Service before LynxView creation.
- Lynx Service needs to be actively injected
#import "AppDelegate.h"
#import "ViewController.h"

#import "lynx_env.h"
#import "lynx_http_service.h"
#import "lynx_view.h"

// Implements the http service if needed.
class LynxHttpServiceImpl : public lynx::pub::LynxHttpService {
public:
LynxHttpServiceImpl() = default;
~LynxHttpServiceImpl() = default;
void Request(std::shared_ptr<lynx::pub::LynxHttpRequest> request, std::shared_ptr<lynx::pub::LynxHttpResponse> response) override {
// TODO
}
};

@interface AppDelegate ()
@end

@implementation AppDelegate {
}

- (void)applicationDidFinishLaunching:(NSNotification *)aNotification {
  // Register http service for lynx.fetch.
  lynx::pub::LynxServiceCenter::GetInstance().RegisterService(std::make_shared<LynxHttpServiceImpl>());

  }

@end#LynxEnv Initialization
LynxEnv provides the global initialization interface for the Lynx Engine. Please ensure that the initialization of LynxEnv occurs before any interface calls to the Lynx Engine. It is recommended to complete the initialization of LynxEnv before LynxView creation.
#import "AppDelegate.h"
#import "ViewController.h"

#import "lynx_env.h"
#import "lynx_http_service.h"
#import "lynx_view.h"

// Implements the http service if needed.
class LynxHttpServiceImpl : public lynx::pub::LynxHttpService {
public:
LynxHttpServiceImpl() = default;
~LynxHttpServiceImpl() = default;
void Request(std::shared_ptr<lynx::pub::LynxHttpRequest> request, std::shared_ptr<lynx::pub::LynxHttpResponse> response) override {
// TODO
}
};

@interface AppDelegate ()
@end

@implementation AppDelegate {
}

- (void)applicationDidFinishLaunching:(NSNotification *)aNotification {
  // Register http service for lynx.fetch.
  lynx::pub::LynxServiceCenter::GetInstance().RegisterService(std::make_shared<LynxHttpServiceImpl>());

  // Initialize LynxEnv
  auto& lynx_env = lynx::pub::LynxEnv::GetInstance();
  // Enable devtool.
  lynx_env.SetDevtoolEnabled(true);
  lynx_env.SetDevtoolAppInfo("App", "LynxExplorer");
  lynx_env.SetDevtoolAppInfo("AppVersion", "1.0.0");
  // Register global native module if needed.
  // lynx_env.RegisterNativeModule("ExplorerModule", ExplorerModuleCreator, nullptr);
}

@end#3. Render LynxView
#Create Resource Fetcher
Lynx Engine itself does not have the ability to integrate downloading resources, so the existing app needs to provide the specific implementation of LynxGenericResourceFetcher, and inject it when constructing LynxView. Lynx will use the injected resource fetcher to obtain the Bundle content
Impl Resource Fetcher
#import <Foundation/Foundation.h>
#import "lynx_generic_resource_fetcher.h"

class ExampleGenericResourceFetcher : public lynx::pub::LynxGenericResourceFetcher {
public:
void FetchResource(std::shared_ptr<lynx::pub::resource::LynxResourceRequest> request, std::shared_ptr<lynx::pub::resource::LynxResourceResponse> response) override;
};
#import <Foundation/Foundation.h>
#import "ExampleGenericResourceFetcher.h"

void ExampleGenericResourceFetcher::FetchResource(std::shared_ptr<lynx::pub::resource::LynxResourceRequest> request, std::shared_ptr<lynx::pub::resource::LynxResourceResponse> response) {
  const char *url_str = request->GetUrl();
  NSString *ns_string = [NSString stringWithUTF8String:url_str];

  NSURL *url = [NSURL URLWithString:ns_string];
  NSMutableURLRequest *nsRequest = [NSMutableURLRequest requestWithURL:url];
  NSURLSession *session = [NSURLSession sharedSession];
  NSURLSessionDataTask *dataTask =
    [session dataTaskWithRequest:nsRequest
              completionHandler:^(NSData *_Nullable data, NSURLResponse *_Nullable nsResponse,
                                  NSError *_Nullable error) {
                if (data && data.length > 0) {
                  response->SetCode(0);
                  response->SetData(
                      (uint8_t *)data.bytes, data.length,
                      [](uint8_t *body, size_t length, void *opaque) { CFRelease(opaque); },
                      (__bridge_retained void *)data);
                } else {
                  response->SetCode(-1);
                  response->SetErrorMessage("error");
                }
                response->Complete();
              }];

  [dataTask resume];
}
#Construct LynxView
LynxView is the basic rendering view provided by Lynx Engine. You can quickly construct a LynxView and provide a NSView as it's parent.
#import "ViewController.h"
#import "ExampleGenericResourceFetcher.h"

#import "lynx_env.h"
#import "lynx_http_service.h"
#import "lynx_view.h"

@interface ViewController ()
@property(nonatomic) std::shared_ptr<lynx::pub::LynxView> lynxView;
@end

@implementation ViewController {
}

- (void)viewDidLoad {
  [super viewDidLoad];

  lynx::pub::LynxView::Builder builder;
  builder.SetScreenSize(self.view.frame.size.width, self.view.frame.size.height, 1.0)
  .SetFrame(0, 0, self.view.frame.size.width, self.view.frame.size.height)
  .SetParent((__bridge NativeWindow)self.view)
  .SetGenericResourceFetcher(std::make_shared<ExampleGenericResourceFetcher>());
  self.lynxView = builder.Build();
  }

- (void)viewDidLayout {
  [super viewDidLayout];
  // It's necessary when resizing the Window.
  self.lynxView->UpdateScreenMetrics(self.view.frame.size.width, self.view.frame.size.height,
  1.0);
  self.lynxView->SetFrame(0, 0, self.view.frame.size.width, self.view.frame.size.height);
  }

@end#Render view
After completing the above steps, all the work of initializing LynxView have been completed. Call the lynxView->LoadTemplate method to render the corresponding Bundle onto the LynxView.
#import "ViewController.h"
#import "ExampleGenericResourceFetcher.h"

#import "lynx_env.h"
#import "lynx_http_service.h"
#import "lynx_view.h"

@interface ViewController ()
@property(nonatomic) std::shared_ptr<lynx::pub::LynxView> lynxView;
@end

@implementation ViewController {
}

- (void)viewDidLoad {
  [super viewDidLoad];

  lynx::pub::LynxView::Builder builder;
  builder.SetScreenSize(self.view.frame.size.width, self.view.frame.size.height, 1.0)
    .SetFrame(0, 0, self.view.frame.size.width, self.view.frame.size.height)
    .SetParent((__bridge NativeWindow)self.view)
    .SetGenericResourceFetcher(std::make_shared<ExampleGenericResourceFetcher>());
  self.lynxView = builder.Build();
  [self loadTemplate];
  }

- (void)loadTemplate {
  // Call `loadTemplate` where you want.
  auto meta_data = std::make_shared<lynx::pub::LynxLoadMeta>();
  meta_data->SetUrl("https://unpkg.com/@lynx-example/hello-world/dist/main.lynx.bundle");
  // Load template with meta_data
  self.lynxView->LoadTemplate(meta_data);
  }

@end
Then you will see the following interface on the screen:
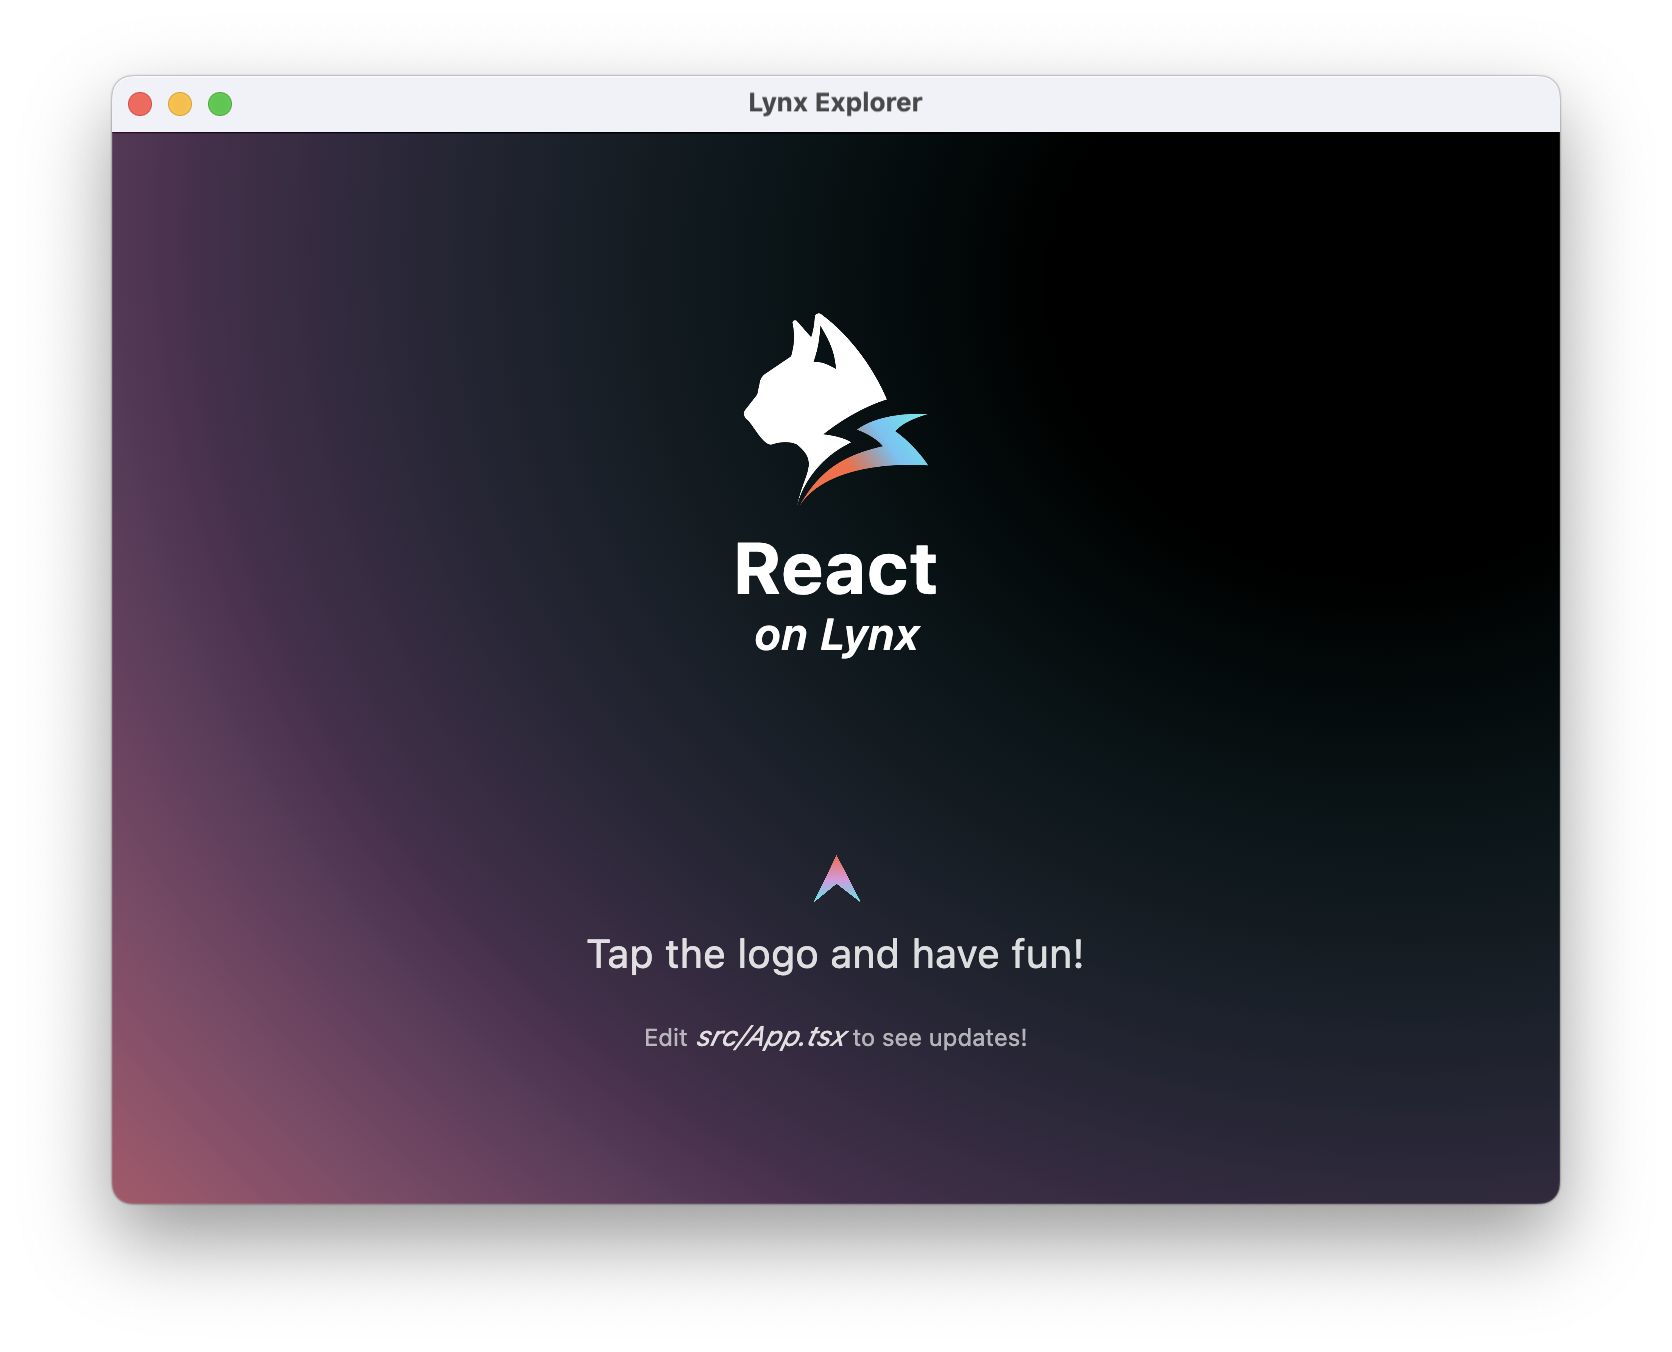
Congratulations, you have now completed all the work of rendering the LynxView!
#4. Now what?
At this stage, you have successfully integrated Lynx into your App. Refer to our developing and debugging docs for in-depth insights on working with Lynx.
During development, you can use Lynx Explorer to quickly preview and iterate on your Lynx pages before integrating them into your native app. Switch to the Try with Explorer approach to set it up.