ReactLynx Rendering Pipeline
This article uses the hello-world project as an example to explain the ReactLynx rendering process in detail:
- Demonstrate the complete execution flow from the first-frame render to component updates in ReactLynx
- Understand the event distribution and timing relationships of each key stage in the Trace view
- Learn how to use the Trace tool to accurately locate performance bottlenecks in the rendering process
First-frame Rendering
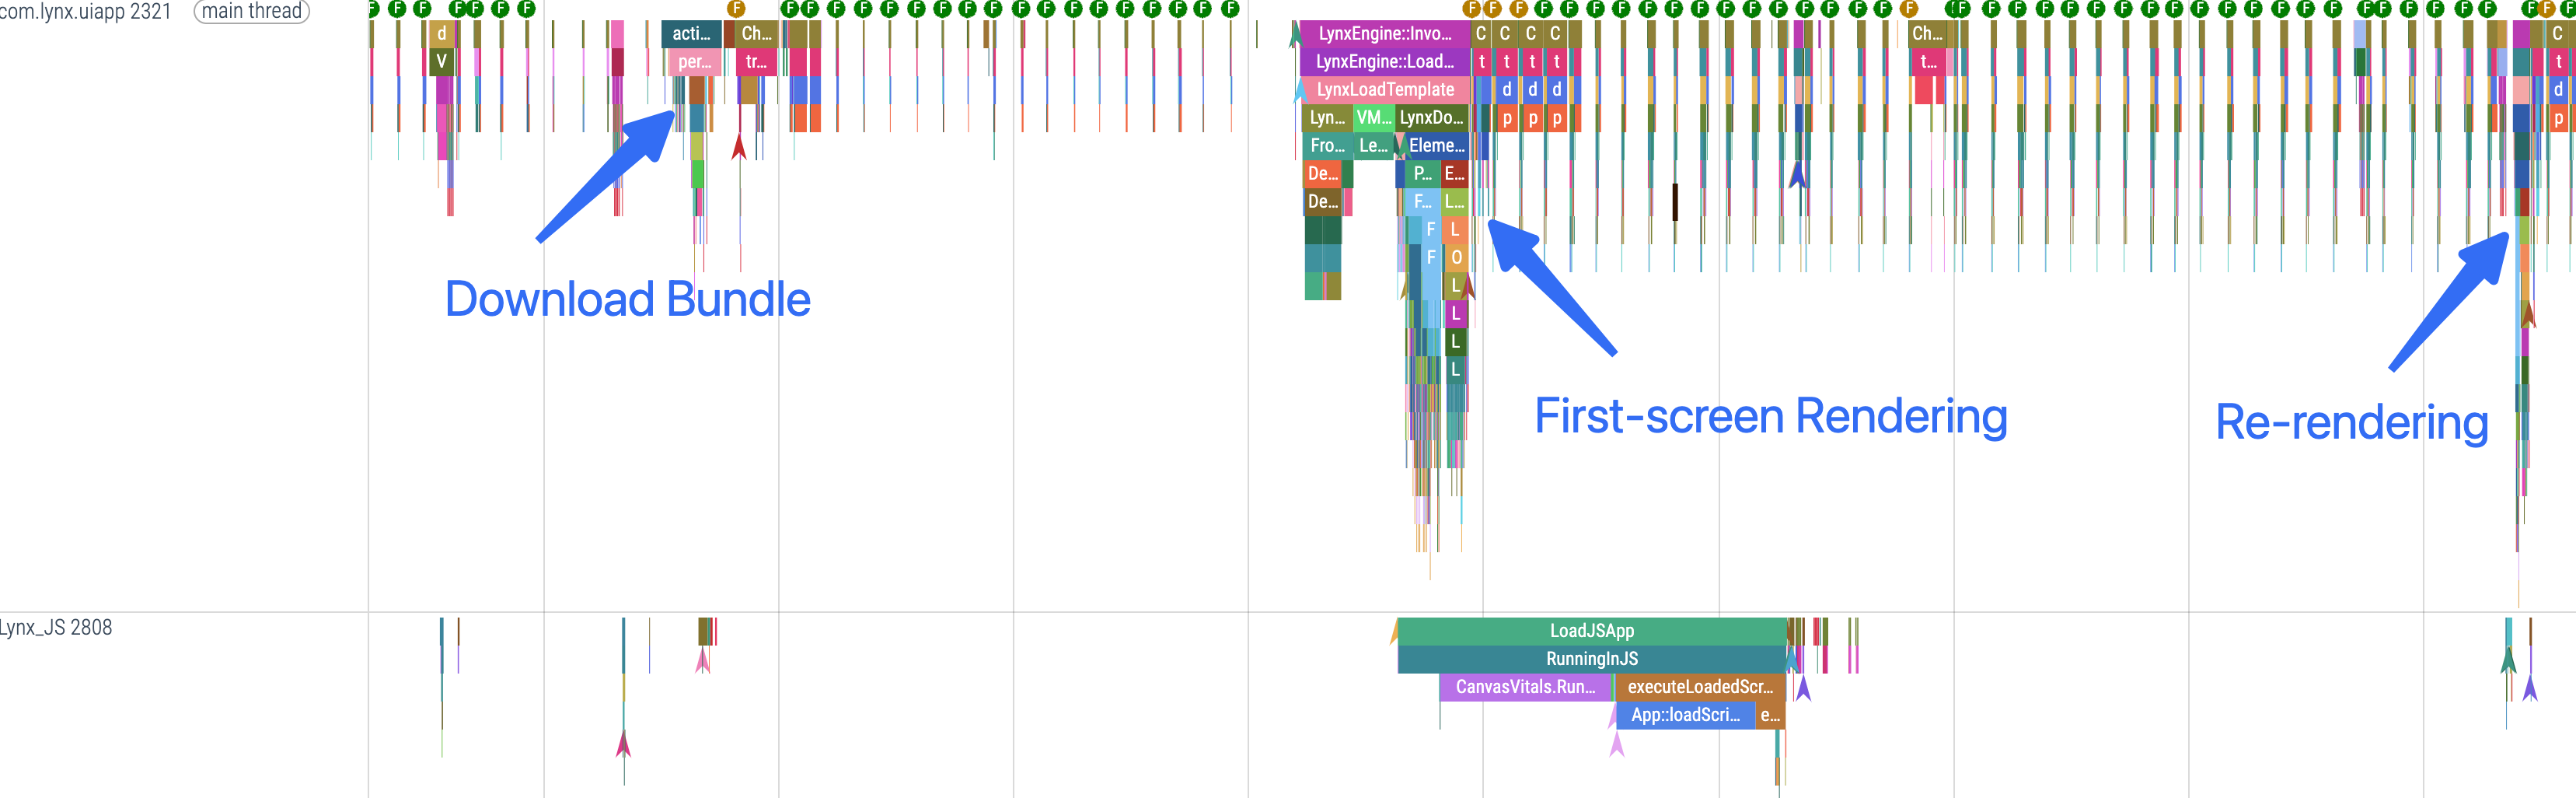
First-frame Rendering includes stages such as downloading the Bundle, loading the bundle, and drawing.
Download Bundle
After the page starts, it first downloads the Bundle。
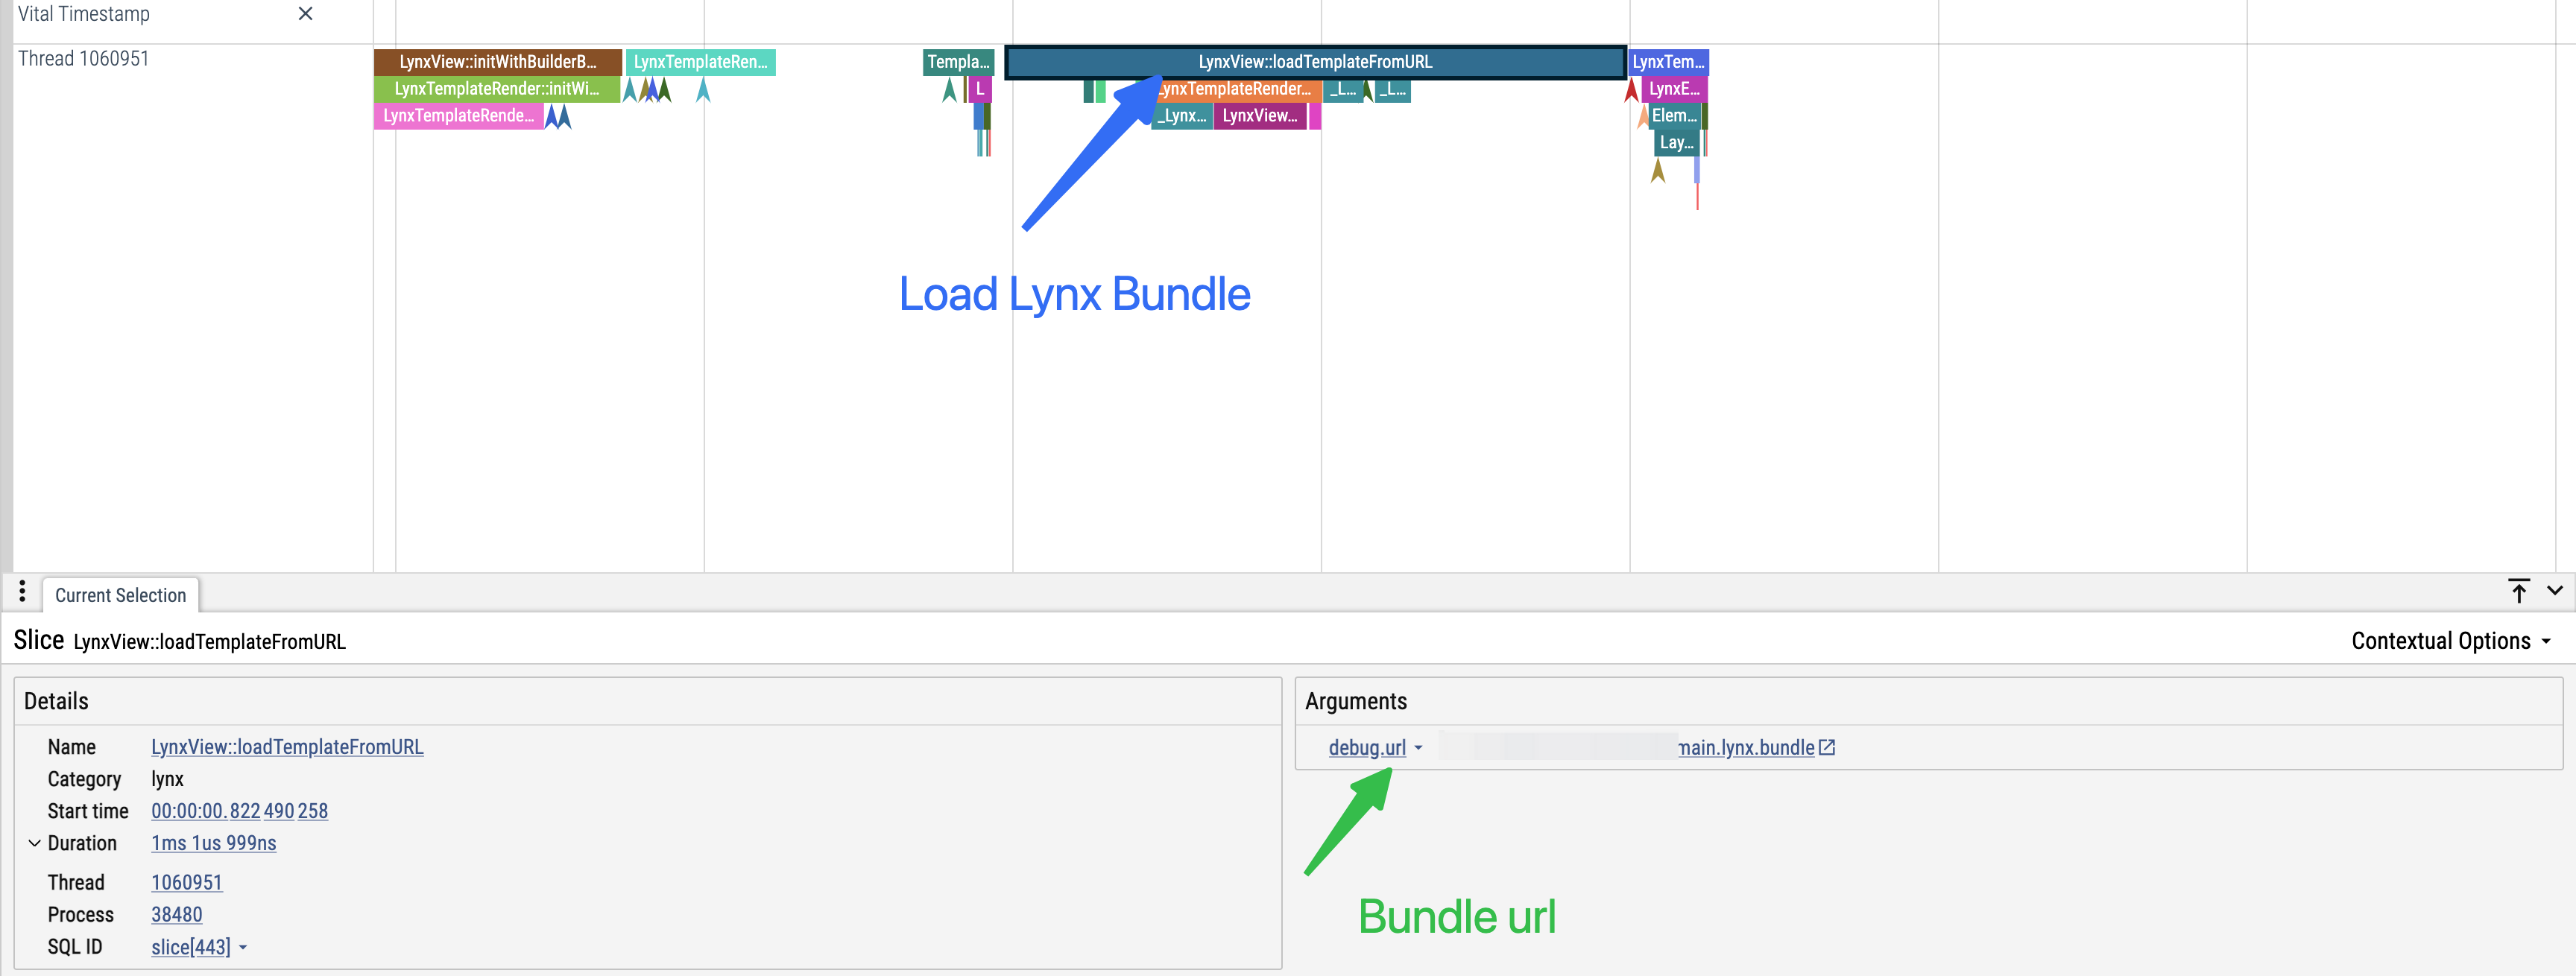
Load Bundle
Once the bundle is downloaded, it enters the loading stage.
Parse Bundle
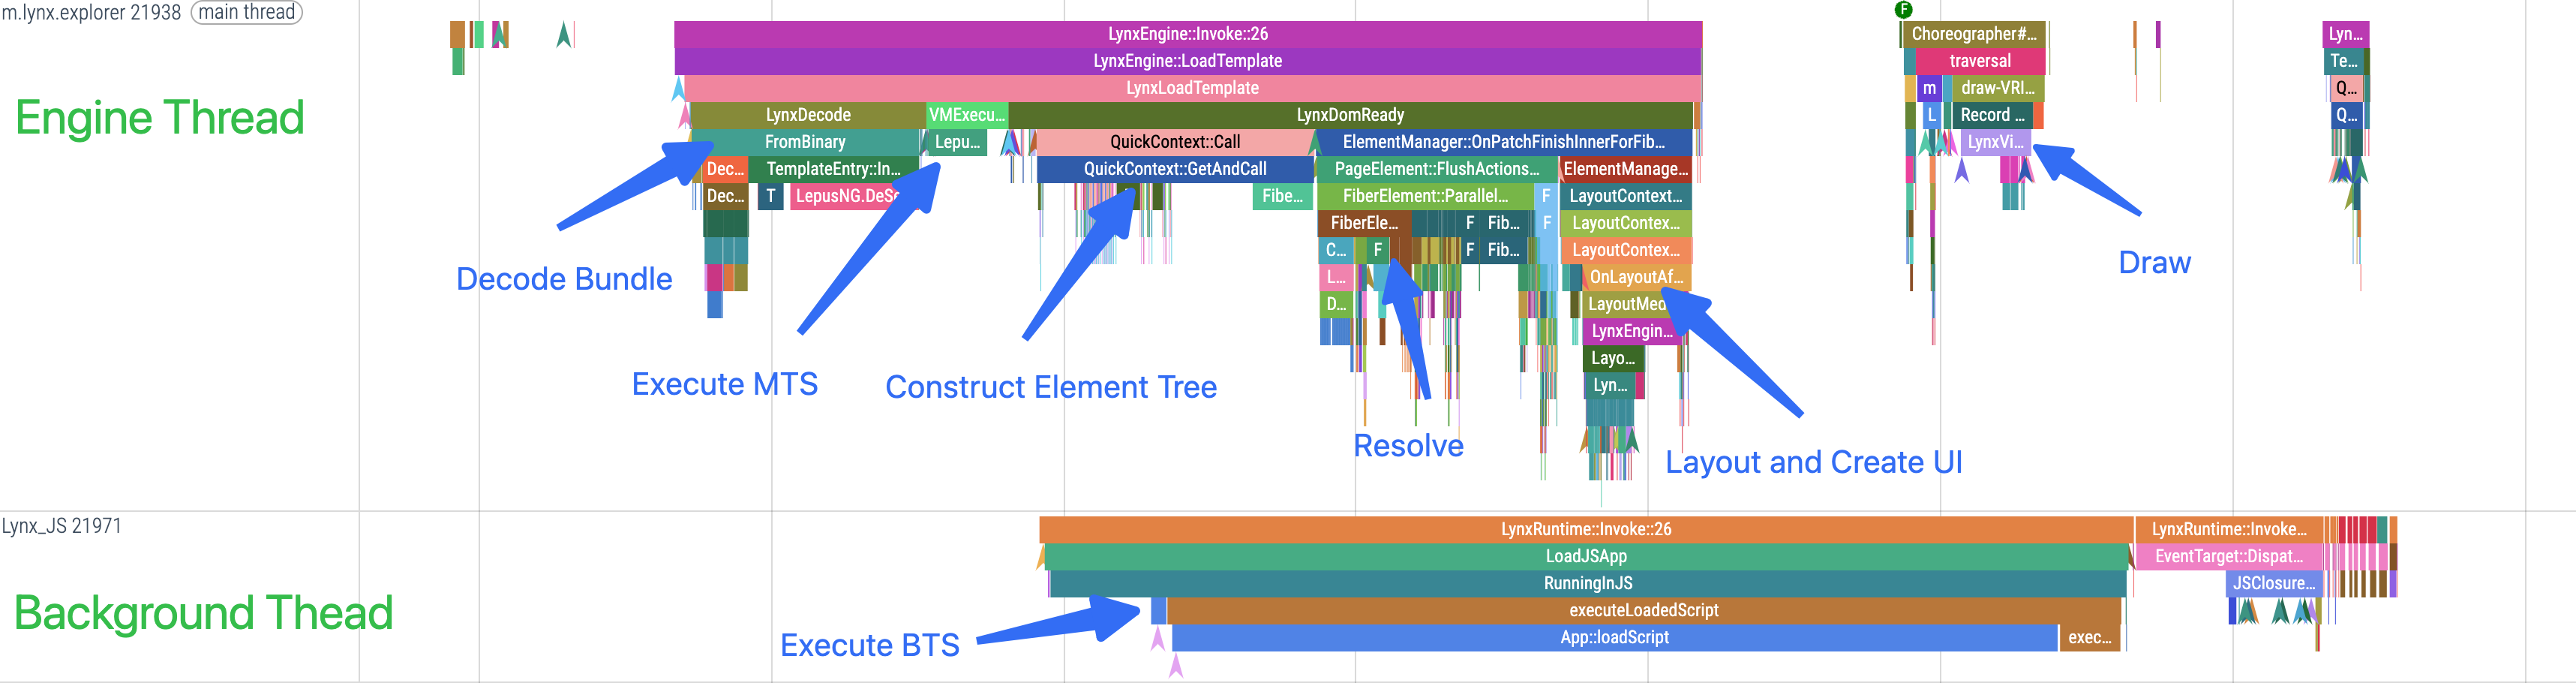
During the bundle loading stage, the content of the bundle—such as CSS stylesheets, scripts, and page configurations—is first parsed
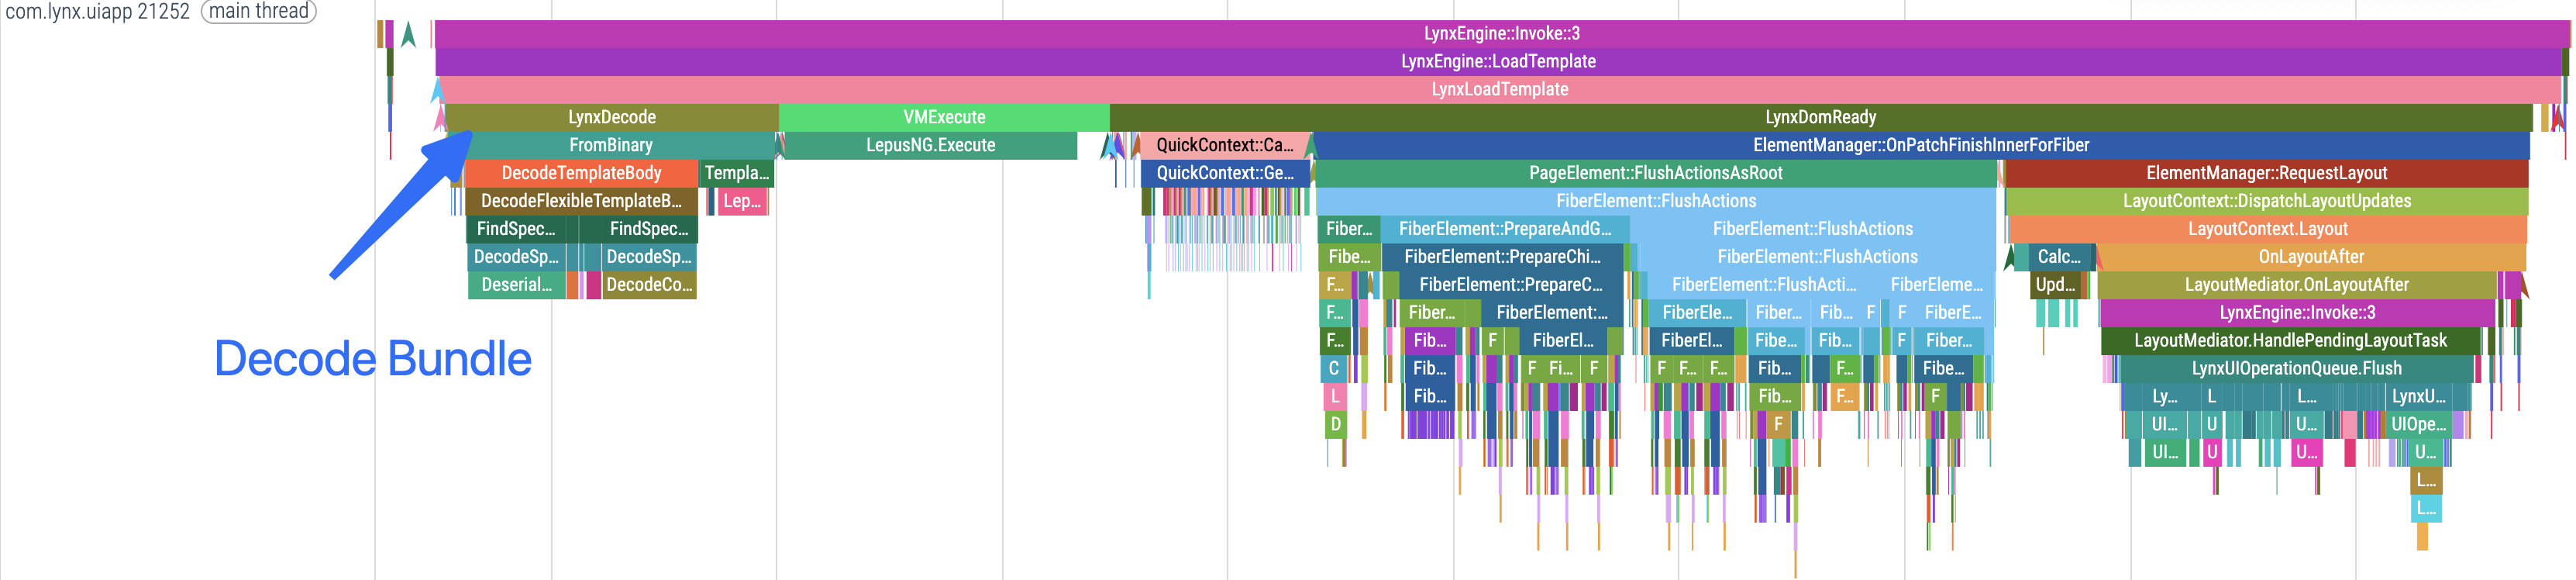
Execute MTS
After parsing the bundle, the Engine thread virtual machine executes the MTS.

Execute BTS
Meanwhile, the background thread virtual machine loads, parses, and executes the BTS.
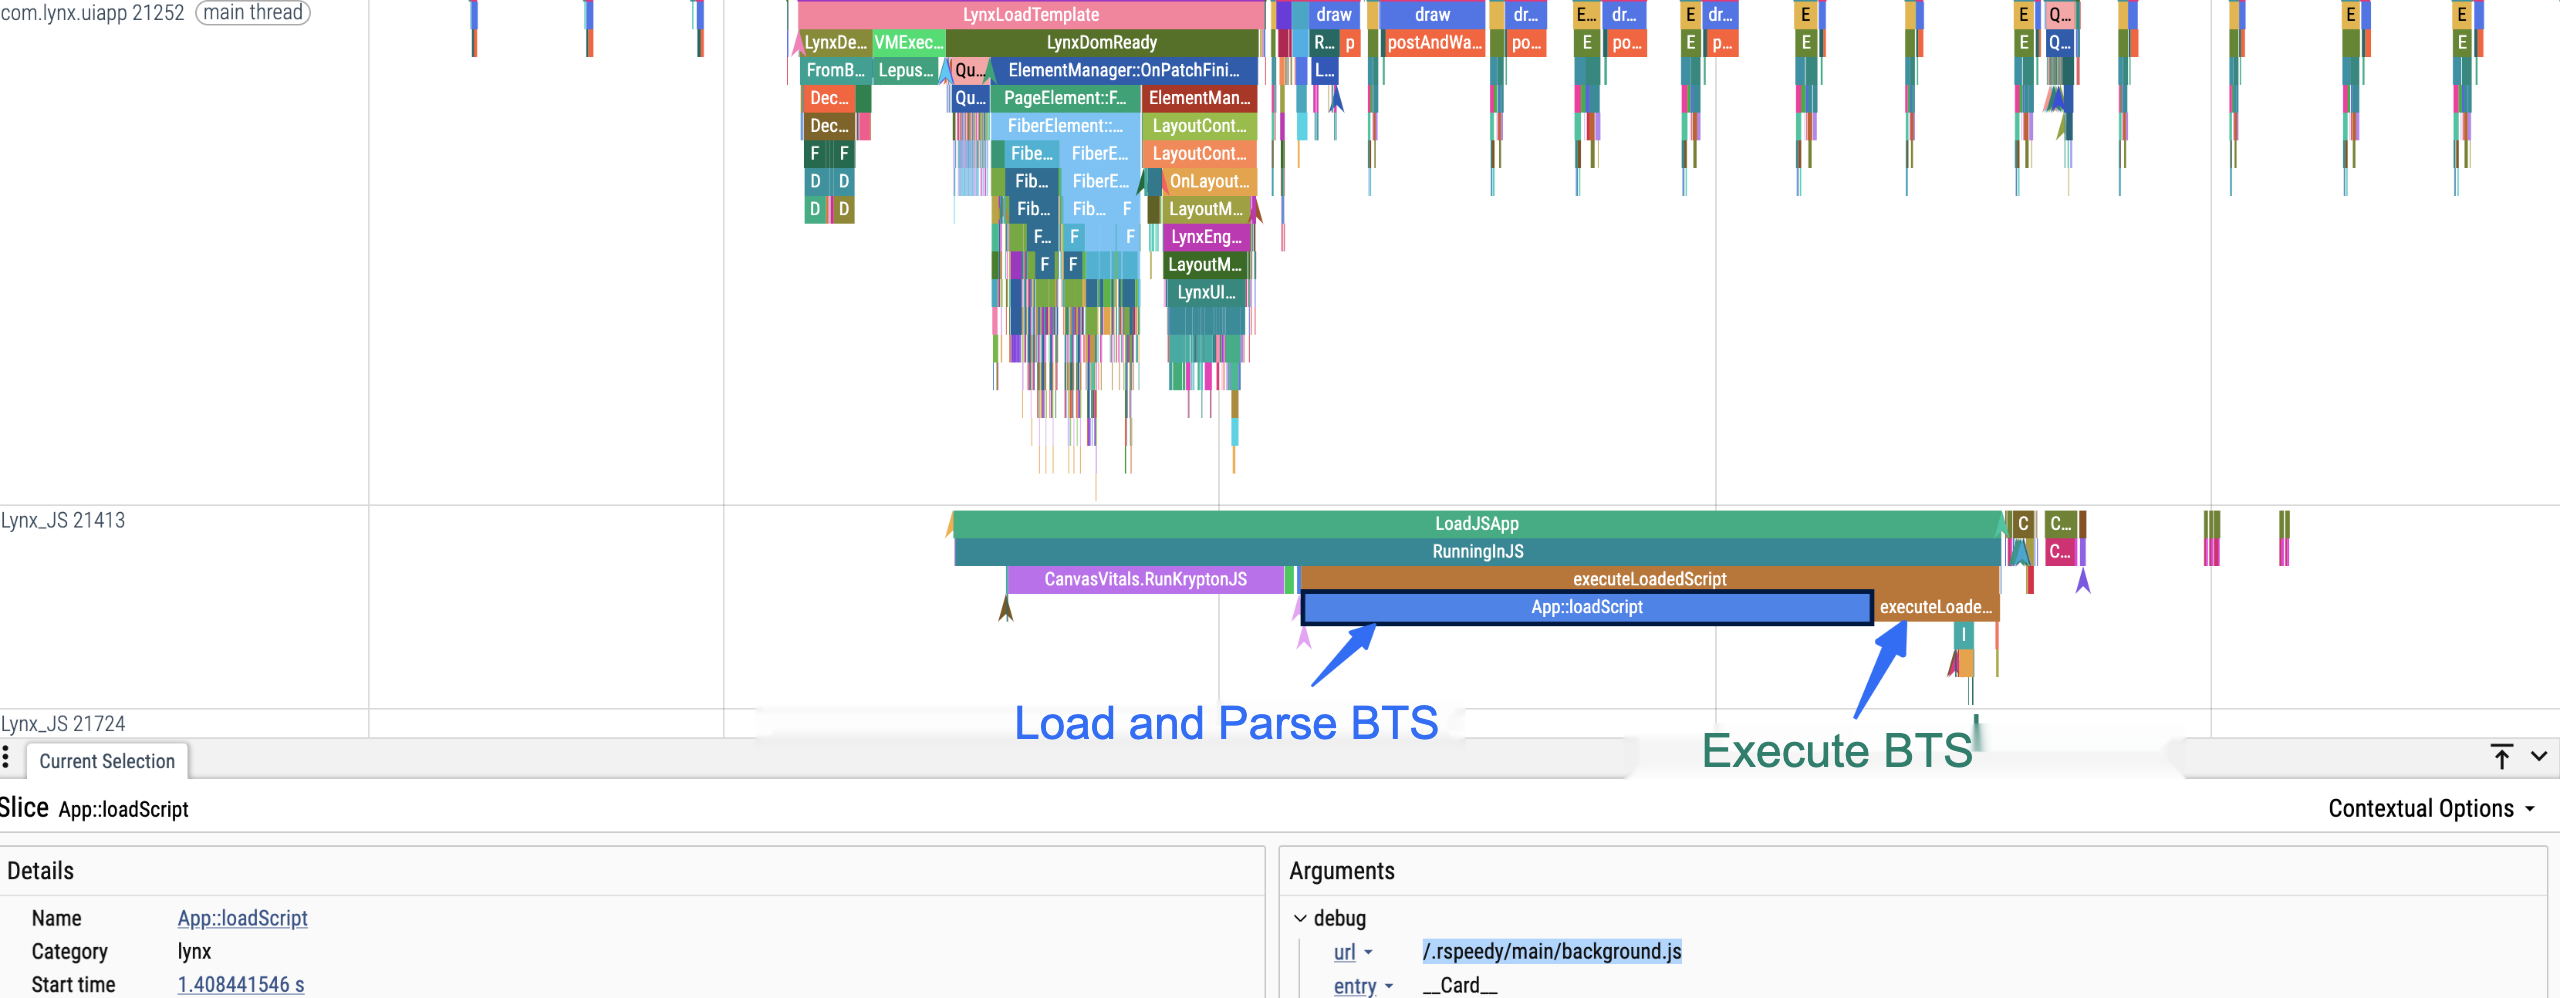
During BTS execution, you can observe the creation process of components.
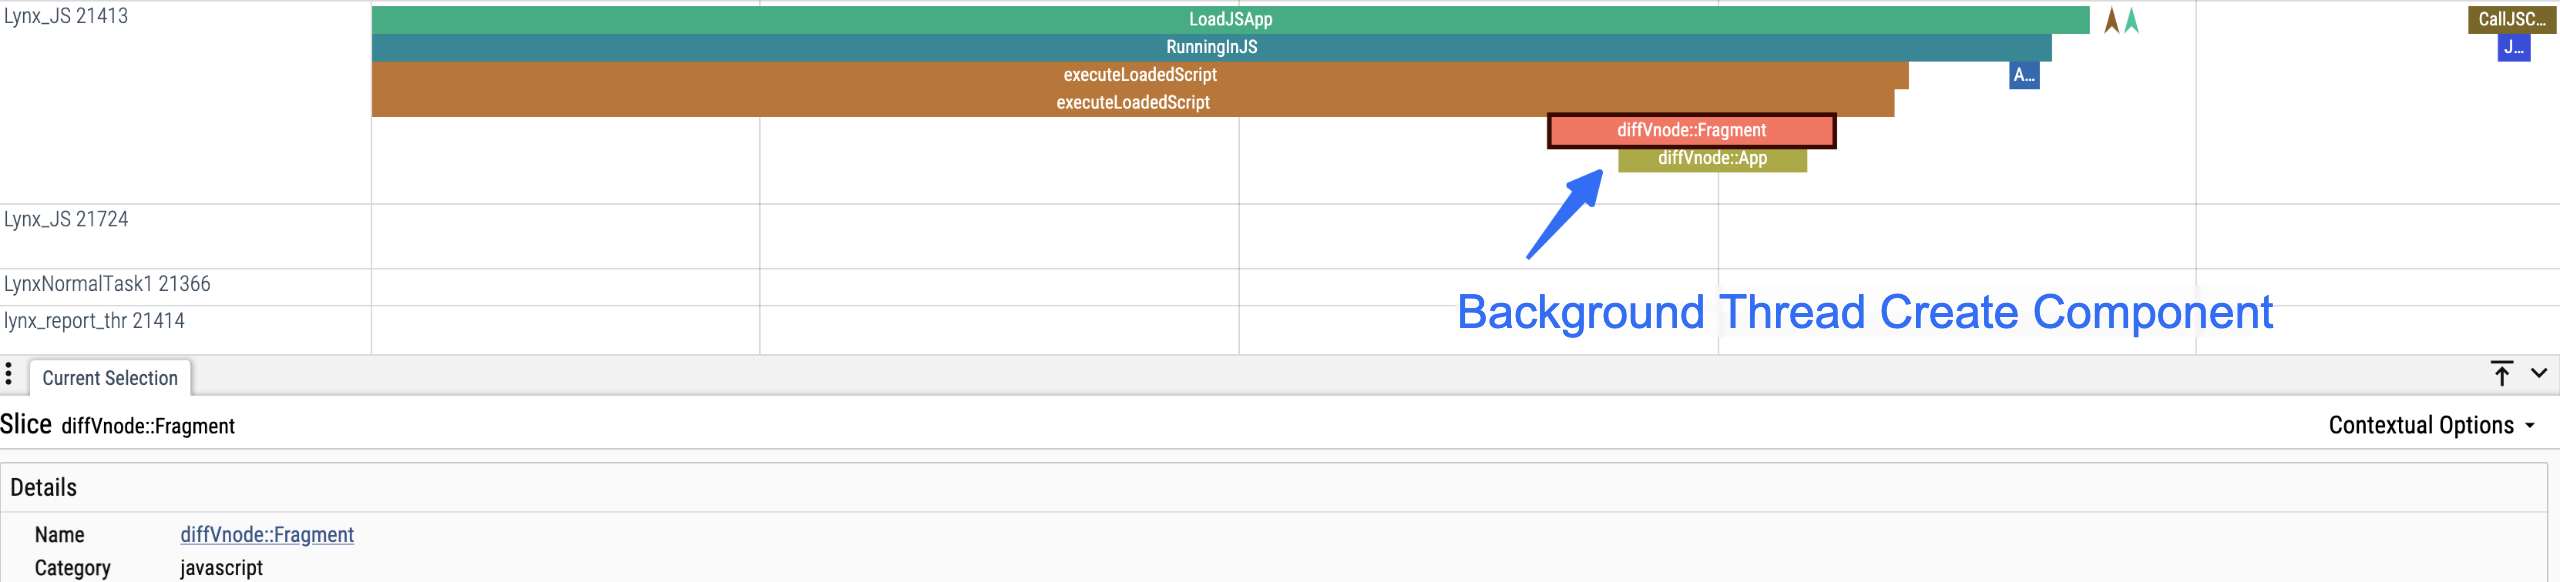
The background thread does not block the Engine thread’s Element tree construction, resolve, layout, and other flows.
Construct the Element Tree
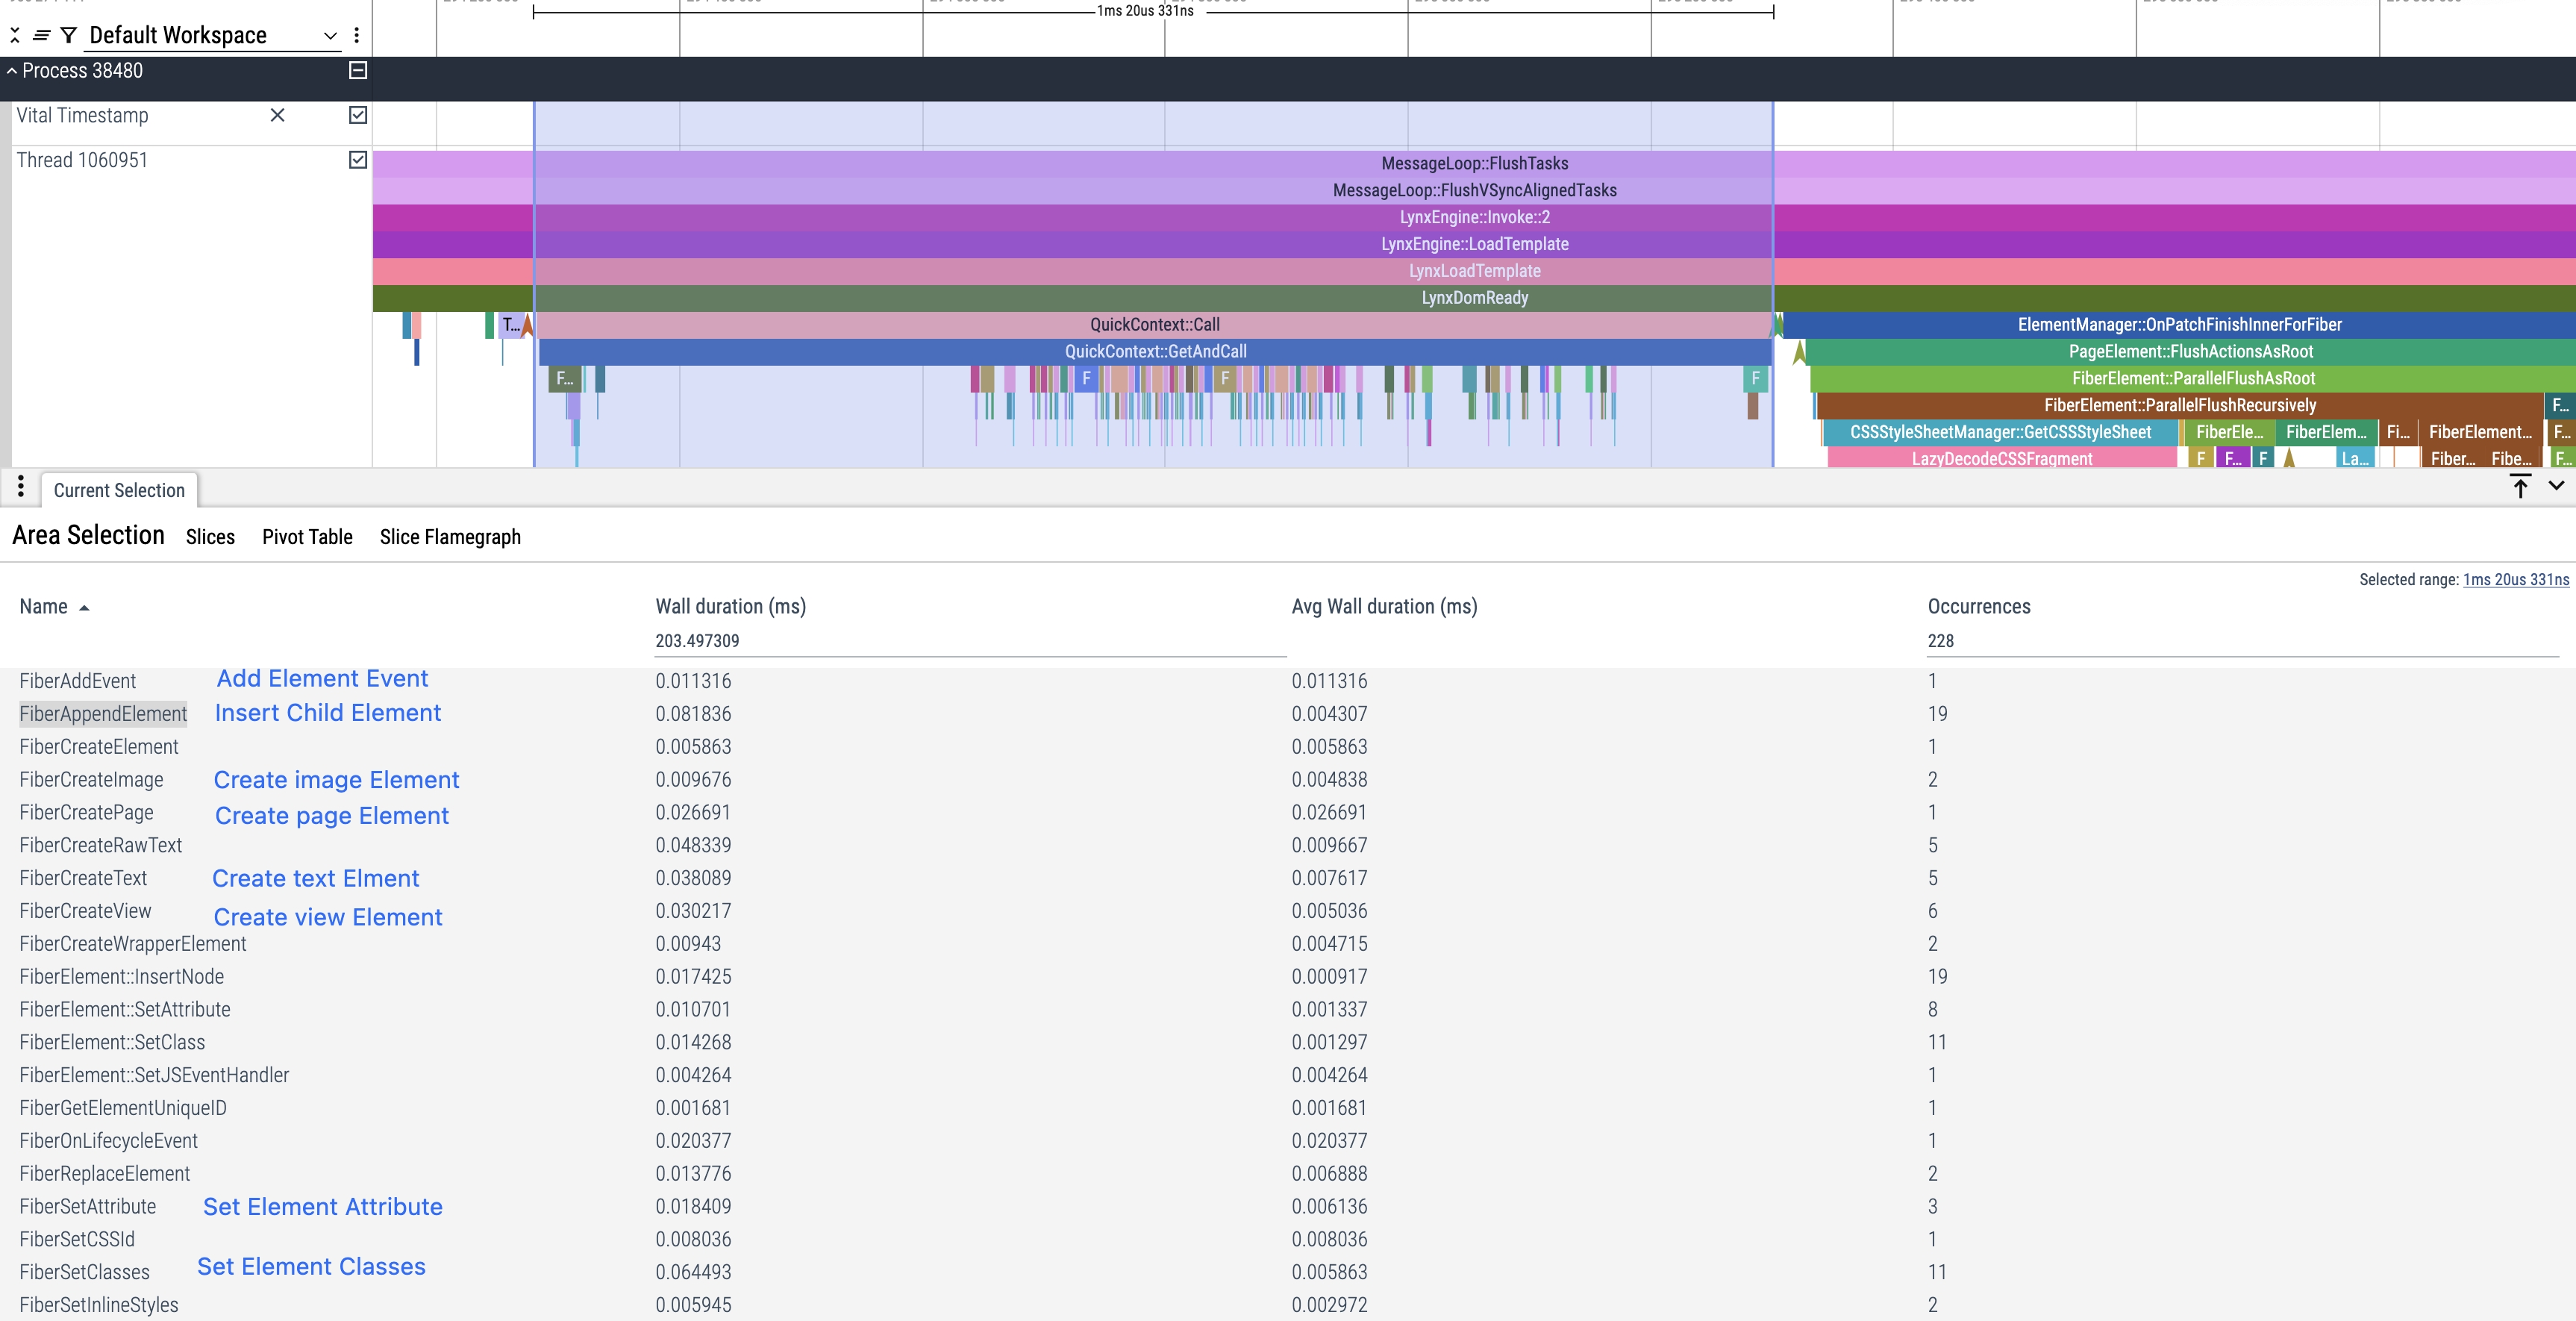
During the Element tree construction stage, the Element PAPI is called to convert the page structure into an Element tree.
Taking the hello-world project as an example, the first frame creates 1 page element, 6 view elements, 2 image elements, and 5 text elements.
In Trace, you can observe the complete process of creating Elements and setting their Events, Classes, and other attributes.
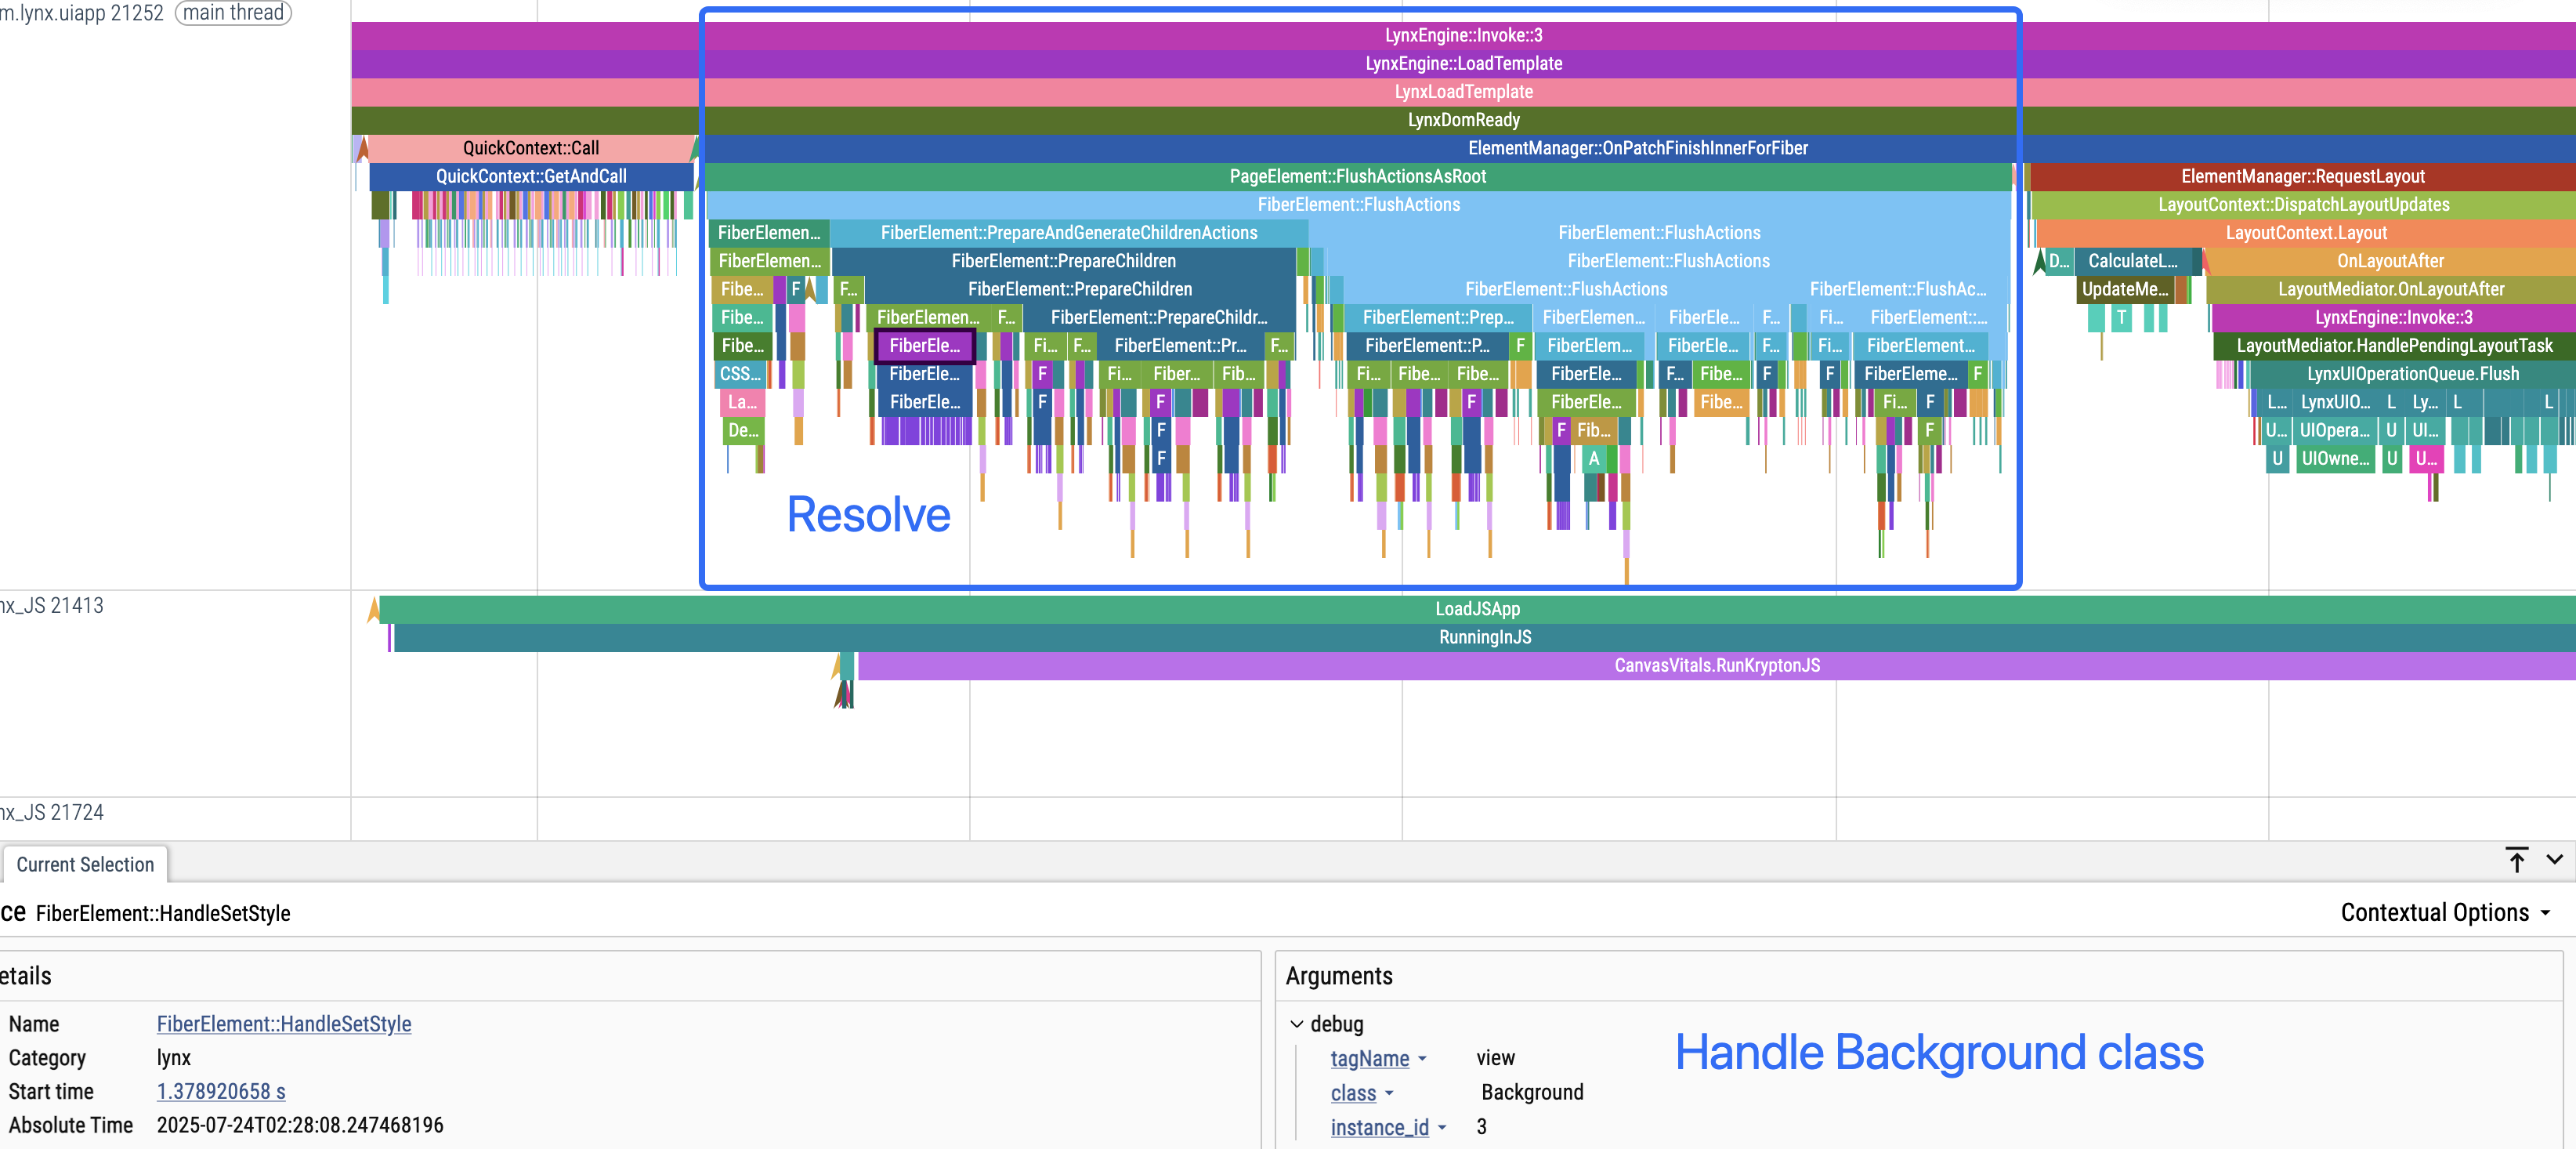
Resolve
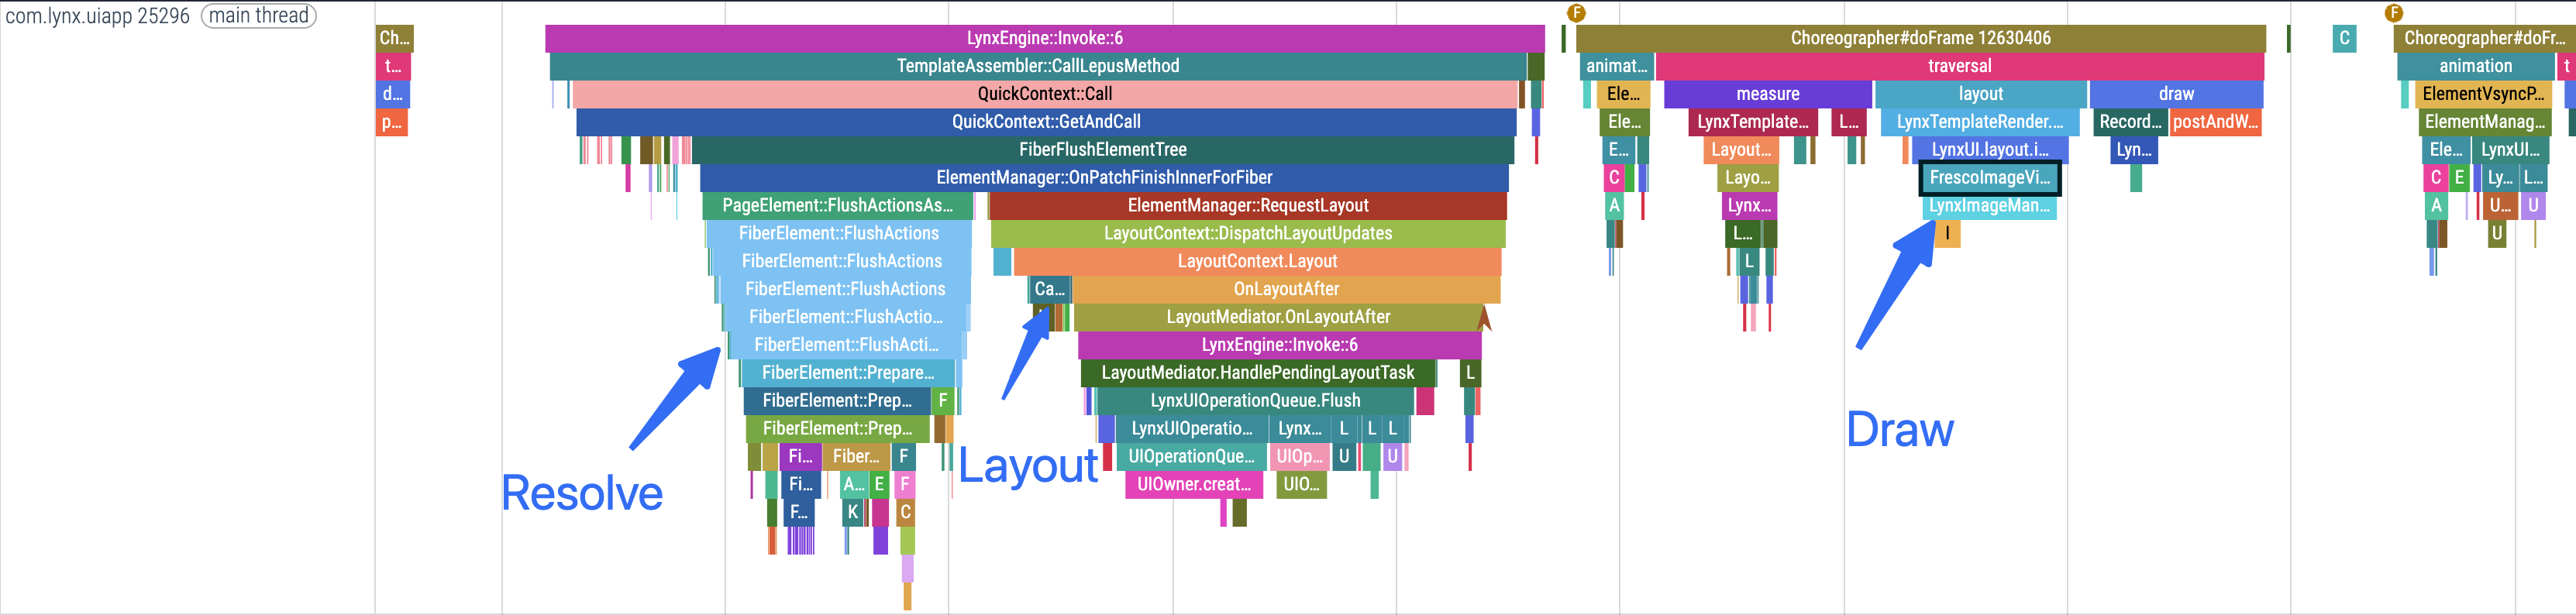
During the Resolve stage, the Element’s className, inline styles, and other attributes are parsed to determine the Element’s style, and the layout node tree is created.
As shown below, the Resolve stage covers the complete execution flow and the parsing of styles for <view className="Background" />.
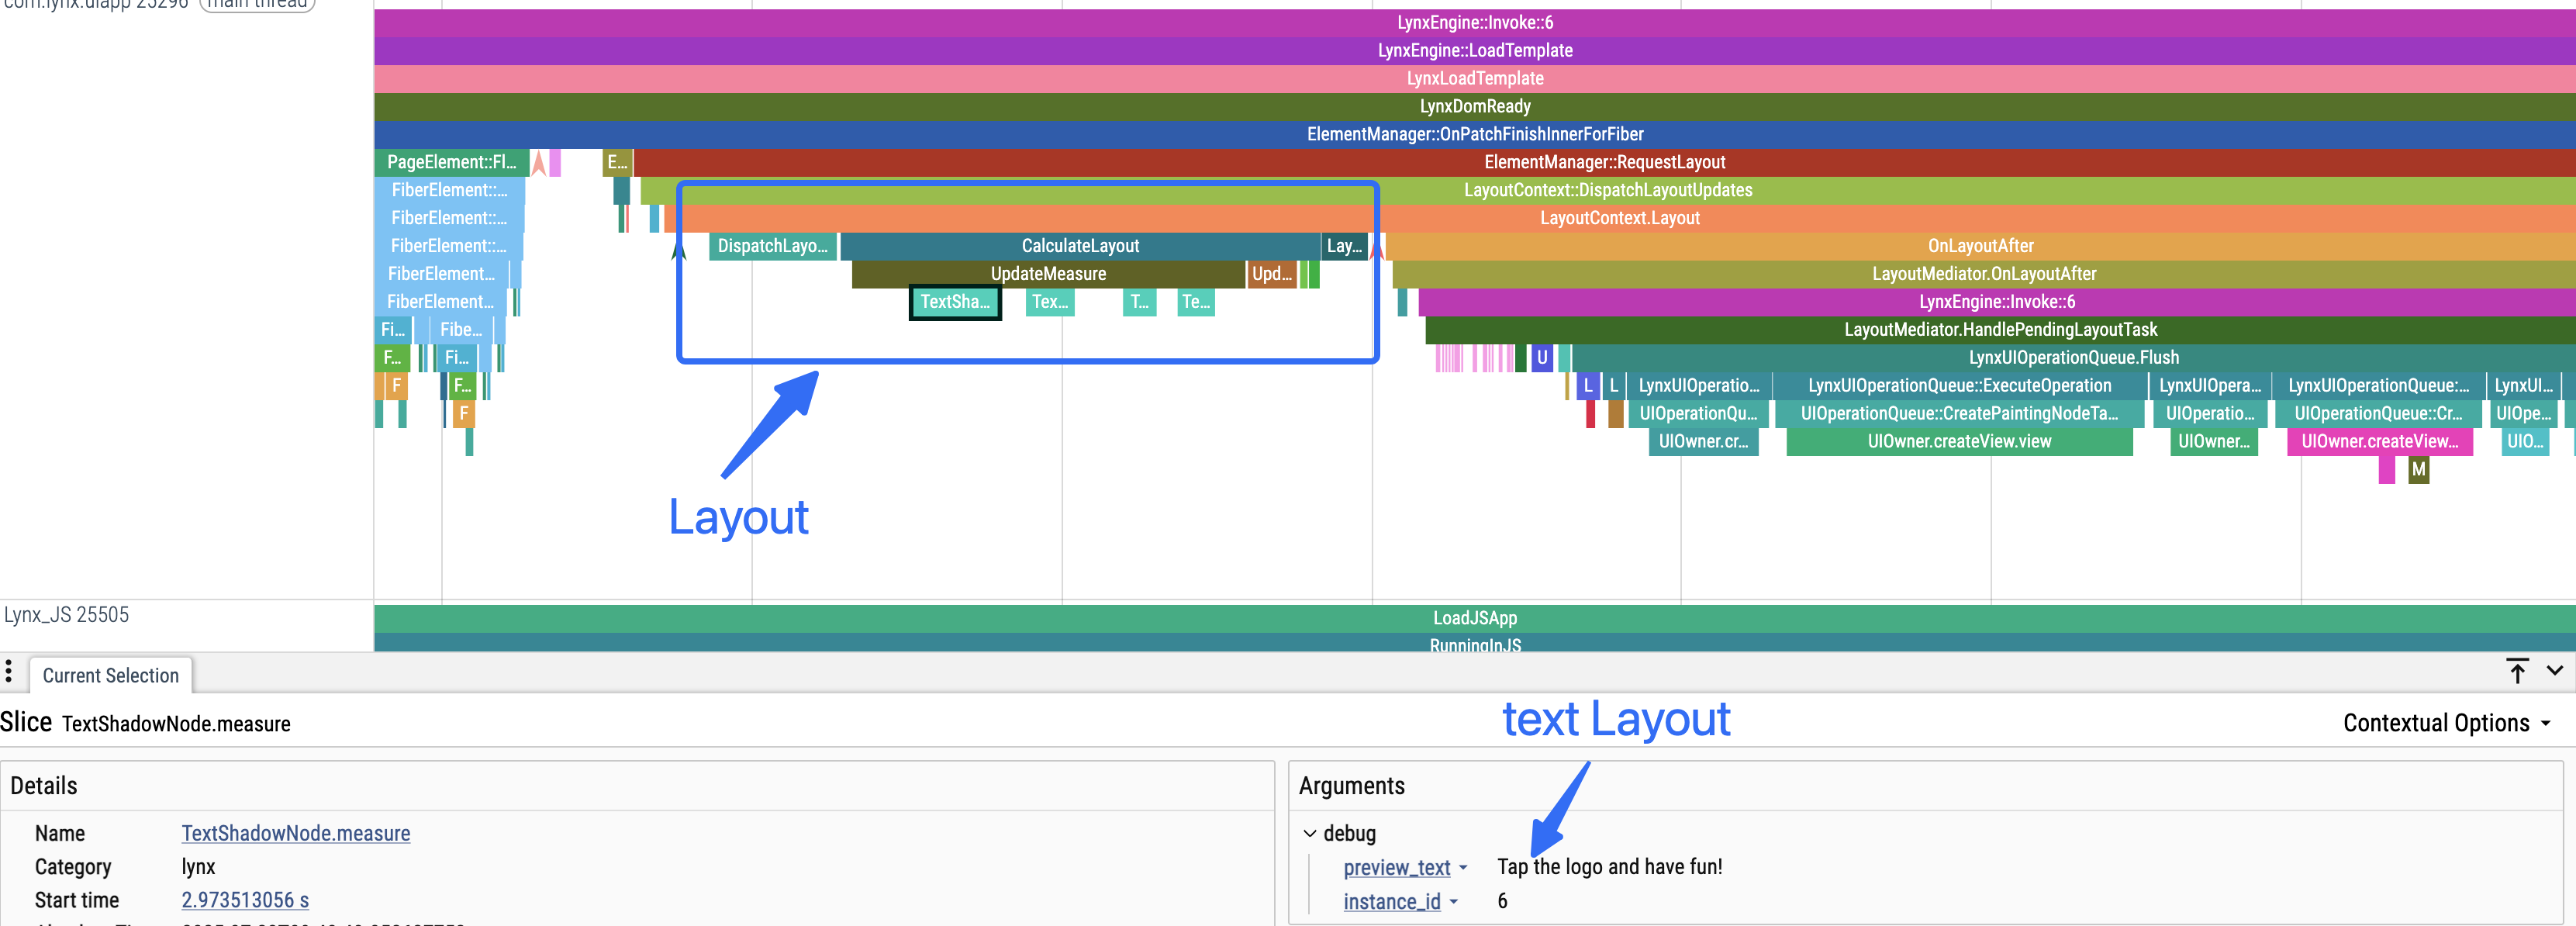
Layout
The layout stage measures and lays out the layout nodes. The following example shows the layout process of the <text>Tap the logo and have fun!</text> node.
Flush
After the layout is complete, platform UIs are created, with various attributes and layout information set.
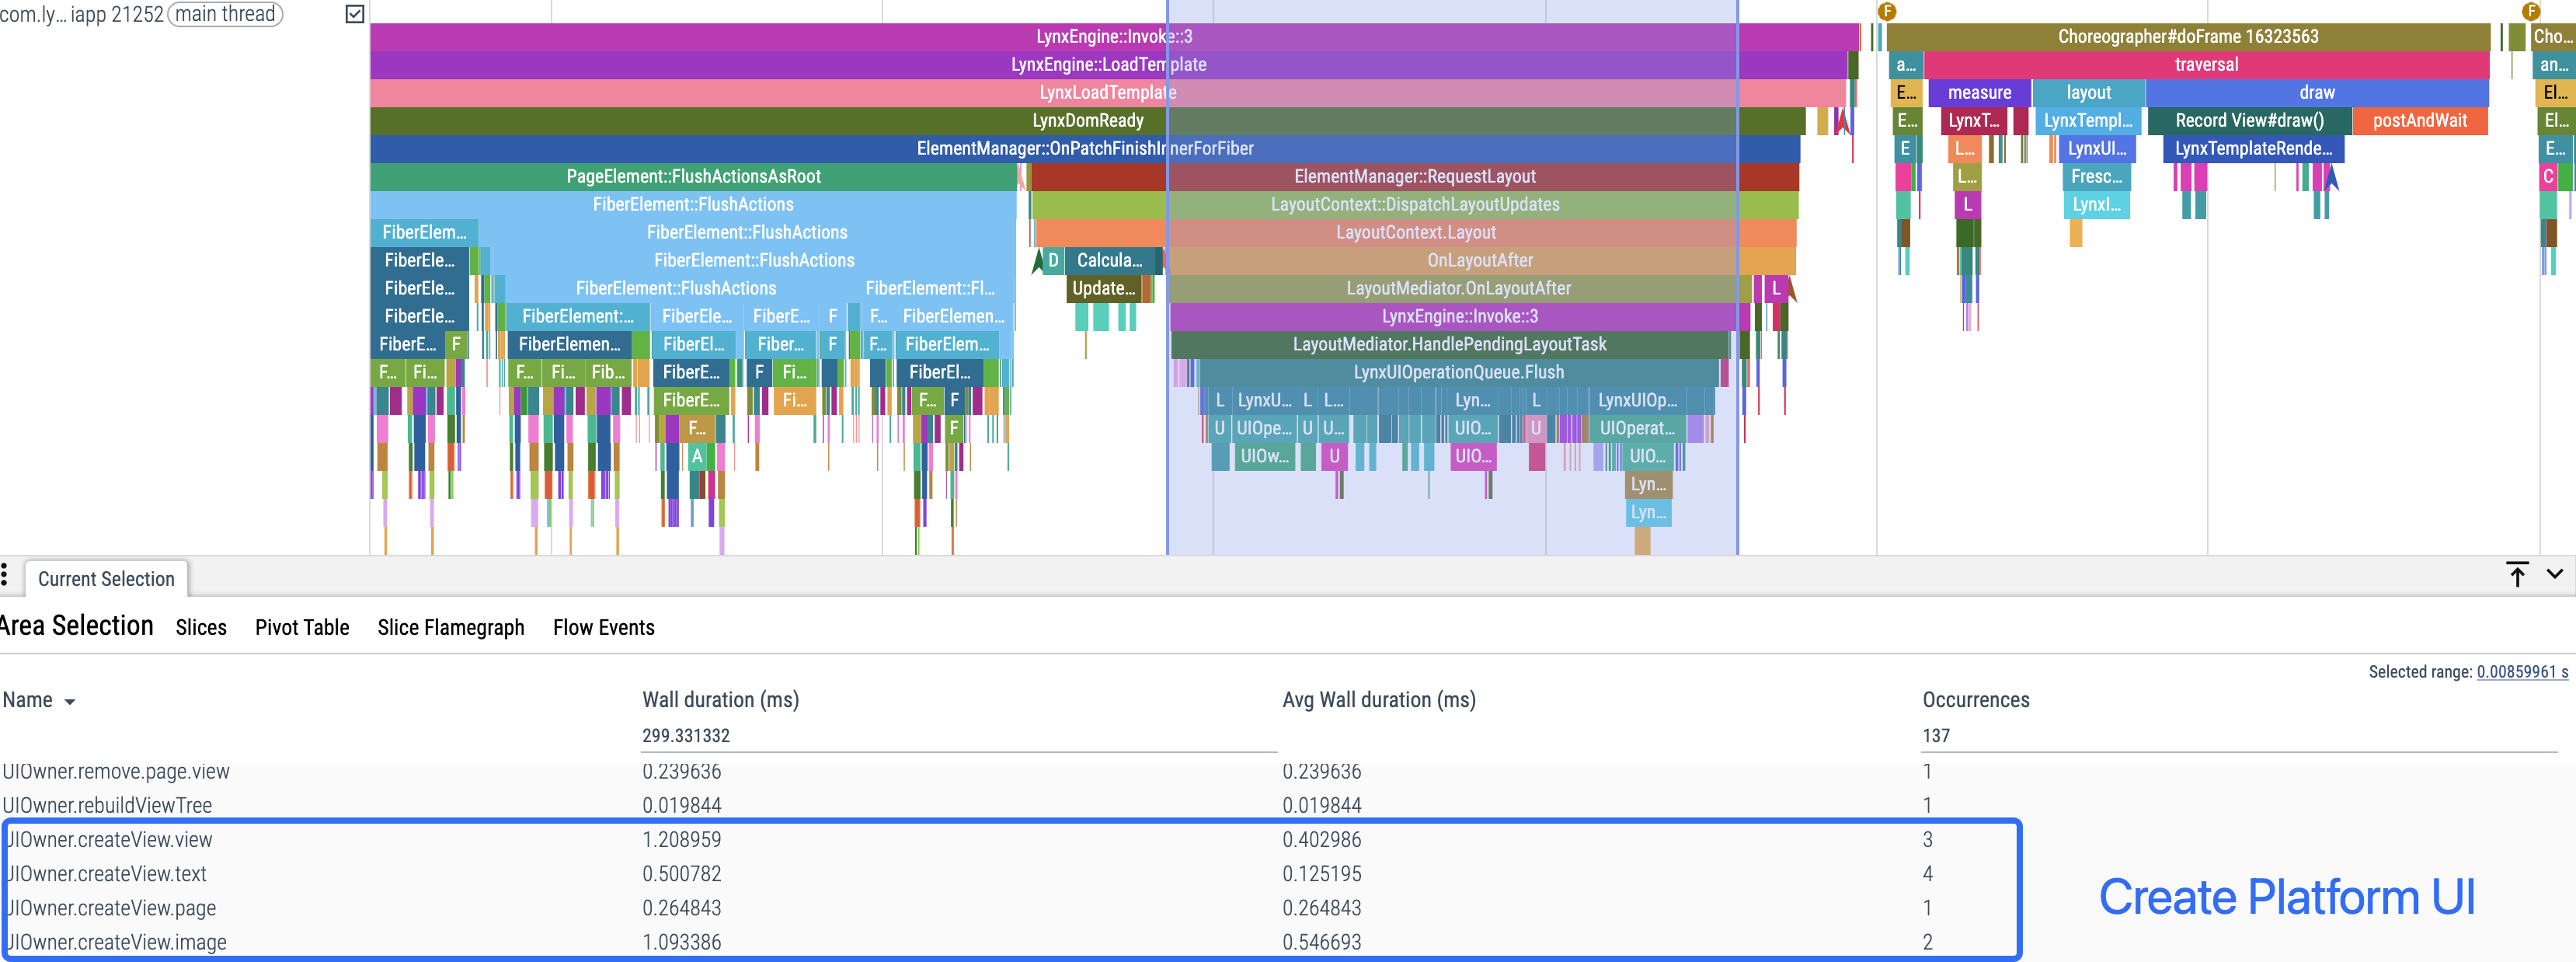
Element nodes containing only layout attributes will not create platform UI nodes. Nested text will be merged with their parent text node to create a single platform UI.
In the hello-world project, the following nodes create platform UI on the first screen:
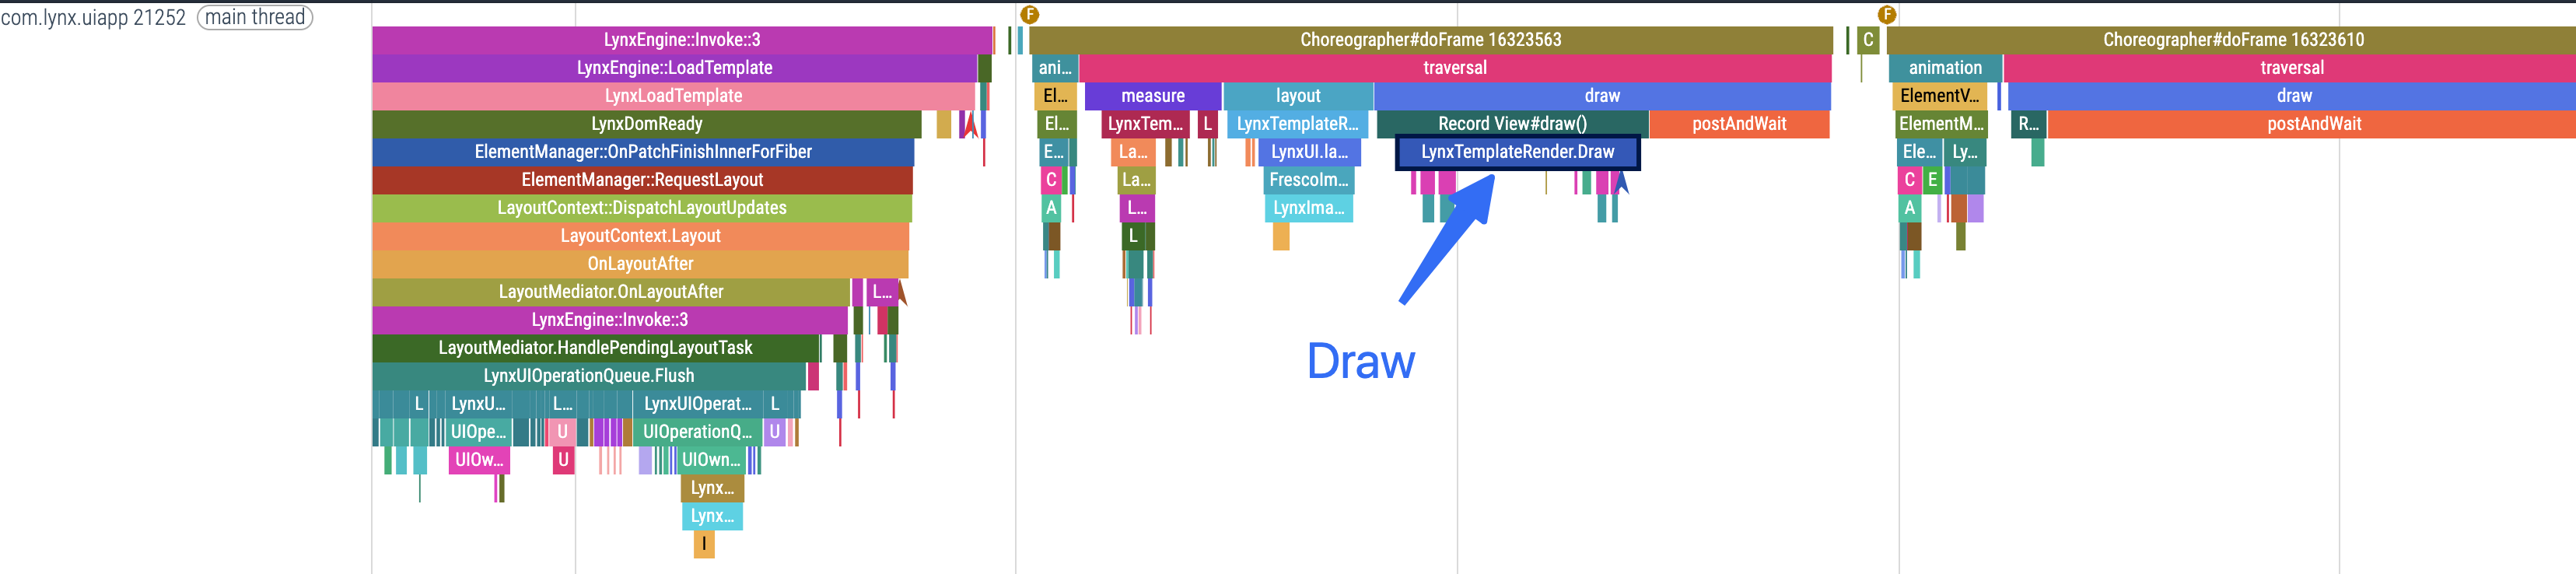
Draw
When the system’s rendering callback occurs, the platform UI completes its first-screen drawing.
Update Rendering Process
Taking the hello-world project as an example, clicking the Logo triggers an update, which demonstrates the component update rendering flow.
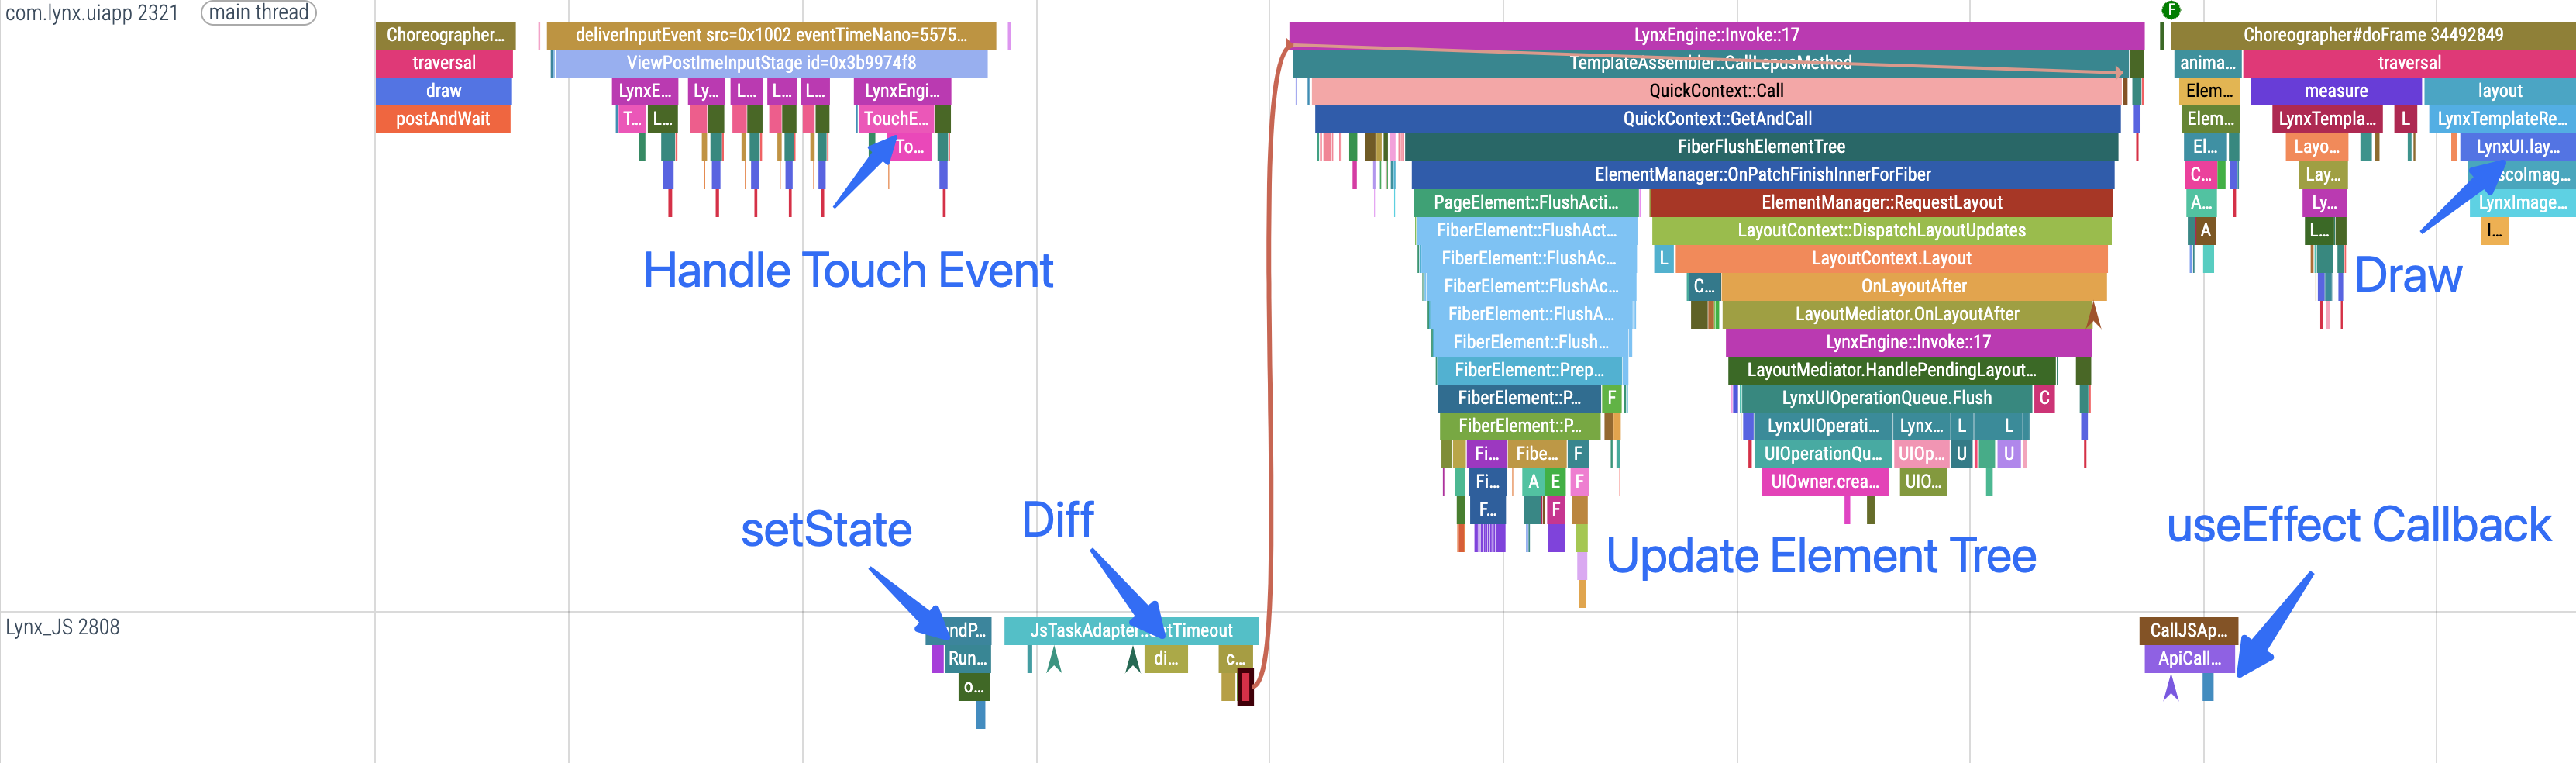
Trigger the Click Event
After clicking the Logo, LynxView processes the click event and sends the event to the background thread, triggering the corresponding node’s click event handler.
To better observe the execution timing of the click event callback in Trace, you can use the Trace API to add custom Trace events.
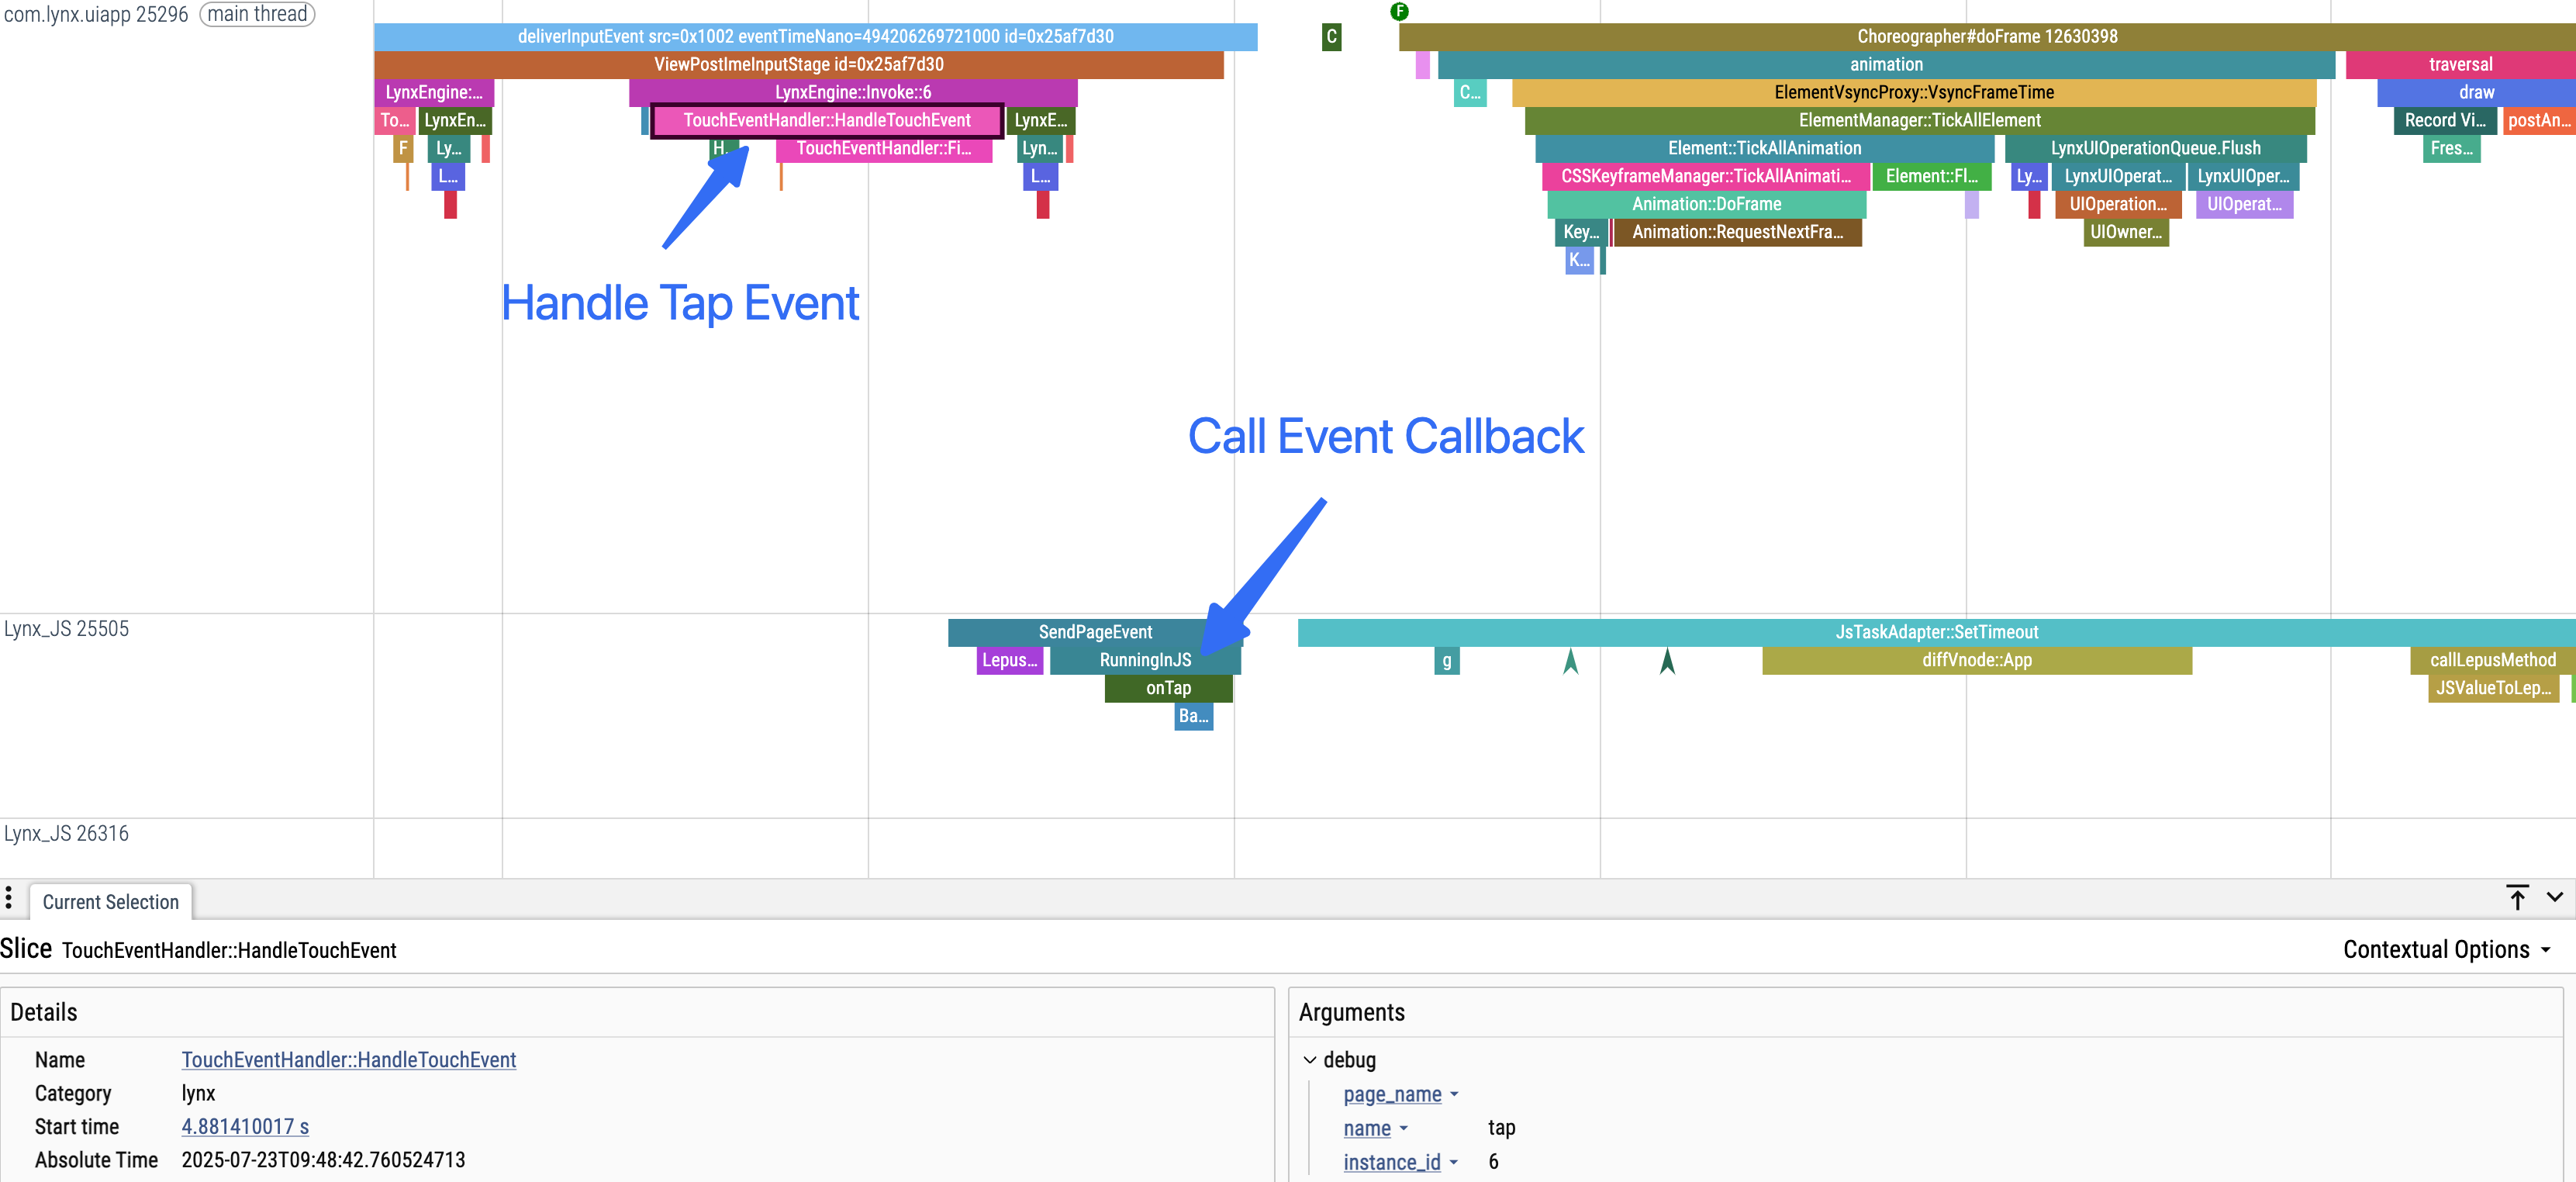
The App component updates the state of alterLogo in the click event callback.
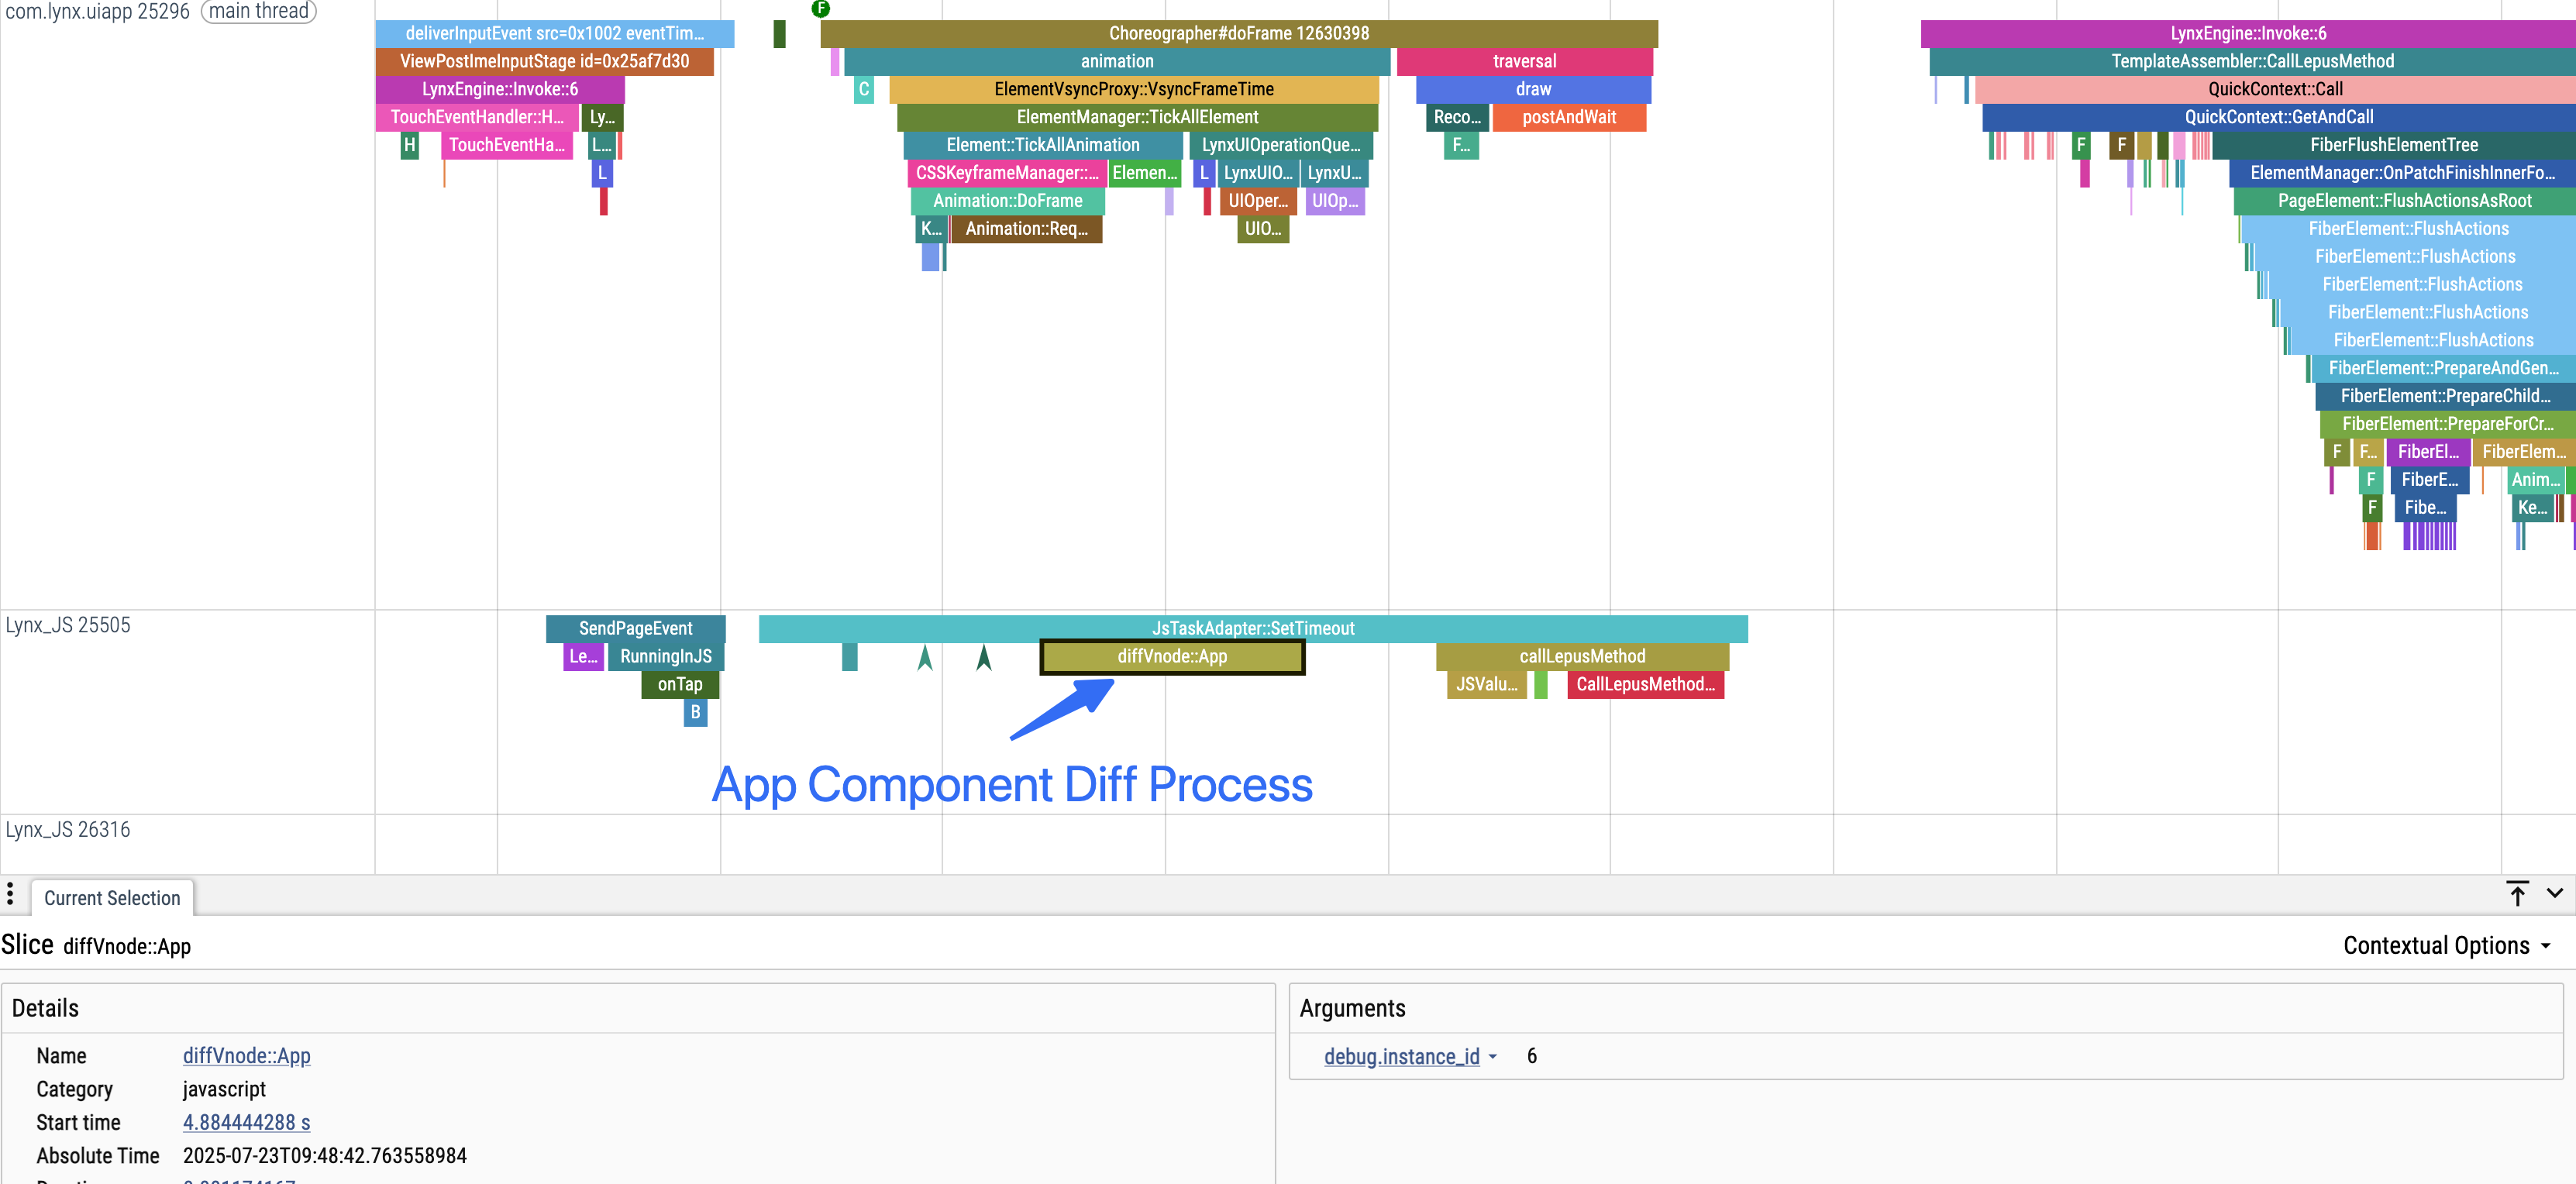
Diff Component Diff
After updating the component state, the component diff process is triggered, and the image node changes:
The following image shows the diff process for the App component:
Component Update Synchronization
After the component diff is complete, the update information is synchronized to the Engine thread, driving subsequent UI changes. In Trace, clicking the CallLepusMethod event allows you to see the UI update process after component diff is complete.
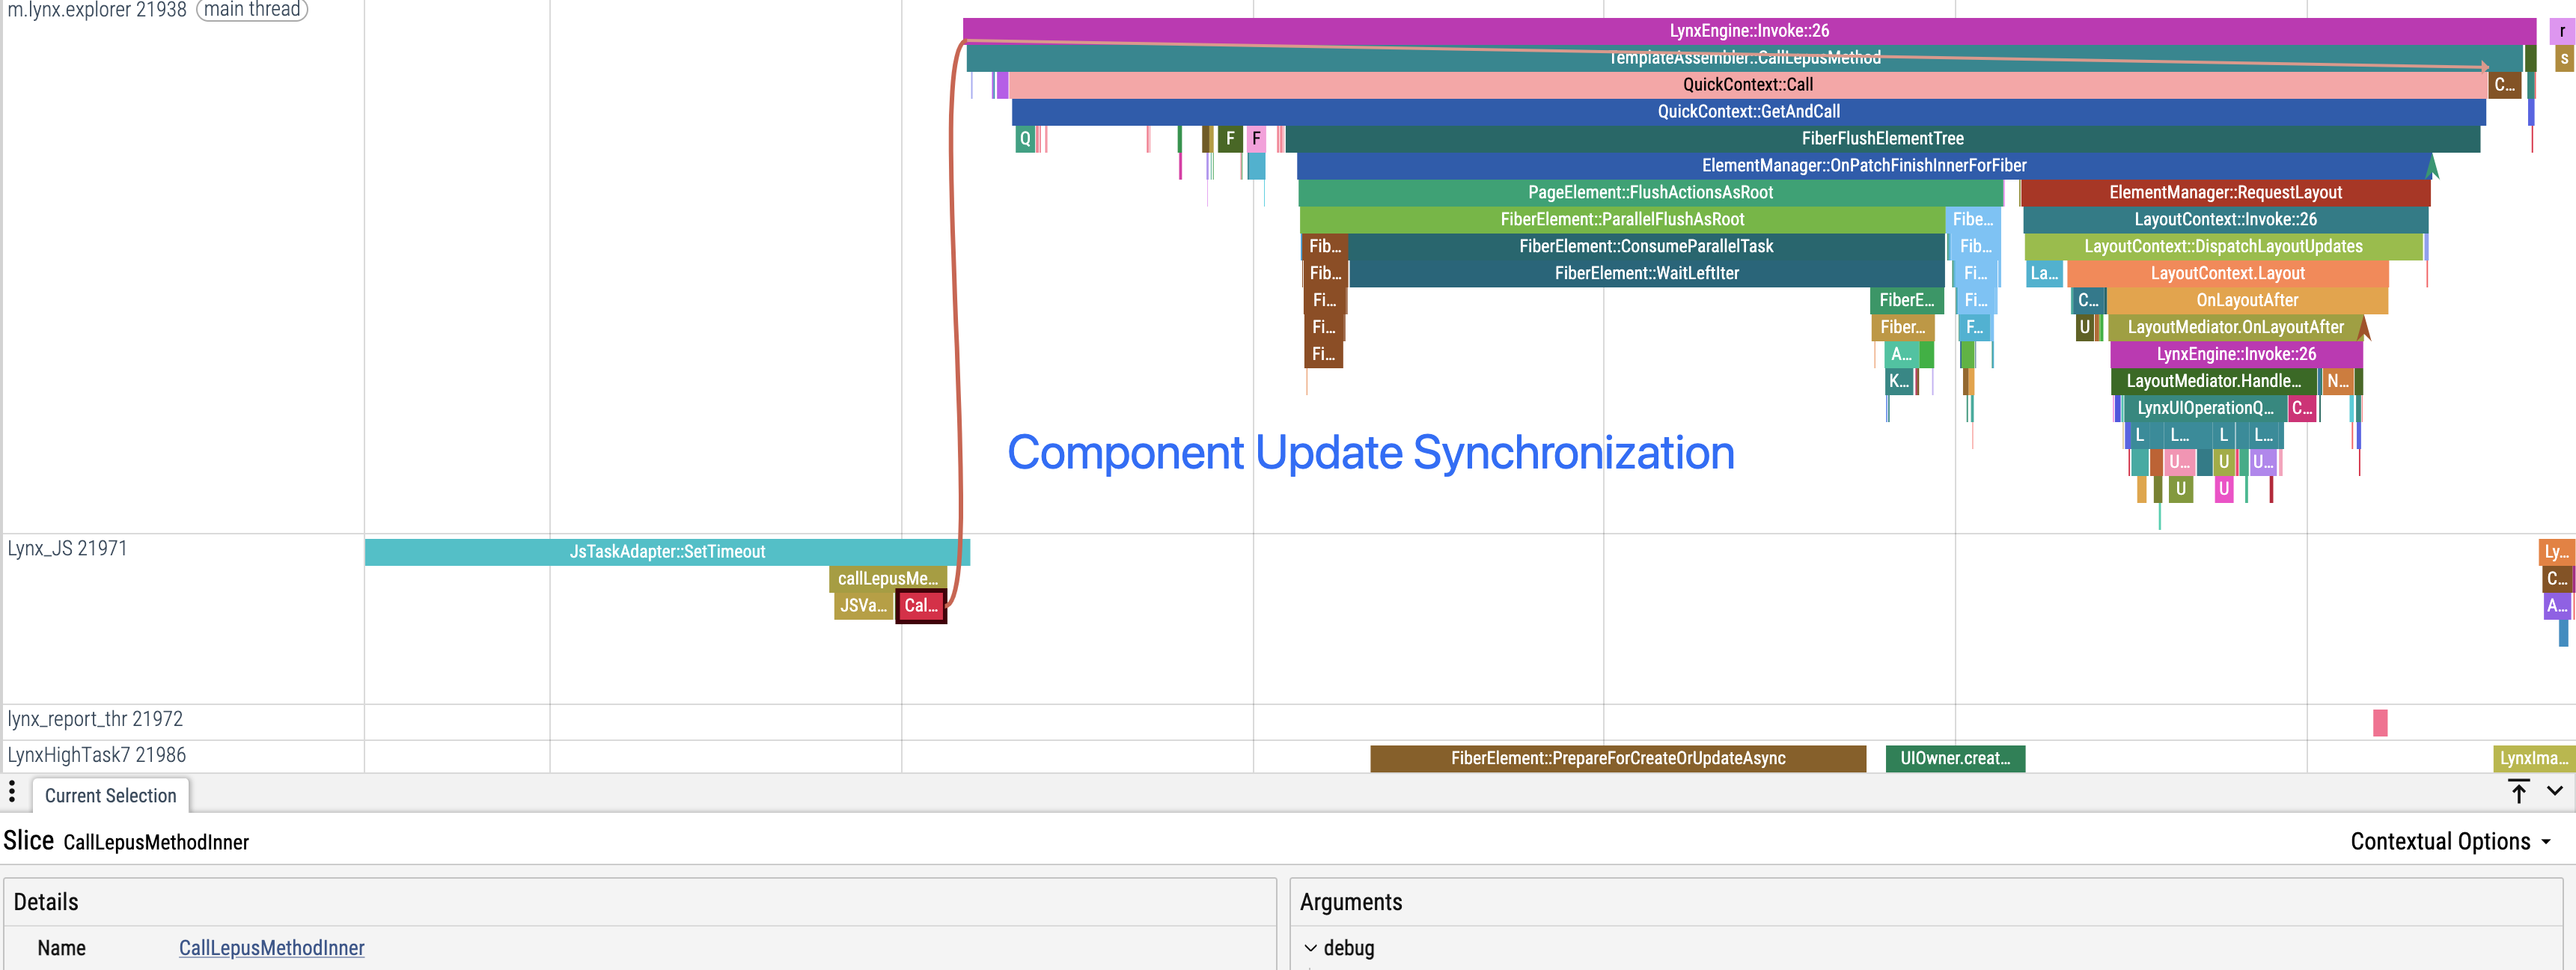
UI Update
The Engine thread shows the update process of the Element tree. As shown below, the Element tree removes one element and adds a new image element.
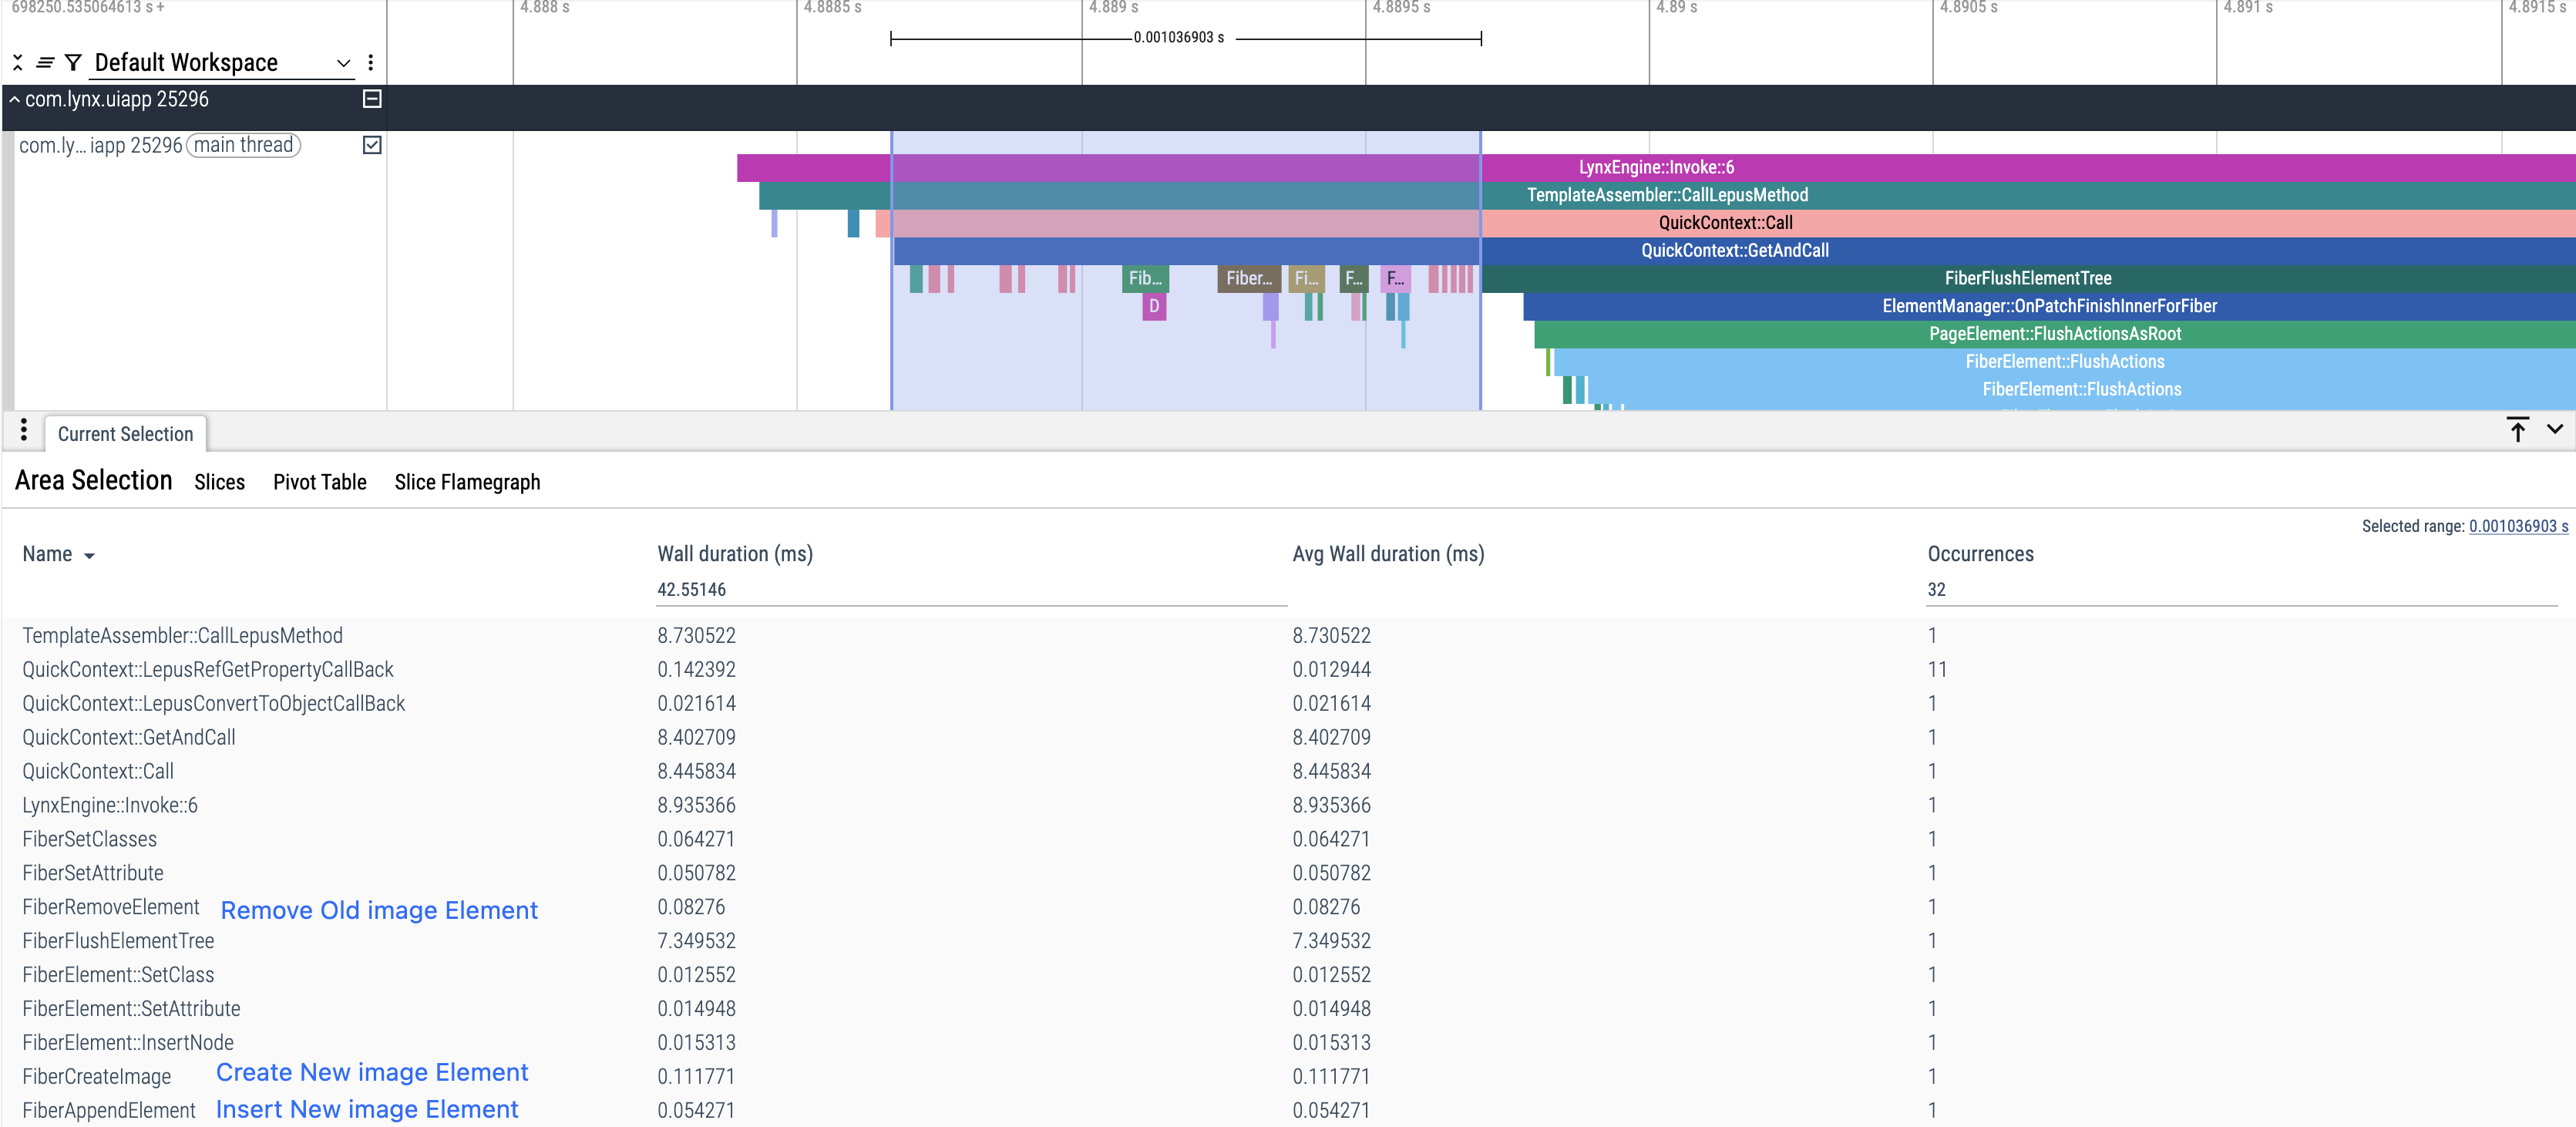
After the Element update is complete, the layout and UI are updated again.
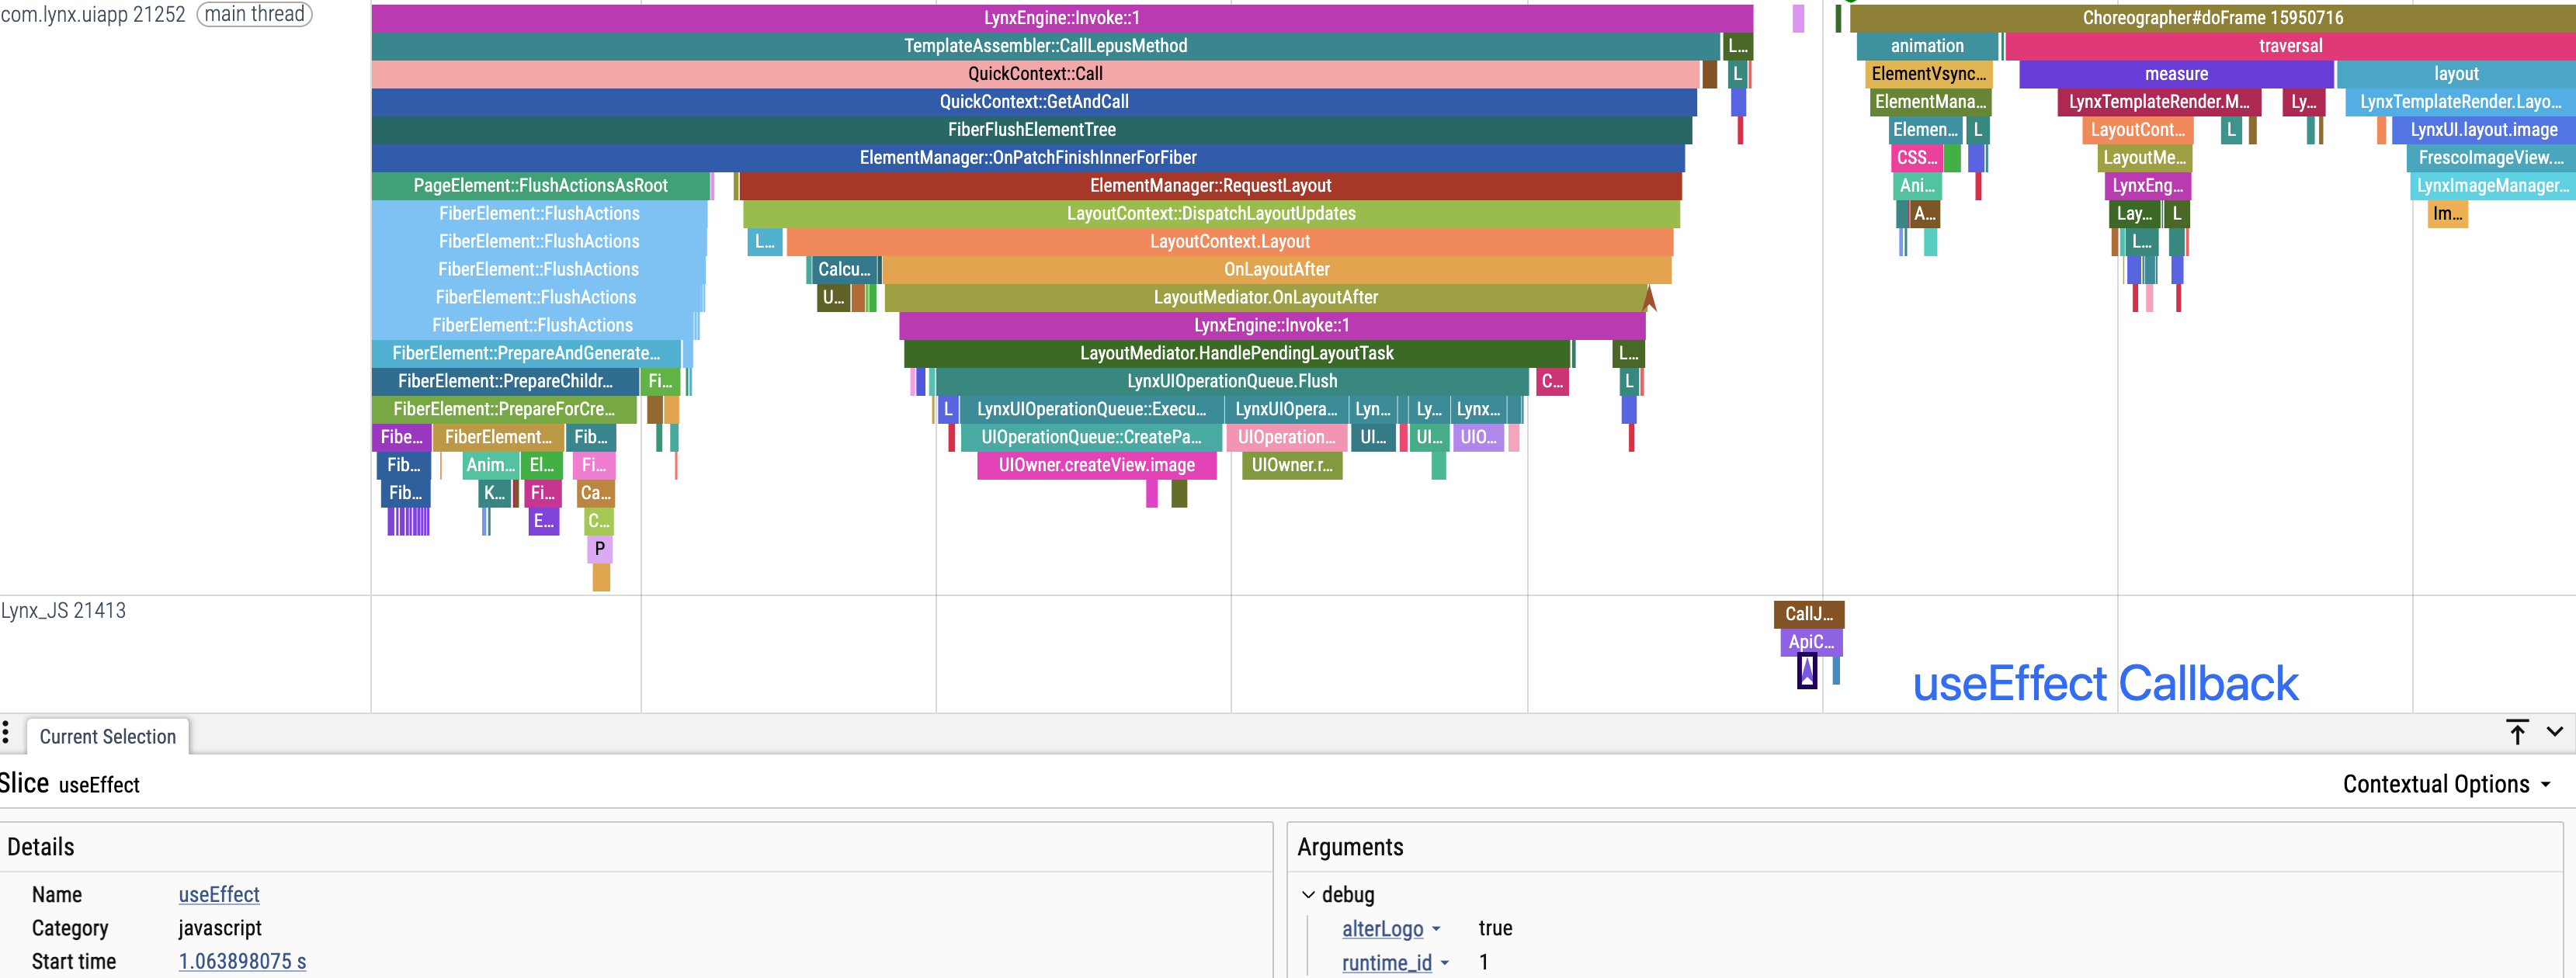
Trigger useEffect Callback
After the Element tree update is complete, the background thread is notified to trigger the component’s useEffect callback.
To better observe the execution timing of the useEffect callback in Trace, use the Trace API to add custom trace events.